
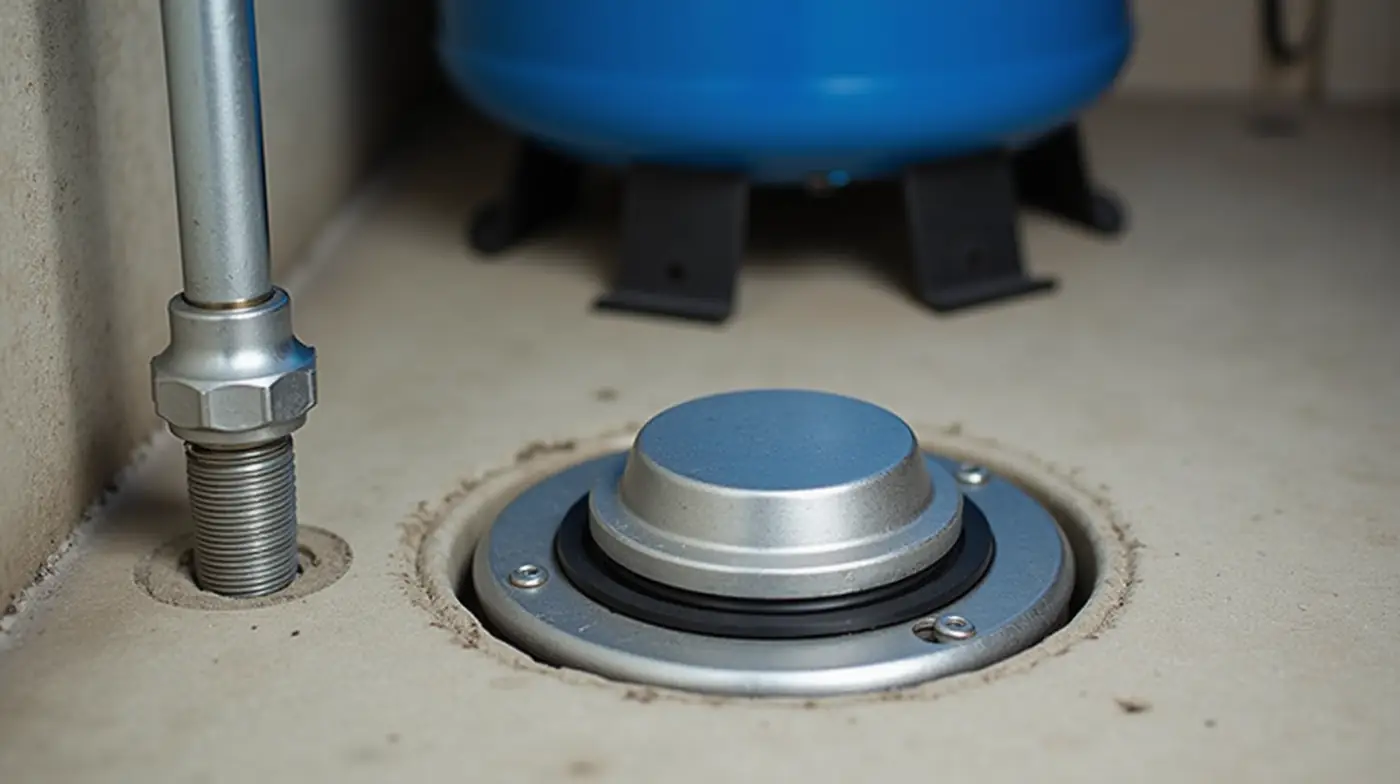
The capped pipe sticking out of your basement floor next to the pump and pressure tank is one of the most important and most overlooked parts of your well system. On a pitless well — the type found in thousands of homes across the Midwest and Northeast — that cap is the well safety seal: the sealed joint that closes the gap between your water line and the top of the well casing. It is the only barrier between your drinking water and the groundwater, soil, and surface runoff surrounding the casing. In two decades of inspecting residential wells, the single most common root cause behind the E. coli and coliform results we see traces back to a failed or missing well safety seal — not the pump, the tank, or the filter.
This guide covers what the safety seal actually does, how to test it for leaks in about fifteen minutes, the seven warning signs that it is time to replace it, and a complete step-by-step replacement walkthrough with 2026 parts and labor costs. We also compare the safety seal against the sanitary caps and pit-well covers used on other well types, so you can identify exactly which sealing system your well has before you buy anything.
By Robert Harrison, Certified Well Inspector
Robert has 20+ years of experience inspecting and testing residential water wells across the western US.
Disclosure: As an Amazon Associate, we earn from qualifying purchases on this page. Product selections are based on independent research and real well water data.
Last updated: November 7, 2026
Table of Contents
- What Is a Well Safety Seal?
- Why the Safety Seal Protects Your Drinking Water
- Safety Seal vs Sanitary Cap vs Pit Well Cover
- How to Test Your Well Safety Seal
- 7 Signs Your Safety Seal Needs Replacing
- How to Replace a Safety Seal on a Pitless Adapter
- Where to Buy: Best Safety Seal Parts for 2026
- FAQ: Well Safety Seal
- Final Thoughts
What Is a Well Safety Seal?
A well safety seal is the cap-and-gasket assembly that bolts over the top of a pitless well adapter and seals the water line to the well. Pitless systems — where the pump or suction line passes directly through the casing into the water without an open pit — became standard in the 1960s and 1970s, and most units still in service today are 40 to 60 years old. The safety seal performs three jobs:
- It seals the water line to the well. Every drop of water in your house passes through the gasket under that cap.
- It is the only access point to the well. The pump is installed, serviced, and pulled through this opening, so the seal must also hold the pressure side of the system closed.
- It keeps contaminants out. The sealed surface stops rain, yard runoff, insects, and sediment from tracking into the well along the outside of the casing.
Physically, a safety seal is typically a galvanized-steel or heavy-plastic (polypropylene or ABS) cap with a compressed EPDM or rubber gasket around its underside. On a 2-wire or 3-wire submersible system, the seal closes around the pump cable through a cable gland; on a jet pump or line-pump system, it seals a 1-inch to 1.25-inch steel or PVC suction line. The sealing surface must be flat and clean — a single chip of rust or a crushed gasket ridge is enough for groundwater to find its way in.
What we see in the field
Pitless adapters became standard for shallow wells (roughly 25 to 100 feet) in the 1960s, and many safety seals installed with the original well have never been replaced. The EPDM gaskets are far past their service life even when the cap still looks sound. We routinely find weeping seals on homes that pass every other test in the house.
For the full pitless system layout, adapter sizing, and what each component does, see our guide to pitless well adapter sizing and installation.
Why the Safety Seal Protects Your Drinking Water
A well is only as safe as its weakest seal, and on a pitless system the safety seal is the only one. Groundwater around the wellhead can carry bacteria from a septic system, livestock, yard compost, or seasonal runoff. When the seal fails, that water does not just sit at the cap — it follows the annular space (the gap between the casing and the surrounding earth) downward and can migrate along the outside of the casing toward the water table, which is exactly the contamination pathway health departments cite in failed well inspections.
In our inspection work, the consequences show up three ways: an E. coli or total coliform positive on an annual test, sudden cloudiness after a heavy rain, and a faint earthy odor that appears in the morning when the pump first kicks on. All three point to infiltration at the wellhead. Per EPA guidance, private well owners should test their water for coliform bacteria at least annually and after any flooding or well work — and when a result comes back positive, a failed safety seal is one of the first places we look before recommending a disinfection round that costs several times more to repeat.
Pro tip: test the water, then test the seal
If a lab result shows coliform bacteria, do not jump straight to chlorination. Have the safety seal and the casing annulus inspected first. Sealing the wellhead costs a fraction of repeated disinfection cycles — and it fixes the cause instead of the symptom.
The same seal that protects water quality is part of your pressure system. A weeping seal lets air into the suction line, which means the pump short-cycles, the pressure tank loses its air cushion, and the motor wears out early. In practice, a $25 gasket failure is how some homeowners end up paying for a $1,500 pump replacement.
Safety Seal vs Sanitary Cap vs Pit Well Cover
Homeowners often use “well cap” and “safety seal” interchangeably, but the three sealing systems serve different well constructions. Identifying which one you have determines exactly what part to buy.
| System | Well Type | How It Seals | Typical Failure Mode |
|---|---|---|---|
| Safety seal (pitless adapter) | Pitless: pump or line enters casing with no pit | Metal or plastic cap with EPDM gasket over the pitless adapter | Gasket hardens and weeps; cap corrodes |
| Sanitary cap | Open cased well (concrete or steel casing above grade) | 4-inch cap over the well with a compressed gasket | Gasket cracks; cap splits or lifts |
| Pit well cover | Older pit systems with a hand pump or pit pump | Flat cover over the open pit | Cover rots; gaps admit insects and runoff |
If your well is an open cased well with a 4-inch opening at floor level, you need a sanitary cap rather than a pitless safety seal — our buyer’s guide to the best sanitary well caps and seals for private wells in 2026 covers the exact cap types and gasket materials to match.
How to Test Your Well Safety Seal
You can run a basic safety seal leak test in about fifteen minutes with a flashlight, a dry white cloth, and a bucket. Turn the pump off at the disconnect switch before you touch anything.
- Inspect visually first. Look for a ring of mineral scale or white residue around the base of the cap — the classic sign of weeping, where water has slowly leaked out for months and left the dissolved minerals behind as it evaporated. Also check for rust streaks, cracks, or a cap that sits visibly proud of the surrounding floor.
- Wipe the area dry. Lay a strip of white paper towel or a dry cloth around the base of the seal, note the time, and let the system sit for 30 minutes.
- Run one pump cycle. Turn power back on, open the nearest faucet until the pump cuts off, then close it. With the system pressurized, inspect the cloth: any dampness at the gasket line means water (or condensation — see the next step) is getting past the seal.
- Rule out condensation. In a cold basement, condensation can mimic a weeping seal. Run your hand under the cap base: condensation is even and cool; weeping is concentrated at the gasket line and feels slightly warm from the casing.
- Listen for air ingress. With the pump running, hold your ear — or have a helper hold theirs — near the seal. A faint hiss or gurgle at the wellhead that stops when the pump cuts off means the seal is admitting air and the suction side is no longer airtight.
- Check the fixtures for air. Run the kitchen faucet for a minute. Bubbles, a sputtering stream, or the pump kicking on and off rapidly all mean air is entering the system — on a pitless well, the safety seal is the most likely entry point.
- Inspect the gasket if you can reach it. On many caps the gasket is visible from inside the cap once it is off. If it is hard, cracked, or flattened into a thin line, it has done its job — plan the replacement.
| Test | What You Are Looking For | What It Means |
|---|---|---|
| Dry cloth after 30 minutes | Dampness at the gasket line | Weeping seal — replace the gasket |
| Listening during a pump cycle | Hiss or gurgle at the wellhead | Air ingress — seal no longer airtight |
| Kitchen faucet, one minute | Bubbles or sputtering flow | Air in the system — seal or check valve |
| Visual inspection of the cap base | Mineral scale ring | Chronic weeping — inspect the casing too |
7 Signs Your Safety Seal Needs Replacing
Replace the well safety seal — at minimum the gasket, ideally the cap and gasket together — when you see any of these:
- A mineral scale ring around the cap base — months of weeping left behind.
- Damp concrete or a small puddle around the wellhead after heavy rain or during the pump cycle.
- Air at the fixtures or short-cycling pump — the suction line is no longer sealed.
- Visible cracks, rust, or a deformed cap that no longer seats flat on the adapter.
- A gasket that is hard, cracked, or flattened when the cap comes off.
- A positive coliform test with no other contamination source (septic system, livestock) nearby.
- Age. A gasket that was installed with a well more than 15 years ago — or never replaced at all — is due for a preventive swap.
| Repair Scope | Typical 2026 Cost (Parts + Labor) |
|---|---|
| Gasket only (cap stays in place) | $10 to $40 in parts; $150 to $400 with labor |
| Safety seal cap plus gasket | $60 to $180 in parts; $300 to $700 installed |
| Full pitless adapter replacement (seal, pump pull, line work) | $400 to $1,200 in parts; $1,000 to $2,500 installed |
Source: 2026 retail pricing and regional contractor estimates compiled from service quotes and manufacturer price lists.
Warning: a weeping seal is a freeze risk
Water weeping out of the seal can freeze on the cap and inside the annulus in winter, cracking the adapter or the casing joint itself — a failure that costs ten times more than a gasket. If your seal is weeping, fix it before the first hard freeze, and review the full procedure to winterize your well system before first frost.
How to Replace a Safety Seal on a Pitless Adapter
If you are comfortable with basic plumbing, a gasket replacement is a solid weekend DIY job; a full cap-and-pump swap is very doable with a helper and a bucket brigade. Turn off power at the pump disconnect and close the house isolation valve before you start.
- Mark the pump line depth. Before anything comes out, measure from the top of the cap to a fixed reference on the floor and mark the line with tape. The pump must go back to the same depth — a pump a few inches out of position can change flow or run the well dry.
- Drain the suction line. Open the downstream faucet to relieve pressure, then open the drain valve on the suction line if your system has one. On systems without a drain, catch the last of the water in a bucket under the connection.
- Disconnect the water line from the cap. On a jet pump system this is a 1-inch to 1.25-inch threaded or compression fitting. Use two wrenches — one on the fitting, one holding the cap — so you do not torque the adapter.
- Unbolt the cap. Most caps are held by four bolts around the flange or a single large hex nut. Loosen in a cross pattern. If the cap is rusted in place, work it loose with penetrating oil — not hammer blows on the casing.
- Withdraw the pump or suction line straight up. On a 2-wire submersible, lift the cable evenly; on a jet pump, lift the pump assembly clear of the well. If it binds, rock it gently side to side; never lever against the casing.
- Remove the old gasket and clean the sealing surface. Wire-brush the flange and the adapter face down to bare metal or clean plastic, then wipe with a rag. Anything left on the surface becomes a leak path under the new gasket.
- Seat the new EPDM gasket. Most kits include a gasket matched to the cap; if you are buying the gasket separately, match the thread size (1-inch, 1.25-inch, or 1.5-inch) and, where possible, the adapter’s manufacturer part number.
- Reinstall the pump to the marked depth and reconnect the suction line, wrapping all threaded joints with PTFE tape or the thread sealant the kit specifies.
- Reseat the cap and torque the bolts evenly. Tighten in a cross pattern in two passes. Over-torquing warps the flange and crushes the gasket unevenly — the opposite of what you want.
- Prime the pump, restore power, and re-test. Follow the procedure in our well pump priming guide, run the pump through a full cycle, and repeat the dry-cloth test from above. The seal should stay bone dry under pressure.
| Tool or Item | Why You Need It |
|---|---|
| Two adjustable or pipe wrenches | Disconnect the suction line without torquing the adapter |
| Ratchet and socket set (or cap key) | Unbolt the flange without stripping the heads |
| Penetrating oil | Free a rusted cap safely |
| Wire brush and rags | Clean the sealing surface flat |
| PTFE thread sealant tape | Reseal the suction line threads |
| Bucket and towels | Catch the last of the water |
| EPDM gasket in the matched size | The actual seal you are replacing |
Where to Buy: Best Safety Seal Parts for 2026
Safety seal parts are available at big-box home centers, plumbing supply houses, and online. Match the thread size and, where possible, the adapter’s brand part number before ordering — a gasket with the right diameter but the wrong thickness will not seal.
| Part | What It Is For | Typical 2026 Price |
|---|---|---|
| Pitless adapter with safety seal | Full assembly when the adapter itself is corroded | $180 to $450 |
| Well safety seal gasket kit | Gasket-only replacement on a sound cap | $15 to $40 |
| Sanitary well cap | For cased open wells, not pitless systems | $35 to $90 |
| PTFE thread sealant tape | Resealing the suction line threads | $6 to $12 |
| Well pump pressure gauge | Verify system pressure after reassembly | $15 to $30 |
Pro tip: buy the assembly if the adapter is pitted
If the top two inches of the pitless adapter show rust pitting, replace the entire adapter with a new safety seal — not just the gasket. A new gasket on a pitted adapter face will weep within a season. We have watched that exact failure play out on three consecutive jobs.
See Also
Pitless Well Adapter 2026: How to Size, Install and Replace — the full system layout behind the safety seal.
Best Sanitary Well Caps and Seals for Private Wells in 2026 — for open cased wells that need a cap instead.
How to Winterize a Well 2026: 9-Step Guide + Costs — pair any seal repair with a proper freeze-prep routine.
FAQ: Well Safety Seal
What is a safety seal on a well?
A well safety seal is the cap-and-gasket assembly that bolts over the top of a pitless well adapter, sealing the water line to the well. It is the only barrier between your drinking water and the groundwater and surface runoff surrounding the casing, and it doubles as the access point through which the pump is installed and serviced.
Is a safety seal the same as a sanitary well cap?
No. A safety seal closes a pitless adapter, where the pump line enters the casing with no open pit. A sanitary cap is a 4-inch cap that closes an open cased well. They look similar from a distance, but they fit different openings and are not interchangeable — buy the part that matches your well type, not the part that looks like it.
How often should a well safety seal be replaced?
Every 10 to 15 years as preventive maintenance, and immediately whenever the leak tests above show weeping or air ingress. EPDM gaskets harden with age even on wells that never show symptoms, so a seal installed with a well from the 1990s or earlier is overdue regardless of how dry the basement looks.
Can I test my well water while the safety seal is off?
No. An open wellhead is an open contamination pathway — insects, dust, and surface water can enter directly. If you pull the pump for service, keep the cap on as much as possible and reseal the well before you do anything else. After any well work, retest for coliform to confirm the water is still clean.
Is a sealed wellhead required by code?
In most states and localities, yes. Well construction and health codes require the wellhead to be sealed against surface contamination, and many local health departments flag an unsealed or weeping pitless well during inspections. Check with your county health department for the specific requirement in your area — it is a five-minute phone call that can save you a failed inspection.
Final Thoughts
The well safety seal is the cheapest insurance policy on your entire well system. A $25 gasket and an hour of your time — or a few hundred dollars of professional labor — keeps surface water out of the annulus, keeps air out of the suction line, and keeps bacteria out of your glass. Test the seal once a year with the dry-cloth method, replace the gasket on schedule rather than on symptoms, and if a coliform test ever comes back positive, inspect the wellhead before you spend a cent on disinfection.
#WellSafetySeal #PitlessAdapter #WellWater #SanitaryWellCap #WellMaintenance #WaterWellOwners #WellPump #WellHead #DrinkingWater #WaterQuality #WellInspection #PrivateWell #DIYWell #HomeownerTips #WellDrilling