
If you are searching for how to seal a well, you are probably facing one of three situations: an old well that no longer produces water and needs to be abandoned, a wellhead that lost its sanitary seal after a freeze or a cracked fitting, or a health department requirement to close a well before a property sale. Every one of those jobs is a well sealing project — and done badly, a poorly sealed well becomes a direct pipeline for septic water, livestock runoff and floodwater straight into the aquifer you and your neighbors drink from.
This guide covers exactly how to seal a well in 2026: the four types of sealing jobs, how to diagnose which one your well actually needs, the step-by-step procedure professionals follow when they seal a well in place, how to fill in an old well safely, and the mistakes that turn a $500 job into a five-figure groundwater problem. The depths, costs and grout volumes below come from county health department requirements and 2026 pricing from licensed well drillers we have spoken with across the western US.
By Robert Harrison, Certified Well Inspector
Robert has 20+ years of experience inspecting and testing residential water wells across the western US.
Published: September 16, 2026
Table of Contents
Why a Well Needs Sealing
A properly constructed well is not just a pipe dropped into the ground — it is a barrier. The space between the outside of the casing and the inside of the drilled hole is called the annulus, and it is the weak point of the entire system. Water moves through the annulus far more easily than through the surrounding soil or rock, so anything that reaches the ground around the wellhead — septic leachate, manure, fertilizer, road salt, or a flood — travels straight down it, past the pump intake and into the aquifer.
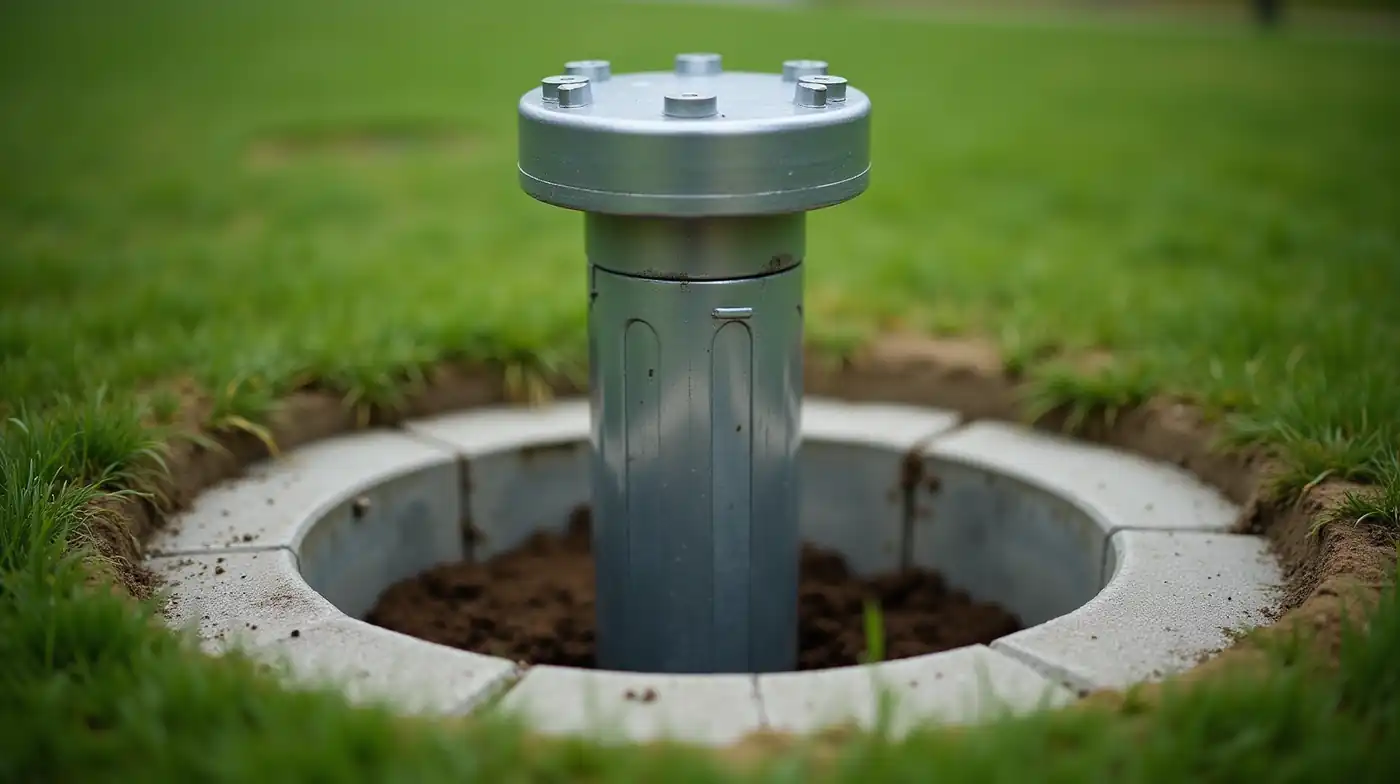
That is why sealing is the single most important protection a well has. The sanitary seal (a 12- to 24-inch column of cementitious grout at the top of the annulus) and the sanitary cap on top of the casing block surface water at the entry point, while a properly grouted annulus blocks the vertical pathway below. Per the EPA guidance for private well owners, unsealed or abandoned wells are among the leading pathways for groundwater contamination on rural properties — and most wells drilled before the early 1980s were built with little or no annulus grout at all.
What we see in inspections
In two decades of well inspections, the pattern is consistent: properties that test positive for E. coli almost always have a wellhead problem — a missing cap, a cracked sanitary seal, or a well that was “sealed” by someone piling dirt on top of the pipe. The contamination pathway is rarely inside the aquifer; it is at the top of the well, where the seal failed. Fix the seal and the test clears.
Four situations call for a well sealing job:
- Abandonment. The well is dry, contaminated, or superseded by a new well, and must be closed permanently — either left in the ground and grouted (in-place abandonment) or filled and capped.
- Failed sanitary seal. The well is still in use, but the top seal has cracked, the cap is gone, or water pools around the wellhead. This is a repair job, not an abandonment.
- Damage. A freeze burst the casing or the wellhead, or a well log shows the annulus is open. If the well is otherwise sound, it may be cheaper to repair and re-seal than to abandon — see our well rehabilitation guide for the decision framework.
- Regulatory requirement. Most county health departments will not approve a new well, a septic system, or even a property transfer until existing abandoned wells on the parcel are properly sealed and recorded.
The Four Types of Well Sealing (and Which One You Need)
People use “seal a well” to mean four different jobs, and the price of each differs by an order of magnitude. Know which one you have before you call anyone.
1. Sanitary seal repair (active well)
The well is still in use. The top 12-24 inches of annulus grout has failed — you can see it seeping at the wellhead, or a dye test shows water bypassing the seal. The job is to re-grout the top column and reinstall the wellhead and cap. It is the cheapest of the four jobs and the one most often skipped until it becomes an emergency.
2. Sanitary well cap replacement (active well)
The seal below is fine but the cap is corroded, cracked or missing. This is the only sealing task that is genuinely a homeowner job — a proper sanitary well cap with a gasket and screened vent fits over the casing in an hour. Our guide to the safest types of well cap covers the gasket, vent screen and locking details that matter.
3. In-place abandonment with grout (abandoned well)
The well is finished, but the casing stays in the ground. A plug is set at the top of the aquifer, the annulus is grouted up to the surface, the casing is cut below grade, and the ground is restored. This is what most counties require when an abandoned well is left in the ground, and it is the correct answer for the majority of old rural wells when someone asks how to seal a well.
4. Plug-and-fill (abandoned well, redeveloped site)
The well is abandoned and the hole is filled with gravel, sand or bentonite to grade, the casing is cut low, and the site is restored as if the well had never existed. This is chosen when the well sits in the middle of a planned building pad, driveway or septic field, or when the owner wants no trace of the well left on the parcel.
| Sealing Job | When You Need It | Casing Stays In? | 2026 Typical Cost | DIY Feasible? |
|---|---|---|---|---|
| Sanitary seal repair | Active well, failed top grout column | Yes | $800-$2,500 | No — requires casing removal to access annulus |
| Well cap replacement | Active well, missing/corroded cap | Yes | $80-$400 (parts + labor) | Yes — the one true homeowner task |
| In-place abandonment | Well dry, contaminated, or replaced | Yes — cut below grade | $500-$3,000 | No — county usually requires a licensed driller |
| Plug-and-fill | Abandoned well under future development | No — filled to grade | $1,500-$8,000 | No — excavation, water management, compaction |
Costs reflect 2026 quotes from licensed well drillers in the western US; deep wells (300+ ft) and rocky terrain push figures toward the top of the range.
How to Tell What Your Well Needs: A 5-Step Diagnosis
Before you spend a dollar, walk the well and answer these questions in order. The answer tells you which of the four jobs above you are actually buying.
Step 1: Is the well in use?
Turn on a faucet fed by the well. If it still delivers water, this is a repair (sanitary seal or cap), not an abandonment — stop here and skip to the repair procedure. Abandonment only makes sense for a well that is dry, contaminated beyond repair, or being replaced.
Step 2: What does the wellhead look like?
Crouch down and look at the top 6 inches of the well. A healthy wellhead has: a solid steel or composite cap, no standing water pooling around the casing, no cement crumbling out of the annulus, and the casing sitting at least 18 inches above the surrounding grade. Missing cap, standing water, or a “dry” ring of bare soil around the pipe are all signs the top seal is open — the exact pathway the E. coli travels.
Step 3: Find the well log
The boring log (from the driller) records the water-bearing intervals — where the productive aquifer sits in the depth. For in-place abandonment, the plug must be set at the top of the uppermost water-bearing zone plus the required grout column above it. No log? A licensed driller can recover one from the county records, or re-log the well with a camera. Sealing to a depth pulled out of thin air is how aquifers get contaminated by your own “completed” job.
Step 4: Check county requirements
Call your county health or environmental department and ask: “What are the current requirements for abandoning a water well on my parcel?” Most western US counties now require a licensed well driller to perform and certify the abandonment, and many require the well to be reported and the property owner notified if the abandoned well crosses a property line. Some states (California, for example) have a formal well abandonment reporting requirement. The county answer defines whether you can DIY, who must sign off, and whether a new well permit is needed before the old one is closed.
Step 5: Check for multiple wells and septic proximity
Old rural properties often have two or more wells — a dry one a hundred yards from the live one. Every one of them needs sealing, and a septic field within 50 feet of an abandoned well changes the urgency from “someday” to “this season.” Our well grout and sanitary seal systems guide covers the materials professionals use for each sealing scenario.
The light test before you call a driller
If the cap is off or cracked, shine a light down the casing and look at the top of the annulus. If you can see wet soil, gravel or standing water below grade inside the well, the top grout column is open — surface water is already finding its way down. A sealed well shows solid, dry grout to the surface where the casing meets the wellhead. A visible open annulus plus an E. coli positive test is the classic combination: the contamination is coming down the outside of the pipe, not from the aquifer.
How to Seal a Well: Step-by-Step Procedure (In-Place Abandonment)
This is the procedure a licensed driller follows when a well is abandoned in place — the job your county health department will most often require. Understanding it is what lets you check the driller’s work and read their invoice, even though you should not do this yourself: the plug must land at the aquifer depth from the well log, and the county sign-off only comes from a licensed operator.
Step 1: Pump out the well and confirm the water level
The well is pumped until the water level falls below the top of the aquifer, and then allowed to rest. The operator marks the casing at grade and measures down to the water — this depth, plus the aquifer interval from the well log, sets where the plug goes. Sealing with the water above the plug means the grout will bleed out into the aquifer and the plug will never set.
Step 2: Set the plug at the top of the water-bearing zone
A plug is lowered and set at the top of the uppermost aquifer interval, plus the grout column your county requires above it (typically the top 10 feet of the well). The plug choice depends on well condition — and this is the step where a homeowner can actually shop materials, since a competent driller will quote each option:
- Expandable clay (bentonite) plug. The default choice for most abandoned wells. A coil or bag of bentonite swells on contact with water and seals the annulus. Cheap, forgiving in soft formations, and it tolerates small case shifts. Our well abandonment plug guide compares clay, cement and foam plugs for each well condition.
- Cement grout plug. Where the county requires a hard, permanent barrier — common near septic systems or where the aquifer is productive and thick — the annulus above the aquifer is grouted with cementitious grout in lifts, and a solid cement plug is set at the aquifer top. Grout is the only option when the well is contaminated: bentonite can wick contamination, cement does not.
- Expandable foam. A fast-setting urethane plug used in small-diameter or damaged wells where a clay bag won’t hold. Expensive and reserved for tight situations.
Step 3: Grout the annulus to the surface
With the plug set, the annulus above it is filled with grout up to the surface, typically in continuous lifts so the grout can’t channel around the plug. On a 200-foot well this is roughly 4 to 8 cubic yards of grout depending on diameter — it is the material that actually blocks the vertical pathway, and it is the line item to verify on the invoice.
Step 4: Cut the casing below grade and remove equipment
Everything above the seal comes out: pump, motor, pressure tank, wellhead, switch, wiring. The casing is then cut 6 to 12 inches below the surrounding grade — never above it — so that surface water, animals and insects can never enter the sealed well. A flush-cut or above-grade pipe is the most common failed abandonment we see at inspections.
Step 5: Restore the site and file the paperwork
The hole is backfilled, compacted and the grade restored to slope water away from the well. Then the driller files the abandonment report with the county — typically including the well location, depth, plug type, grout volume and a site sketch. Get a copy for your records: it is what a future buyer, septic installer or new-well permit application will ask for. If the well crosses a property line, the county will also notify the neighbor, and the cost is often split per local agreement.
Pro tip: ask for the plug depth in writing
When comparing driller quotes, ask each one to state the plug depth they will set and why. A quote that says “we will plug it” without a depth tied to the aquifer interval is not a quote you can compare. The correct number comes from the well log, and any competent driller will quote it in the first phone call.
How to Fill In an Old Well (Plug-and-Fill)
When the well sits where something new is going — a building pad, a driveway, a septic field, or simply a lawn the owner wants back — the job is bigger than in-place abandonment: the well is filled all the way to grade, not just sealed. Here is how the fill-in works and what it costs.
When fill-in is the right choice
- The well is under or near a future structure or utility.
- The county requires the site restored with no protruding pipe (common where wells are shallow and the casing was never cut below grade).
- The well casing is collapsed or damaged so far down that an in-place plug cannot be set reliably.
Step-by-step: filling an old well
- Confirm the well log and water levels. Same as in-place abandonment — the aquifer interval dictates the lower seal. A filled well still needs a plug at the aquifer; filling to grade without plugging the aquifer just trades a surface problem for a buried one.
- Remove all equipment and cut the casing low. The casing is cut 2-3 feet below grade, with the top of the casing sealed off.
- Set the aquifer plug. Cement grout is the standard for fill-in jobs — a solid, permanent barrier at the top of the water-bearing zone.
- Backfill in lifts. The annulus and, where specified, the borehole itself are filled with clean gravel or sand in 1-2 foot lifts, compacted as you go. Bentonite or grout caps the top of the fill where it meets the surface. Layering matters: dumped-in fill settles unevenly and leaves a sinkhole over the well within a couple of rain seasons.
- Grade and restore. The site is graded to slope water away, re-vegetated, and the fill is left to settle for a season before any structure is built on it. New construction on a freshly filled well pad without a settling period is how “the slab cracked” stories start.
- File the abandonment report. Same paperwork as in-place — the county needs the fill depth, material and plug details.
What filling an old well costs in 2026
Fill-in runs $1,500 to $8,000 depending on depth, diameter and terrain — typically 2-3x the price of in-place abandonment because of the excavation, material and compaction labor. Rocky terrain, a deep well, or a well sitting under existing slab all push the price up. Get at least three quotes, and confirm in writing who files the abandonment report before the crew arrives.
Never pour concrete or dump fill down a well yourself
The “easiest” way to kill an old well — shoveling dirt, dumping concrete or pouring gravel straight down the open pipe — is also the one that contaminates aquifers. Without a plug at the aquifer depth, the fill percolates down the annulus and opens a direct channel into the water-bearing zone. It costs nothing and poisons the well you still use a hundred yards away. This is the single most common cause of contaminated private wells we attribute to owner error.
Common Well Sealing Mistakes to Avoid
Mistake 1: Sealing to a depth pulled out of a price sheet
The plug goes at the top of the water-bearing zone from the well log — not at “60 feet” because that is what the driller quoted. A plug set 30 feet above the aquifer does nothing: the annulus below it is still an open pipe into your water supply. Always ask for the plug depth in writing and confirm it matches the aquifer interval.
Mistake 2: Abandoning without pulling the pump first
A pump left in the casing below the seal blocks the grout, creates a void where the plug cannot seat, and in some counties voids the abandonment certification. Equipment comes out before the plug goes in — every time.
Mistake 3: Using bentonite in a contaminated well
Bentonite is a natural, permeable clay — it swells to seal, but it does not stop dissolved contaminants the way a solid cement plug does. If the well is contaminated (bacteria, nitrates, chemicals), the seal must be cement, or the contamination keeps migrating. This is the one material decision where “cheaper” is actively dangerous.
Mistake 4: Leaving the casing at or above grade
A flush-cut or proud pipe invites animals, children, snowmelt and standing water straight into the well. Code in most western US counties requires the casing cut 6-12 inches below finished grade. If you see a neighbor’s “sealed” well with the pipe poking out of the lawn, it is not sealed.
Mistake 5: Skipping the county filing
An unfiled abandonment surfaces at the worst possible moment — the property sale, the septic permit, the new well application — when the county requires proof of proper abandonment before it will move forward. The filing costs the driller about an hour; the paperwork gap costs the owner a week of delays and sometimes a redo. Get the filed report and keep the copy with the well log.
From speaking with county health inspectors
The three documents inspectors ask for at a property transfer or septic permit, in order: the well log (boring record), the abandonment report (plug type, depth, grout volume, filed signature), and a site sketch showing the well’s location relative to the septic field and property lines. If you inherit a property with old wells and none of these exist, budget for a driller to recover or re-log the well before the permitting office will approve anything.
Frequently Asked Questions About Sealing a Well
How much does it cost to seal a well in 2026?
For in-place abandonment by a licensed driller, expect $500 to $3,000 depending on well depth, diameter and terrain; plug-and-fill (full fill to grade) runs $1,500 to $8,000. A failed sanitary seal on an active well is $800 to $2,500, and a cap-only repair is $80 to $400. The biggest cost driver is depth: a 150-foot well is cheap, a 400-foot well in rocky ground is not. Get at least three quotes and ask each to state the plug depth they will set.
Can I seal a well myself?
Only the cap. Replacing a sanitary well cap on an active well is a legitimate homeowner task — a gasketed cap with a screened vent takes an hour and a parts bill under $150. Everything that involves the annulus — re-grouting the seal, setting an abandonment plug, filling the well — requires access to the well bore at aquifer depth, and most counties require a licensed driller to perform and certify the work. A DIY job that skips the county filing will surface at your next septic permit or property sale.
What is the difference between a sanitary seal and a well cap?
They are two separate barriers at the top of the well. The sanitary seal is the 12- to 24-inch column of cement grout filling the annulus (the gap between the casing and the ground) at the top of the well — it blocks water traveling down the outside of the pipe. The well cap sits on top of the casing and blocks rain, surface runoff, insects and animals from entering the well directly. A well needs both: a cap on a well with no annulus seal is a lid on an open pipe, and a grouted seal under a missing cap is a barrier with the door propped open.
Do I have to seal an old well before selling my property?
Usually, yes — but it depends on your county. Most western US counties will require existing abandoned wells to be properly sealed and the abandonment reported before they will issue a new septic permit, a new well permit, or sometimes clear a title transfer. The practical sequence: call the county health department, get the list of abandoned wells on record for your parcel, and have a licensed driller seal and file each one. The cost is far lower than discovering the requirement mid-escrow.
How deep does the grout need to go when sealing a well?
Two numbers matter. The plug must sit at the top of the uppermost water-bearing zone (from the well log) — that is the permanent barrier protecting the aquifer. The grout column above the plug runs from the plug to the surface, sealing the entire vertical pathway. On a typical 200-foot residential well the grout column is the top 10 feet plus whatever the county requires above the aquifer; the exact depth is set by your county’s abandonment standard, which is why the well log and the county call come before any quote.
Conclusion: How to Seal a Well, and When to Call a Pro
How to seal a well comes down to one decision: is the well still in use? If yes, this is a repair — fix the sanitary seal, replace the cap, and re-test the water; our well disinfection guide is the next step if the water tested positive after the seal failed. If the well is finished, it is an abandonment, and the standard is always the same: plug at the top of the aquifer, grout the annulus to the surface, cut the casing below grade, and file the report with the county. Every other “sealing” method — dirt piled on the pipe, a concrete pour down the bore, a lid on a flush-cut casing — leaves the aquifer exposed and will show up as a failed well test or a blocked property sale within a few years.
Get the well log, call the county health department, and get three licensed quotes with the plug depth in writing. Seal it right the first time: the grout column is the only thing standing between the septic field and the water you drink, and it is the cheapest piece of insurance on the property.
See Also
Best Well Grout, Bentonite Sealing & Sanitary Seal Systems 2026 — the materials professionals use for each sealing scenario, compared
Best Well Abandonment Plugs & Sealing Materials for Private Wells 2026 — clay, cement and foam plugs compared by well condition
What Is the Safest Type of Well Cap to Use? 2026 — the one sealing task you can do yourself, done right
#WellSealing #SanitarySeal #WellAbandonment #PrivateWell #WellWater #WaterWell #WellMaintenance #WellCap #WellGrout #BentonitePlug #WellInspection #WellOwner #WellDrilling #WellRehabilitation #CleanWater