
When a well pump fails, or a new electrician asks the one question that stops a replacement cold — what are the voltage and the full load amps? — the answer lives on a small metal or plastic tag riveted to the motor housing. Reading a well pump nameplate is the single most useful DIY skill a well owner can learn. It tells you the exact electrical requirements of your pump, its hydraulic rating, and the model data you need to order a like-for-like replacement without guessing. In this 2026 guide you will learn how to read a well pump nameplate line by line, what FLA, LRA, horsepower, and RPM actually mean, how to use that data to size your breaker and wire, and what to do when the tag is rusted off. After more than 20 years of inspecting residential wells, I can tell you that the nameplate holds the answer to nine out of ten pump questions before a service truck is ever called.
By Robert Harrison, Certified Well Inspector
Robert has 20+ years of experience inspecting and testing residential water wells across the western US.
Last updated: October 29, 2026
Disclosure: As an Amazon Associate, we earn from qualifying purchases on this page. Product selections are based on independent research and real well water data.
Table of Contents
- What Is a Well Pump Nameplate (and Why It Matters)
- Where to Find the Nameplate on Your Pump
- How to Read a Well Pump Nameplate: Every Line Explained
- How to Use the Nameplate to Buy a Replacement Pump
- Nameplate Data and Your Electrical Panel
- Common Nameplate Confusions
- When the Nameplate Is Missing, Rusted, or Illegible
- Where to Buy: Test Tools and Replacement Pumps
- Frequently Asked Questions
What Is a Well Pump Nameplate (and Why It Matters)
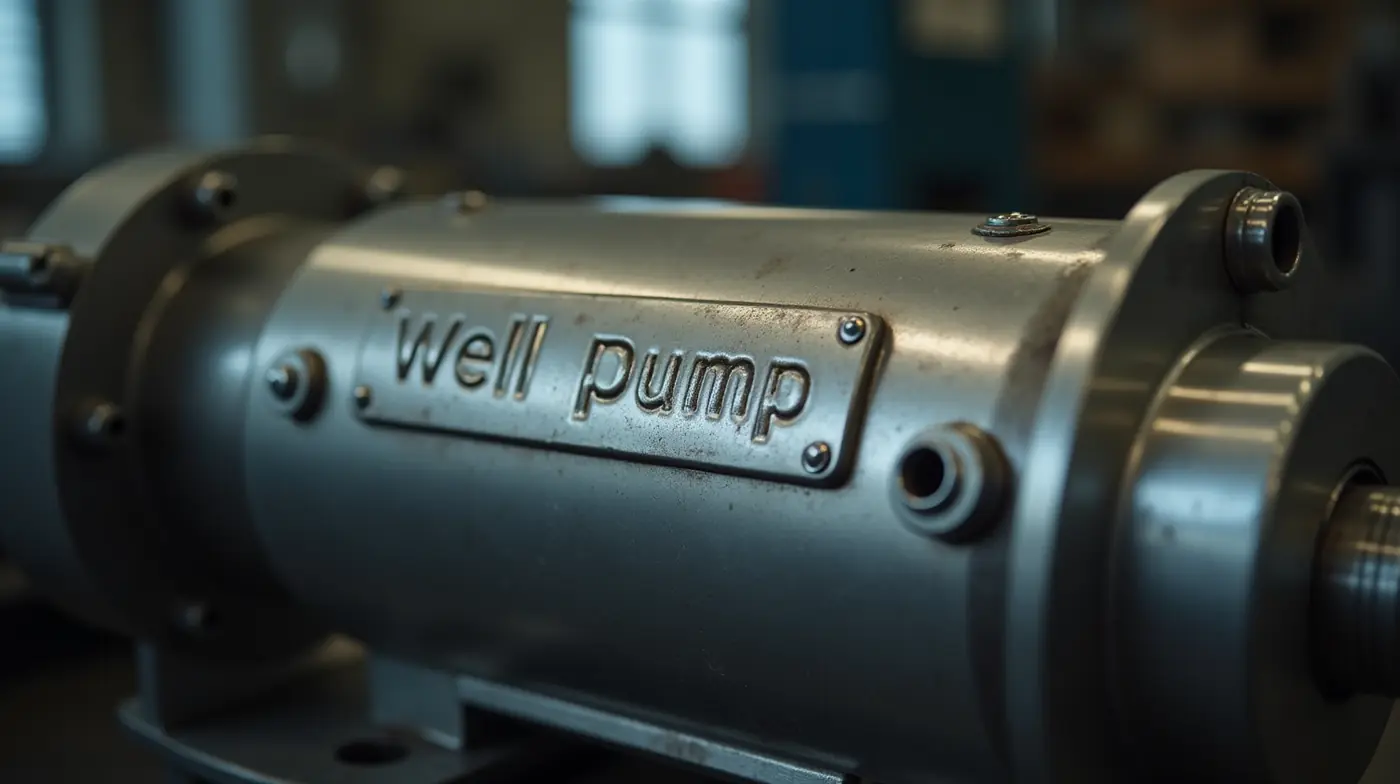
A well pump nameplate is the permanent identification label on the pump motor — a stamped, laser-etched, or riveted plate that lists the manufacturer, model number, electrical ratings, and hydraulic limits of the unit. Think of it as the pump’s birth certificate: every value the manufacturer guarantees, and the data every installer, electrician, or replacement buyer needs, is printed there. On a submersible well pump it is typically a stainless or aluminum plate riveted to the housing; on a jet pump it is often a sticker or tag on the motor or cast iron housing.
Here is why the nameplate matters so much in practice. When the pump dies, the model number on the plate is what gets you an exact replacement or a documented like-for-like. The voltage and amp figures are what your electrician uses to verify that the existing circuit can handle the new motor — and what you need to check before buying anything. The horsepower, RPM, and flow rating tell you whether a different pump will actually meet your house’s demand. Finally, the nameplate is the first thing a well inspector, warranty claim, or insurance adjuster asks for. In my inspection work, a legible photo of the nameplate has saved homeowners from at least one bad pump purchase and one mis-sized electrical job per year.
Pro Tip: Photograph It Now, Not Later
If your pump is still running, take a macro photo of the nameplate today and save it with a note of the well’s depth and the pump’s install date. Nameplates corrode on the bottom of a wet well, and the data you will need most urgently is the data you can read least easily in a crisis. A single well-lit photo, stored in your phone and printed for the utility closet, eliminates most of the guessing when replacement time comes.
Where to Find the Nameplate on Your Pump
The nameplate location depends on the pump type, but the search is short if you know where to look.
Submersible well pumps (deep wells, 250 ft and deeper casing)
The nameplate is riveted to the stainless steel motor housing, usually within the first 6 to 12 inches below the top of the pump, on the flat face between the mounting ears. On a running system you will never see it — the pump lives 60 to 300 feet underground. When the pump is pulled, the plate is on the motor section, never on the impeller end. Some manufacturers (Goulds, Burkam, Pedrollo, Franklin Electric) also stamp a secondary model code on the housing near the top flange, which can be read with a wet-well inspection mirror or a small camera on a wire before the pump is pulled.
Jet pumps (shallow and deep well, installed in a pit or utility room)
Jet pumps are accessible, so the nameplate is easy: a sticker or tag on the motor housing, most often on the side or top of the motor, and sometimes repeated as a second tag inside the disconnect box or on the pump casting itself. Deep well jet pump assemblies carry nameplates on both the motor and the pump section; the motor plate carries the electrical data, the pump plate carries the model.
Reading a Nameplate on a Pulled Pump: Lighting That Works
Wet, oily, or corroded plates are the real enemy, not the height. Dry the plate with a rag, use a bright flashlight at an angle (grazing light makes etched numbers pop), and shoot a zoomed photo with your phone. If the numbers are pitted, a second pass with a white crayon or chalk rubbed lightly into the etching reveals characters that are invisible to the eye. Work the plate slowly; a misread amp figure is a breaker problem later.
How to Read a Well Pump Nameplate: Every Line Explained
Every manufacturer formats the plate slightly differently, but the same fields appear on virtually all residential well pumps. The table below walks through each line you will see, with a real-world example and the reason it matters to you.
| Nameplate Field | Typical Example | What It Means | Why It Matters to You |
|---|---|---|---|
| Model number | G-10-1-3 / 3/4-13-250 | Manufacturer’s family code, usually encoding horsepower, speed, and depth class | The key to ordering a replacement; dealers decode it in seconds |
| Serial number | 24W32-018834 | Unique unit ID; often encodes the build date | Warranty claims and manufacturer support |
| Voltage (V) | 230V or 115V | Required supply voltage; some pumps are dual-voltage 115/230V | Must match the circuit; a 230V pump on 115V will hum and overheat |
| Frequency (Hz) | 60 Hz | Electrical frequency of the supply (50 Hz units are import models) | US residential service is 60 Hz; a 50 Hz pump runs slow and underperforms |
| Phase | 1 | Number of supply phases; residential pumps are single-phase | A 3-phase pump will not run on a standard home circuit at all |
| FLA (full load amps) | 12.5 A | Current the motor draws at full rated load, running steady | Sizes your breaker, wire, and pump protector; the most important electrical number |
| LRA / max start amps | 75 A (locked rotor) | Current for the first moments of startup, typically 5-7x FLA | Explains trip events at startup; matters for fuses and short cables |
| Horsepower / watts | 1 HP / 750 W | Mechanical output rating of the motor | Drives flow, head, and energy cost; the replacement matching point |
| RPM | 3,450 (4-pole 60 Hz) | Motor speed; 3,450 rpm is standard for 60 Hz residential pumps | Determines flow/pressure curve shape; 2-pole 3,600 rpm units run hotter |
| Max depth / head | 250 ft (76 m) | Maximum total dynamic head the pump is rated to deliver | Must exceed your static level plus drawdown plus house head |
| Max flow / duty | 12 GPM, continuous | Rated flow at the design point and the duty type | Confirm it meets peak demand (two fixtures plus irrigation) |
| Insulation / IP rating | Class F, IP68 | Winding temperature class and enclosure sealing | Submersibles should be IP68 (fully sealed); Class F gives thermal margin |
| Manufacturer + date code | Goulds, week 32 of 2024 | Brand and build date | Age tells you how much service life remains in the motor |
Source: typical nameplate data from Goulds, Burkam, Pedrollo, and Franklin Electric residential submersible and jet pump lines; always the specific plate on your pump that governs.
Voltage: 115V vs 230V, the Number That Changes Everything
Voltage is the first field to read and the one that causes the most expensive mistakes. A 230V submersible connected to a 115V circuit will hum, draw excessive current, and burn out within minutes. A 115V pump on 230V is destroyed almost instantly. Residential wells are wired for one of two voltages, and the nameplate tells you which one your pump needs. Most 3/4 HP and smaller submersibles ship as 115V; from 1 HP upward, 230V is standard because the current — and the heating losses in the long drop cable — drop by half. If your plate reads “115/230V,” the pump is dual-voltage and a selector switch (or the tap position inside the disconnect) chooses the supply. When in doubt, our guide to submersible well pump 115V vs 230V covers how to tell which voltage your well is wired for before you buy anything.
Amps: What FLA and LRA Actually Tell You
FLA (full load amps) is the steady current the motor draws at its rated load. It is the number your electrician uses to size the circuit: the breaker and wire must carry at least 125% of FLA for a continuous duty load, per NEC Article 430. LRA (locked rotor amps, sometimes printed as “max amps” or “start amps”) is the inrush current during the first 1-3 seconds of startup, typically 5 to 7 times FLA on a 1 HP motor. LRA matters less for the breaker (which is slow enough to ride through inrush) and more for fuses, long ungrounded cables, and why a weak supply voltage makes a healthy pump look like a failing one. If you are troubleshooting a pump that trips at startup, the next step is measuring what the motor actually draws — see our well pump amp draw guide for clamp-meter technique and the diagnostic thresholds.
Horsepower, Watts, and the Real Power Draw
Horsepower is the mechanical output the pump delivers to the water; the electrical input is always higher because the motor is not 100% efficient. A “1 HP” submersible on a 230V plate typically draws 8 to 10 amps FLA, which is 1,800 to 2,300 watts of electrical input against 750 watts of mechanical output. The difference is heat, which is why running a pump below its rated flow (cycling against a closed system) cooks motors faster than almost anything else. When you compare two pumps of different brands, compare the FLA and the curve at your working point — not the HP badge. Our well pump electricity cost guide shows how to turn that nameplate FLA into a monthly dollar figure for your rate.
How to Use the Nameplate to Buy a Replacement Pump
With the data in hand, replacing a submersible or jet pump is a process of matching, not guessing. Follow these six steps in order — the sequence matters because the electrical constraints are the ones that can invalidate a perfectly good hydraulic match.
- Record every value on the plate. Photograph it, then write the model, serial, voltage, phase, FLA, LRA, HP, RPM, max depth, and max flow on a card and tape it inside the utility closet. Every later decision hangs off this list.
- Match voltage and phase first. The replacement must run on the same supply the well is wired for. If the old plate says 230V, the new pump must accept 230V — dual-voltage units are the safe choice if your panel has both.
- Match horsepower within half a step. A 1 HP replacement for a 1 HP pump is the default. Going up one step (1 to 1.5 HP) is acceptable if the well yields the extra flow and the circuit can carry the extra amps; going down usually ends in a pump that cannot meet demand.
- Verify the hydraulic rating against your well. The replacement’s max depth (total dynamic head) must exceed your static water level plus drawdown plus house pressure head. If you have never measured it, our guide to how to size a well pump walks through the static level, drawdown, and head math.
- Check the electrical supply can carry the new FLA. The existing breaker and wire were sized for the old plate. A bigger replacement pump may need a bigger breaker and wire — that is an electrician call, not a DIY one.
- Confirm physical fit. Casing diameter (most 250 ft class pumps fit 4 inch casing), hanger and drop pipe size, pitless adapter or wellhead configuration, and discharge pipe thread. A mismatch here means a custom adapter or a different pump.
The table below separates what must match from what is allowed to differ, which is the checklist I hand to homeowners who are ordering their own replacements.
| Must Match the Old Nameplate | May Differ |
|---|---|
| Voltage and phase (115V or 230V, single phase) | Brand and model number (like-for-like is best, but a documented cross-reference works) |
| Horsepower (within half a step of the old rating) | Exact RPM (3,450 vs 3,600 is acceptable; do not mix 50 Hz units) |
| Max depth / total dynamic head rating (at least as high as the old pump) | Insulation class and IP rating (newer units are usually better, not worse) |
| Casing diameter, hanger, drop pipe, and wellhead fit | Finish, plate layout, and cosmetic details |
| FLA at your supply voltage (verify the circuit can still carry 125% of it) | Warranty terms and price |
Nameplate Data and Your Electrical Panel
Two nameplate fields drive the electrical side of any pump job: voltage and FLA. The breaker and wire in your panel were originally sized for the pump that was there. When you read the new nameplate, run the FLA through the 125% continuous-duty rule: multiply FLA by 1.25, and the next standard breaker size up must be at or above that number, with the wire sized for the breaker. The table below shows typical residential submersible nameplate FLA values and the circuits they imply. These are representative figures from common 60 Hz 4-pole motors — the plate on your pump is always the final authority.
| Motor HP | Typical FLA at 115V | Typical FLA at 230V | Common Circuit |
|---|---|---|---|
| 1/3 HP | 7-9 A | 4-5 A | 15 A breaker, 14 AWG |
| 1/2 HP | 8-11 A | 4-6 A | 15-20 A breaker, 14-12 AWG |
| 3/4 HP | 11-15 A | 6-8 A | 20 A breaker, 12 AWG |
| 1 HP | 15-18 A | 8-10 A | 20 A breaker, 12 AWG |
| 1.5 HP | 20-24 A | 11-13 A | 20-30 A breaker, 12-10 AWG |
| 2 HP | 24-30 A (often 230V only) | 13-16 A | 30 A breaker, 10 AWG |
| 3 HP | — (sold at 230V) | 17-21 A | 30 A breaker, 10 AWG |
Source: representative FLA ranges from Goulds, Burkam, and Pedrollo residential motor nameplates; NEC Article 430 continuous-duty sizing governs the final circuit.
Warning: Never Upsize the Breaker to Stop Tripping
If a replacement pump trips the breaker, the breaker may be doing its job. A tripping circuit usually means the motor is drawing above its nameplate FLA — a sign of low supply voltage, a failing bearing, a blocked impeller, or a wire that is too small for the run. Swapping in a bigger breaker removes the protection and converts a nuisance trip into a motor burn or wire fire. The fix is to find why the amp draw is high, which our well pump amp draw guide covers with clamp-meter tests. And if you are touching the wiring itself, our well pump wiring diagram guide shows what a correct disconnect-to-pump circuit looks like before you change anything.
Common Nameplate Confusions
FLA vs LRA vs “Max Amps”
Three amp figures can appear on one plate, and mixing them up leads to wrong circuit sizes. FLA is the running current at full load — use it for breaker and wire sizing. LRA (locked rotor amps) is the first-second startup current, 5 to 7 times FLA; use it only when checking fuses and very long, thin drop cables. “Max amps,” where printed, is usually the same as LRA. Rule of thumb: size for FLA, respect LRA, ignore the rest.
Dual-Voltage Plates That Read “115/230V”
A plate that lists both voltages means the motor has a tapped winding and runs on either — but it must be set for the supply it receives, typically via a voltage selector switch on the motor or a tap configuration in the disconnect. A dual-voltage pump wired for 230V and fed 115V will run at roughly half speed and half pressure while overheating slowly, which is why “the pump runs but the water is weak” is often a tap-position problem, not a pump problem.
HP vs the Actual Watts the Pump Consumes
Horsepower is the output at the shaft; the plate’s watts (or the FLA times voltage) is the input from your meter. A 1 HP pump typically consumes 1,800-2,300 watts electrically while producing 750 watts of mechanical work. Energy bills track the input, which is why two pumps with the same HP badge can cost different amounts per month — the efficiency curve, not the badge, decides.
What “Duty: Continuous” Means
Duty describes how long the motor is designed to carry its rated load. Residential well pumps are rated for continuous duty: full load, indefinitely, without thermal shutdown. If a plate reads something else (intermittent or short-time duty), it is not a standard well pump motor and should make you pause before buying it for well service.
When the Nameplate Is Missing, Rusted, or Illegible
It happens: a plate that spent 15 years at the bottom of a wet well comes up pitted, painted over, or gone. Work through these five steps in order — each one narrows the possibilities, and together they recover the full spec sheet in most cases.
- Check the disconnect box and old paperwork. The previous installer often left a data tag or the purchase receipt in or on the disconnect box, and the original driller’s report may list the pump model. A photo of the plate may already exist in a phone, an email, or a well record you forgot you had.
- Measure the supply voltage. With the power off and the test leads on the disconnect terminals, confirm whether the well is wired 115V or 230V. This single measurement eliminates half of every replacement search. A basic Fluke 117 digital multimeter handles the job, or a cheaper AC voltage tester if you only need the voltage reading.
- Measure the running amps with a clamp meter. If the old pump still runs, clamp around one ungrounded wire while water is flowing and read the steady current. At 230V, roughly 4-6 A points to 1/3-1/2 HP, 6-8 A to 3/4-1 HP, 8-13 A to 1-1.5 HP, and 13-17 A to 2 HP. At 115V the numbers roughly double. A Klein Tools CM120 clamp meter does this safely without opening the circuit; a Fluke 376 is the professional-grade option if you troubleshoot wells regularly.
- Call the manufacturer with whatever you can read. A partial serial number, a date code, or even the housing casting number often identifies the exact configuration. Manufacturer support lines exist precisely for this, and a photo of a half-legible plate through a phone camera frequently gets you the full spec sheet in one call.
- As a last resort, pull the pump or hire a pump installer. If the pump is dead and nothing else recovers the data, a controlled pull with a submersible pump pulling strap gets the plate in your hands — or a licensed pump installer reads the plate, specifies the replacement, and handles the electrical verification in one visit.
Where to Buy: Test Tools and Replacement Pumps
Whether you are reading a plate for the first time or ordering a replacement, the table below is the short shopping list for a nameplate-driven pump project, with the tools and the pump brands that show up most often on residential wells.
| You Need | Recommended Product | Why We List It |
|---|---|---|
| Voltage and continuity checks | Fluke 117 digital multimeter | The workhorse of well diagnostics; non-contact voltage plus accurate AC readings |
| Running-amp measurement | Klein Tools CM120 clamp meter | Safe no-break clamp measurement of FLA at the disconnect box |
| Replacement submersible (1 HP class) | Goulds G-10 submersible well pump | The most common 250 ft class residential submersible; nameplate data is easy to verify |
| Replacement submersible (budget class) | Burkam submersible well pump | The value option in the same size class; match the plate before ordering |
| Disconnect box (when replacing) | Well pump disconnect box | Code-required service point; size it to the new pump’s FLA |
| Dry-run protection | Well pump protector | Shuts the pump off on low amps (dry well) and resets after power events; size to the nameplate FLA |
For the full shortlist of the best submersible units in each size class, and the nameplate fields to compare between brands side by side, see our how to size a well pump guide — it pairs the sizing math with the comparison tables.
Frequently Asked Questions
What does FLA mean on a well pump nameplate?
FLA stands for full load amps: the current the motor draws in steady running at its rated load. It is the number you use to size the breaker, wire, and pump protector, because a well pump is a continuous-duty load and the NEC requires the circuit to carry at least 125% of FLA. If your plate says 12.5 A FLA, the circuit should be sized for at least 15.6 A — a 20 A breaker with 12 AWG wire.
How do I tell if my well pump is 115V or 230V?
Read the voltage line on the nameplate — it states 115V, 230V, or both for dual-voltage units. If the plate is unreadable, measure the supply at the disconnect box with a multimeter while the system is powered: roughly 110-120 V means 115V service, roughly 208-240 V means 230V. You can also infer it from the wiring: a well circuit with a neutral wire alongside two hots is wired for 230V; a single hot plus neutral is 115V.
Can I replace my well pump with a different horsepower?
Yes, with limits. Stepping up one size (for example 1 HP to 1.5 HP) is generally safe if the well yields the extra flow, the drop pipe can pass it, and the electrical circuit can carry the higher FLA — verify that last point against the new nameplate before ordering. Stepping down is usually a mistake: the pump will short-cycle, run longer, and struggle at peak demand. Keep the max depth rating at or above the old pump’s.
What if the nameplate is rusted off or illegible?
Work in this order: check the disconnect box and driller paperwork for a data tag, measure the supply voltage, clamp-meter the running amps of the old pump (if it still runs), then call the manufacturer with any partial serial or date code. Most of the time you recover voltage, approximate horsepower, and model family — enough to specify a correct replacement. A full recovery path, with the amp-to-HP estimation chart, is in the section above.
Where is the nameplate on a submersible well pump?
On a submersible, the nameplate is riveted to the stainless motor housing, typically within the first 6 to 12 inches below the top of the pump, on the flat face between the mounting ears. On a jet pump it is a sticker or tag on the motor, usually on the side or top. If you need the data without pulling the pump, a wet-well mirror or a small camera on a line can often read the secondary model stamp near the top flange.
See Also
- How to Size a Well Pump 2026 — the static level, drawdown, and total dynamic head math that the nameplate’s depth rating must clear.
- Submersible Well Pump 115V vs 230V 2026 — how to tell which voltage your well is wired for, and when a dual-voltage unit is the right buy.
- Well Pump Wiring Diagram 2026 — what a correct disconnect-to-pump circuit looks like, including the 125% breaker and wire sizing shown in this guide.
#WellPump #WellPumpNameplate #WaterWell #SubmersiblePump #WellWater #PrivateWell #WellMaintenance #PumpReplacement #WellElectrical #WellOwner #WaterWellSystem #WellEquipment #PumpRepair #WellHelp #HomeWell