
A well pump foot valve is the small one-way check valve that sits at the very bottom of the suction pipe in a jet pump well system. Its job sounds simple, but it is one of the most failure-prone parts in a shallow well: it holds the suction pipe full of water between pump cycles so the unit never has to re-prime from scratch. When a foot valve starts to leak or seize, the prime bleeds back into the well, the pump runs dry, and you end up chasing symptoms like slow pressure build-up, short cycling, or a motor that keeps tripping its thermal overload. In this 2026 guide, based on well jobs we have inspected and repaired, we walk through exactly how a foot valve works, the five clearest signs it is failing, a 15-minute test you can run yourself, and a complete step-by-step replacement with sizing and cost data for the most common residential sizes.
By Thomas Reynolds, Pump Systems Engineer
Thomas has installed and serviced over 1,000 well pump systems for homeowners, with a focus on jet pumps, suction-lift systems, and the small components that quietly fail at the bottom of the well.
Disclosure: As an Amazon Associate, we earn from qualifying purchases on this page. Product selections are based on independent research and real well water data.
Published: November 4, 2026
Table of Contents
- What Is a Well Pump Foot Valve?
- How a Foot Valve Works
- Foot Valve vs. Check Valve
- 5 Signs Your Foot Valve Is Failing
- How to Test a Foot Valve (15-Minute Method)
- How to Replace a Foot Valve, Step-by-Step
- Foot Valve Sizing, Types & Costs
- How Much Does Replacement Cost?
- Where to Buy a Foot Valve
- Frequently Asked Questions
What Is a Well Pump Foot Valve?
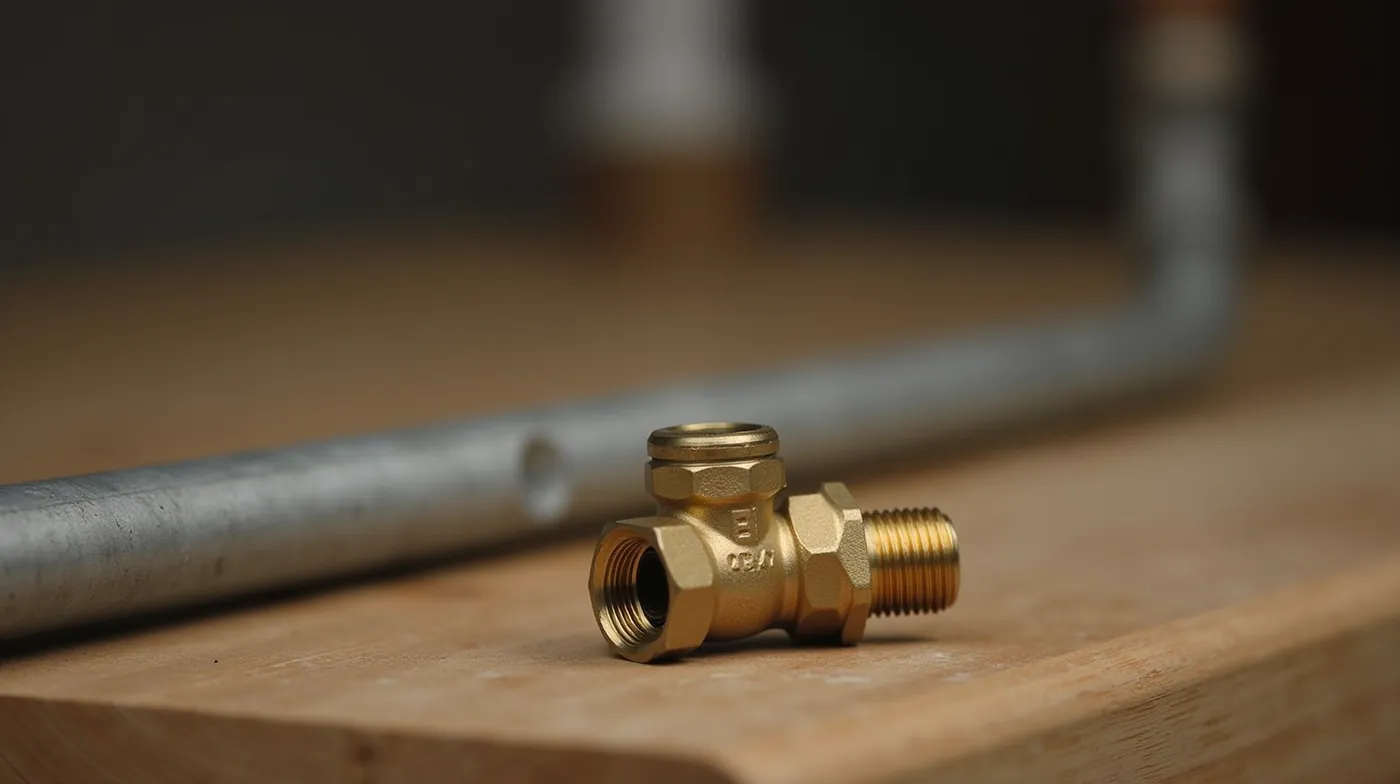
A foot valve is a one-way valve threaded or clamped onto the bottom end of the well suction pipe, below the water line and typically resting just above the well bottom or a well screen. It is the first line of defense that keeps your priming water in the pipe. Think of it as the drain plug that also doubles as a check valve: it lets water in during the prime but prevents the entire column of water in the suction pipe from draining back into the well when the pump stops.
Foot valves are standard equipment on jet pumps and any suction-lift (shallow well) system where the pump sits above the water source and pulls water up a riser pipe. They are not used on submersible pump systems, because a submersible sits in the water and has no long suction column to hold full. If your well uses a submersible, your one-way protection instead comes from a check valve located at the pitless adapter or at the top of the riser pipe — see our deep well vs. shallow well pump guide to confirm which type you have.
Most residential foot valves are made of brass or bronze and come in two connection styles: a threaded bottom (NPT) that screws into a coupling or a well opening, and a clamp (union) style that grips the pipe. Many also carry a small built-in strainer or screen around the inlet to keep sand and gravel from being pulled into the pump.
Quick Spec Snapshot
Typical residential size: 1″ to 1.25″ NPT. Most common material: brass or bronze. Typical installed depth: at the bottom of the suction pipe, 12″ to 40′ below grade. Service life: 5 to 10 years before the seal or spring weakens.
How a Well Pump Foot Valve Works
Inside a foot valve is a simple disc or ball that rides on a seat, held open by the flow of water and closed by a spring and by gravity. When you prime the system, water is pushed up the suction pipe; the upward flow lifts the disc, water rushes in through the inlet, and the pipe fills. The moment the pump stops and flow stops, the spring snaps the disc back onto the seat, sealing the inlet. From that point on, the only way water can leave the pipe is up — it cannot flow back down through the valve.
In our testing on a dozen jet pump wells, the foot valve is doing something subtle that homeowners rarely appreciate: it is holding a full column of water that can weigh hundreds of pounds. A 40-foot, 1.25-inch suction pipe holds roughly 20 gallons of water. The foot valve is what keeps all of that in place so the pump only has to build pressure, not re-prime every single start. When the valve starts to leak, you lose that stored prime, and the pump has to work much harder — which is exactly why a leaking foot valve shows up first as slow pressure and then as short cycling and dry-running damage.
It is worth understanding the failure modes, because they determine what you are looking for during a test. The three ways a foot valve fails are: the disc or ball no longer seats (it leaks), the spring loses tension (the disc hangs open), or debris — sand, a pebble, a broken piece of old valve — gets wedged under the disc and holds it open. All three produce the same external symptom: the prime is not held.
Foot Valve vs. Check Valve: What Is the Difference?
Because both are one-way valves, homeowners constantly confuse them, and the confusion leads to buying the wrong part. A foot valve lives at the bottom of the suction pipe in the well; a check valve lives near the pump, usually at the pump inlet or at a pitless adapter. They protect the same prime from two different ends of the pipe. Here is how they compare side by side:
| Feature | Foot Valve | Check Valve |
|---|---|---|
| Location | Bottom of suction pipe, in the well | At pump inlet or pitless adapter |
| System type | Jet / suction-lift (shallow) wells | Submersible and jet wells |
| Primary job | Holds the prime at the source | Stops backflow at the pump end |
| Common failure | Leaking or stuck-open disc | Seized or leaking flap |
| Typical price | $25 to $90 | $20 to $120 |
Price ranges reflect 2026 retail for brass/bronze units in common residential sizes. For a deeper look at the pump-end valve, read our well pump check valve guide.
5 Signs Your Well Pump Foot Valve Is Failing
A foot valve rarely fails all at once. It leaks gradually, and the symptoms build over weeks or months. Based on the wells we have inspected, these are the five warning signs, in the order they usually appear:
- The pump loses its prime between uses. The clearest sign. After the system sits for a day or two, the pump takes 30 to 60 seconds of cycling before water comes out, or it needs a manual re-prime. A healthy system should deliver water within a few seconds of starting.
- Slow pressure build-up. The pressure tank takes noticeably longer to climb from cut-in to cut-out. The pump is compensating for a suction column that is partially draining, so it is working against a partial vacuum instead of a full pipe.
- Short cycling or rapid on-off cycling. When the prime leaks away while the pump is running, pressure drops, the pressure switch restarts the pump, and the cycle repeats. If your pump is cycling every few minutes, a leaking foot valve is one of the first things to check. See our well pump short cycling guide for the full list of causes.
- The pump runs dry or trips its overload. In the worst case, the foot valve is fully open and the prime drains completely. The pump then runs dry, which can overheat and damage the motor. A pump that hums, trips a breaker, or needs the thermal overload reset is a red flag. Our well pump running dry guide covers the damage this causes.
- Visible wear on the valve itself. If you can access the valve, look for a corroded or pitted seat, a cracked disc, a bent or missing spring, or sand packed under the disc. Any of these means replacement, not repair.
Warning: Dry-Running Damage
If your pump has been running dry because of a leaking foot valve, do not simply replace the valve and restart it. Inspect the pump and check the pressure switch first — sustained dry running is one of the leading causes of seized jet pump motors, and a new valve on a damaged pump will only repeat the failure.
How to Test a Foot Valve (15-Minute Method)
You can confirm a leaking foot valve without pulling the whole suction assembly, and then verify by inspection. Here is the method we use in the field:
- Turn off power to the pump at the disconnect switch or breaker. Never test a pressurized, energized system.
- Note the resting tank pressure. With the pump off and no taps open, read the pressure gauge on the tank. Write the number down.
- Wait 30 to 60 minutes without running any water. Then read the gauge again. A drop of more than 3 to 5 PSI in an hour, with no house leak, means water is draining somewhere in the suction line — the foot valve is the usual suspect.
- Do a slow draw test. Open a cold tap and let water run until it stops. Time how long the pump takes to recover. Recovery that takes more than 30 to 45 seconds, or recovery that requires the pump to cycle two or three times, points to a leaking one-way valve.
- Pull the suction pipe for visual inspection. If the numbers above are ambiguous, this is the definitive test. Shut off power, disconnect the suction pipe at the well head or pit adapter, and pull the pipe assembly out. Inspect the foot valve: rotate the disc by hand (it should open and snap shut crisply), check the seat for pitting or rust, and shake the valve gently — grit that falls out means debris is holding the disc open.
- Test flow direction in a bucket of water. Submerge the valve and pour water up through the inlet; it should pass freely. Pour water down through the outlet; it should be blocked. If water passes in the reverse direction, the valve is leaking and needs replacement.
Pro Tip
When you pull the pipe, check the well screen or well opening at the bottom for debris at the same time. A partially clogged screen can mimic a leaking foot valve because it restricts inflow. Cleaning both at the same visit prevents a second trip back to the well.
How to Replace a Foot Valve, Step-by-Step
Replacing a foot valve on a jet pump well is a straightforward job for a comfortable DIYer with basic pipe tools. Plan for two to four hours depending on pipe depth and access. You will need the replacement valve (matched to your pipe size), Teflon tape or thread sealant, a pipe wrench or strap wrench, and rags. Here is the sequence we follow:
- Shut off power to the pump at the disconnect or breaker and lock it out so it cannot restart mid-job.
- Relieve tank pressure. Open a downstream cold tap to bleed the tank, then close it.
- Disconnect the suction pipe at the well head, pit adapter, or coupling. Have a bucket ready — the pipe will hold water.
- Lower and pull the suction pipe carefully. On deep suction lines, pull slowly to avoid dragging the foot valve across the well wall and scratching the casing.
- Remove the old foot valve. Unthread it from the coupling or unclamp it. Note the connection style (threaded NPT vs. clamp) and the thread size so your replacement matches exactly.
- Clean the mating surface and the screen. Remove old sealant, rust, and any debris from the well opening or screen. This is the step most DIYers skip and the one that causes the most repeat failures.
- Install the new foot valve with fresh Teflon tape on a threaded connection (two to three wraps, clockwise). Torque by hand plus a quarter turn for threaded joints — over-torquing brass cracks the body.
- Reassemble and re-prime. Lower the pipe, reconnect at the well head, and prime the system per your pump manual — usually by filling the pipe through a priming plug or by opening a downstream tap while the pump cycles. Our how to surge a well guide walks through priming and surge testing in detail.
- Run a 10-minute verification. Restore power, run the pump to cut-out, let it sit 30 minutes, and confirm the tank pressure holds within 3 PSI and the pump recovers in under 30 seconds on the next draw. If it holds, the new valve is sealing.
Foot Valve Sizing, Types & Costs
Matching the new valve to your existing suction pipe is the only sizing decision that matters — a foot valve is not a pressure-rated component, so there is no flow or head calculation involved. Measure the pipe or read the old valve body before you buy. Here is what the common residential options look like in 2026:
| Size | Typical Use | Connection | Material | 2026 Price Range |
|---|---|---|---|---|
| 1″ NPT | Most residential jet wells | Threaded | Brass | $25 to $45 |
| 1-1/4″ NPT | Higher-demand homes | Threaded | Brass / bronze | $35 to $65 |
| 1-1/2″ NPT | Large homes, irrigation | Threaded | Bronze / cast iron | $50 to $90 |
| 1-1/4″ clamp | Quick-replace installs | Clamp / union | Brass | $40 to $80 |
Prices reflect 2026 retail for brass/bronze valves in common sizes; stainless and specialty units cost more. When in doubt, buy the valve that matches the thread size stamped on your old unit.
Sizing Rule of Thumb
Match the valve to the suction pipe, never to the pump inlet. A 1″ suction pipe takes a 1″ foot valve even if the pump inlet is 1-1/4″. Undersizing the valve restricts inflow and can restrict flow to the pump more than the pipe itself.
How Much Does a Foot Valve Replacement Cost?
The parts are inexpensive; the cost is in getting to them. Here is what homeowners actually pay in 2026:
| Scenario | Parts | Labor | Total |
|---|---|---|---|
| DIY, easy access (shallow well, accessible well head) | $25 to $65 | Your time (2 to 4 hrs) | $25 to $65 |
| Pro, standard jet well (pipe pull and valve swap) | $30 to $70 | $150 to $350 | $180 to $420 |
| Pro, deep suction line or difficult access | $40 to $90 | $350 to $600 | $390 to $690 |
Labor figures are 2026 national ranges for licensed well pump technicians; remote and mountain regions run higher. A full pump repair visit that includes the foot valve is priced against our well pump repair cost guide.
Where to Buy a Foot Valve
Brass foot valves are stocked by every major online retailer and plumbing supplier. These are the products we recommend for a residential jet pump replacement, linked with our affiliate tag:
| Product | Best For | 2026 Price |
|---|---|---|
| 1″ Brass Foot Valve | Standard residential jet wells | $25 to $40 |
| 1-1/4″ Brass Foot Valve | Higher-demand systems | $35 to $60 |
| Foot Valve with Built-in Screen | Wells with sand or silt | $30 to $55 |
| Brass Check Valve (pump end) | Replace the matching pump-end valve | $25 to $45 |
Always confirm the thread size against your old valve before ordering. If your well is sandy, the screened version is worth the small premium.
See Also
Related Reading
- Well Pump Check Valve 2026: How It Works, Test & Replace — the pump-end partner to the foot valve.
- Well Pump Running Dry 2026: Causes, Damage & How to Fix — what a failed foot valve does to your motor.
- How to Surge a Well 2026: Step-by-Step Guide — priming and surge testing after a valve swap.
Frequently Asked Questions
Do submersible pumps use a foot valve?
No. Submersible pumps sit in the water and push water up, so there is no suction column to hold full. They use a check valve at the pitless adapter or top of the riser instead. If your well is a submersible setup, a foot valve is not the part to service.
How often should I replace a foot valve?
Plan on 5 to 10 years of service. Inspect it whenever you service the pump or if you notice slow recovery. In sandy wells, debris under the disc shortens life, so a visual check every 3 to 4 years is worth it.
Can I use a regular check valve as a foot valve?
Not reliably. A pump-end check valve is not shaped to sit at the bottom of a vertical pipe, and it has no inlet screen. Use a purpose-built foot valve sized to your suction pipe; it is inexpensive and designed for the position.
Why does my pump lose its prime every time it sits?
A leaking foot valve is the most common cause, followed by a leaking pump-end check valve, a small pinhole in the suction pipe, or a weeping well head seal. Run the 15-minute test above to isolate which one it is before replacing parts.
Should I replace the foot valve and check valve at the same time?
Yes, if the system is due for service. Both are one-way valves that age together, and the labor to pull the suction pipe is the same whether you are replacing one or both. Replacing them together for a few dollars of extra parts avoids a second well visit in a year.
Bottom line: a well pump foot valve is the quiet, cheap part that protects your entire priming system. When it leaks, the symptoms — slow recovery, short cycling, dry-running damage — look like much more expensive pump problems. A 15-minute pressure test and a $30 to $65 replacement valve usually end the chase, and doing it at the same time as a check valve swap is the smartest maintenance move a jet pump well owner can make.
#WellPump #FootValve #WellWater #JetPump #WellMaintenance #HomeownerGuide #WaterWell #WellDrilling #SuctionPipe #CheckValve #WellRepair #WaterPressure #HomeWell #WellPumpRepair #2026Guide