
You’ve just moved into your dream home in the countryside, with a beautiful well supplying your water needs. However, you’ve encountered a frustrating issue – low water pressure or, even worse, no water at all. Before you panic, it’s important to understand that these common well pressure problems can be resolved easily with a few simple steps. In this article, we will explore the causes of low pressure and no water, as well as provide you with practical solutions to tackle these issues head-on. So, let’s dive in and ensure a smooth flow of water in your home!

Checking the Pressure Switch
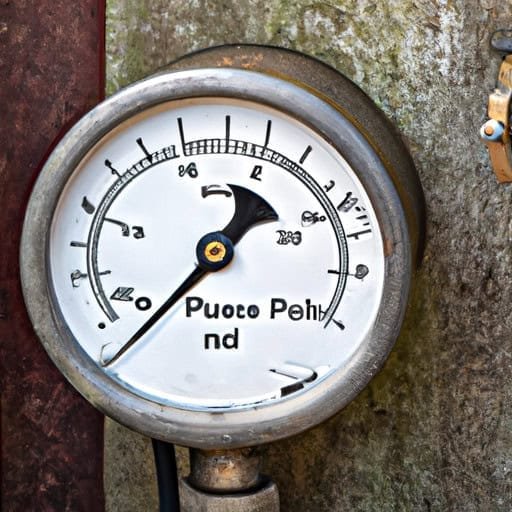
Inspect the Pressure Gauge
The first step in troubleshooting well pressure problems is to inspect the pressure gauge. The pressure gauge is typically located on the pressure switch or near the pressure tank. It indicates the current pressure in the well system. If the pressure is reading unusually low or high, it could be a sign of a problem with the pressure switch.
Test the Cut-in and Cut-out Pressure
To further diagnose issues with the pressure switch, it is important to test the cut-in and cut-out pressure settings. The cut-in pressure is the pressure at which the well pump starts running, while the cut-out pressure is the pressure at which the pump shuts off. Use a pressure gauge or a multimeter set to measure pressure to determine if the switch is activating at the correct pressure points. If the cut-in and cut-out pressures are off, the pressure switch may need to be adjusted or replaced.
Adjust the Pressure Switch
If the pressure switch is not functioning correctly, it may be necessary to adjust it. This should be done with caution and in accordance with the manufacturer’s instructions. Typically, adjusting the pressure switch involves turning a nut or dial to increase or decrease the pressure settings. Be sure to make small adjustments and test the system after each adjustment to ensure the pressure is within the optimal range.
Examining the Pressure Tank
Check for Waterlogged Tank
A common cause of low pressure in a well system is a waterlogged pressure tank. A waterlogged tank occurs when too much water fills the tank, displacing the air and reducing the system’s ability to maintain pressure. To check for a waterlogged tank, turn off the power to the well pump and drain all the water from the tank. Once emptied, use a tire pressure gauge to check the air pressure in the tank. It should be set to the recommended pressure range, typically between 38-40 psi (pounds per square inch).
Inspect Air Volume Control
The air volume control (AVC) is a device that helps maintain the proper amount of air in the pressure tank. It is attached to the tank and regulates the air pressure inside. Over time, the AVC may become damaged or clogged, affecting its performance. Inspect the AVC for any signs of damage or debris buildup. If necessary, replace the AVC to ensure proper functioning of the pressure tank.
Adjust Tank Pressure
If the pressure tank is not maintaining the correct pressure, it may need to be adjusted. Using a tire pressure gauge, check the current pressure in the tank and compare it to the recommended pressure range. If it falls outside the range, adjustments can be made using an air compressor. Add or release air from the tank until the pressure aligns with the manufacturer’s specifications.
Checking the Well Pump
Verify Power Supply
Before diving into more complex troubleshooting steps, it is crucial to verify that the well pump is receiving power. Check the circuit breaker to ensure it has not tripped. If the breaker has tripped, reset it and see if the well pump starts running again. Additionally, inspect the wiring leading to the pump to ensure there are no loose connections or damage.
Inspect the Pressure Relief Valve
The pressure relief valve is a safety feature that helps prevent excessive pressure buildup in the well system. It is typically located near the pressure tank or on the well pump itself. Inspect the pressure relief valve for any signs of damage or leakage. If the valve is not functioning correctly, it may need to be replaced to restore proper pressure regulation.
Inspect the Pump Motor
If all other steps have been followed and the well pump is still not working, it may be necessary to inspect the pump motor. Check for any signs of damage, wear, or overheating. The motor should be securely connected to the pump and free from obstructions. If any issues are detected, it is best to consult a professional well pump specialist for further assistance.
Examining the Pressure Control Valve
Check for Clogs or Debris
The pressure control valve, also known as the pressure regulator, ensures that the water pressure in the well system remains at a consistent level. Over time, the valve may become clogged with sediment or debris, leading to pressure problems. Inspect the pressure control valve and clean any accumulated debris. In some cases, the valve may need to be replaced if it is severely clogged or damaged.
Adjust the Pressure Control Valve
If the pressure control valve is not functioning properly, it may require adjustment. Refer to the manufacturer’s instructions on how to adjust the valve. Generally, the adjustment involves turning a screw or dial to increase or decrease the pressure setting. Make small adjustments at a time and test the system after each adjustment to ensure optimal pressure regulation.

Inspecting the Well System
Check for Leaks
One of the most common causes of low pressure or no water in a well system is a leak. Inspect all visible components of the well system, including pipes, connections, and fixtures, for any signs of water leakage. If a leak is detected, it is important to address it promptly to prevent further damage and restore proper pressure.
Inspect the Water Filtration System
If your well system is equipped with a water filtration system, it is crucial to inspect and maintain it regularly. Check for any clogs or obstructions in the filters and clean or replace them as needed. A clogged filter can restrict water flow and result in low pressure or no water.
Clean the Sediment Filter
Many well systems are equipped with a sediment filter to trap debris and sediment before it enters the plumbing system. Over time, this filter can become clogged and decrease water flow. Remove the filter periodically and clean it thoroughly. If the filter is damaged or no longer effective, replace it to ensure optimal water quality and pressure.
Performing Maintenance Tasks
Flush the Well System
Regularly flushing the well system is an important maintenance task that helps remove sediment, bacteria, and mineral buildup. Follow the manufacturer’s instructions or consult a professional for guidance on how to properly flush your specific well system. Flushing should be done periodically to maintain water quality and prevent pressure problems.
Clean the Pressure Switch and Tank
Dirt, debris, and mineral deposits can accumulate in the pressure switch and tank, affecting their performance. Turn off the power to the well system and carefully clean these components using a soft brush or cloth. Be sure to remove any obstructions or buildup to maintain proper pressure regulation.
Inspect and Lubricate Pump Parts
Well pump components, such as bearings and motors, may require regular inspection and lubrication to ensure smooth operation. Use appropriate lubricants recommended by the manufacturer and follow the instructions for proper application. Regular maintenance of pump parts can prolong their lifespan and prevent pressure-related issues.

Addressing Electrical Issues
Verify Circuit Breakers and Fuses
Electrical issues can cause well pressure problems. Check the circuit breakers and fuses connected to the well pump to ensure they have not tripped or blown. If any abnormalities are discovered, consult an electrician for further inspection and repair.
Check for Loose Connections
Loose electrical connections can disrupt power supply to the well pump, resulting in low pressure or no water. Inspect all wiring and connections leading to the pump, ensuring they are secure and tightly fastened. If loose connections are found, tighten them carefully or seek assistance from a professional.
Test the Voltage and Amps
Measuring the voltage and amps of the well pump can help identify any electrical issues that may be affecting pressure. Use a multimeter to test the voltage and amps at the pump. Compare the readings to the manufacturer’s specifications to determine if the electrical supply is sufficient. Any significant deviations may indicate a problem that requires professional attention.
Dealing with Well Water Contamination
Test the Water Quality
Water contamination can contribute to poor pressure and affect the overall quality of well water. It is essential to test the water regularly for contaminants, including bacteria, chemicals, and minerals. Various home testing kits are available, but for accurate results, it is recommended to send samples to a certified laboratory. Identifying and addressing water quality issues can improve pressure and ensure safe drinking water.
Install an Effective Water Treatment System
If water quality issues are detected, installing an appropriate water treatment system is crucial. Depending on the specific contaminants present, options may include filtration systems, disinfection methods, or water softeners. Consult a water treatment specialist to determine the best solution for your well system and ensure effective treatment of water contaminants.
Consult a Professional for Remediation
In situations where the well water is extensively contaminated or poses a health risk, it is essential to consult a professional for remediation. Well remediation may involve disinfection, well cleaning, or even drilling a new well. Professionals have the expertise and equipment necessary to address severe water contamination issues and restore proper pressure and quality.
Considering Professional Help
Contact a Well Pump Specialist
If all troubleshooting steps have been followed, and the well pressure problems persist, it may be time to contact a well pump specialist. These professionals have in-depth knowledge of well systems and can diagnose and repair complex issues. Explain the symptoms and steps you have already taken to provide them with as much information as possible.
Consult a Plumber or Water System Technician
For issues that extend beyond the realm of well pump problems, it may be necessary to seek assistance from a plumber or water system technician. These professionals can inspect the plumbing system, fixtures, and other components of the water system to identify and address any underlying issues impacting pressure. Their expertise can ensure a comprehensive evaluation and appropriate resolution.
Preventing Future Problems
Regular Maintenance and Inspection
To minimize the occurrence of well pressure problems, it is important to establish a routine maintenance and inspection schedule. Regularly inspect all components of the well system, including the pressure switch, tank, pump, and plumbing connections. Perform necessary maintenance tasks, such as flushing the system, cleaning filters, and lubricating parts. By proactively addressing potential issues, you can maintain optimal pressure and prolong the life of your well system.
Educate Yourself on Well System Operation
Understanding how your well system operates can empower you to identify early signs of pressure problems and take appropriate action. Educate yourself on the basic functioning of well pumps, pressure switches, tanks, and other components. Familiarize yourself with common symptoms of well pressure issues and the steps required for troubleshooting. This knowledge will enable you to confidently address minor issues and seek professional help when necessary.
Conserve Water Usage
Excessive water usage can put strain on the well system and contribute to pressure problems. Implement water conservation practices in your daily routine to reduce the demand on the system. Simple measures, such as fixing leaks promptly, using efficient appliances, and practicing mindful water usage, can help maintain consistent pressure and preserve the longevity of the well system.
In conclusion, handling common well pressure problems requires a systematic approach to diagnose and address issues with various components of the well system. By inspecting and adjusting the pressure switch, examining the pressure tank, and checking the well pump, pressure control valve, and well system, you can identify potential causes of low pressure or no water. Performing regular maintenance tasks, addressing electrical issues, managing well water contamination, and seeking professional help when needed are all essential in maintaining proper pressure and ensuring the longevity of your well system. By following these guidelines and implementing preventive measures, you can handle common well pressure problems effectively and enjoy a reliable water supply.