
When your well water stops flowing in the middle of a cold snap, the first question is how to thaw a frozen well pump without making the damage worse. And the honest answer is that it depends on where the ice is. The ice could be in the supply line between the well and the house, in the well house itself, in the pump pit, or around the pitless adapter — and each location needs a different thawing approach. What you should never do is keep running a pump that is pushing against ice. A submersible motor running against a blocked line will overheat, trip its thermal overload, or worse, burn out the windings in a motor that costs $1,500 to $4,500 to replace.
This guide walks through the exact symptoms of a frozen well pump, a safe step-by-step thawing procedure, a comparison of every thawing method with real costs, what freezing actually damages, and the prevention steps that keep your system above freezing all winter. We have thawed well systems in unheated well houses from Montana to Minnesota, and the process is the same every time: cut the power, find the ice, apply gentle heat from the house side out, and never let the pump run against a blocked line.
By Thomas Reynolds, Pump Systems Engineer
Thomas has installed and serviced over 1,000 well pump systems for homeowners across the northern US, specializing in submersible pump failures, freeze damage, and winterization.
Published: October 8, 2026
Disclosure: As an Amazon Associate, we earn from qualifying purchases on this page. Product selections are based on independent research and real well water data.
Table of Contents
- How to Tell Your Well Pump or Water Line Has Frozen
- Step 1: Shut the Pump Down Before You Thaw Anything
- Step-by-Step: Safe Thawing Methods for a Frozen Well Pump
- Thawing Methods Compared: Speed, Cost, and Risk
- What Freezing Actually Damages in a Well Pump System
- How Much Does It Cost to Thaw a Frozen Well Pump?
- How to Keep Your Well From Freezing Again
- FAQ: Frozen Well Pump Questions
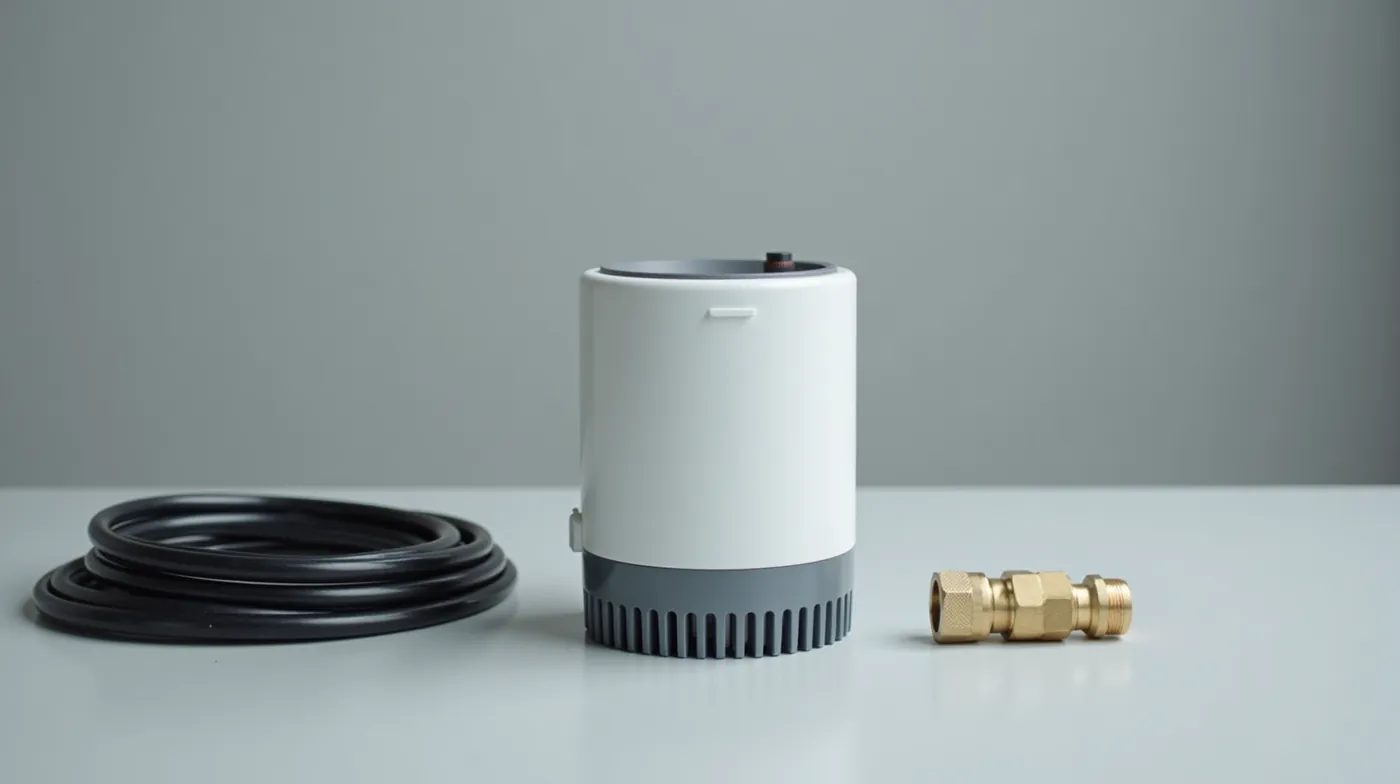
How to Tell Your Well Pump or Water Line Has Frozen
Ice in a well system rarely announces itself. You usually notice the problem at the tap, and by that time the pump may have already been running against a blocked line for an hour or more. Here are the symptoms we see most often, in order of how commonly they appear:
- The pump runs but no water comes out. You hear the pump humming at the pressure tank, the breaker is not tripped, and the tap stays dry after a full minute. This is the classic frozen supply line signature — the pump is pushing against ice somewhere between the well head and the house.
- Water pressure drops to a trickle in the coldest hours. A partial freeze (ice forming inside the pipe but not fully blocking it) shows up as weak flow at 4 a.m. that improves by noon as the line thaws. If your low pressure follows the thermometer, freezing is a strong suspect.
- The pump hums but will not start turning. The motor is seized or the line is completely blocked so the rotor cannot turn against the load. A single hum lasting ten seconds followed by silence means stop and investigate — do not keep restarting it.
- The breaker trips every time you try to run water. An iced-up line raises the static head dramatically; the motor draws well above its rated amps and trips the breaker or its internal thermal overload.
- Frost or damp spots on the supply line or well house walls. If you can see the line in the well house or attic, a wet or frosty section pinpoints exactly where the water is standing and freezing.
Before you start thawing anything, rule out the non-freeze causes. If the pump does not run at all, even at 60 degrees outside, the problem is more likely electrical — check the breaker, the pressure switch, and the float switch first. Our well pump not turning on guide covers the full electrical checklist. Freezing-related symptoms specifically follow a cold snap, and they clear up (slowly) as temperatures recover — that pattern is what distinguishes a frozen line from a dead motor.
Step 1: Shut the Pump Down Before You Thaw Anything
This step protects your motor more than the thawing method protects your line. A submersible pump is designed to push water; when the line ahead of it is blocked with ice, every second of run time is heat and current with no output. Here is the exact shutdown sequence:
- Flip the well pump breaker to OFF. It is in your main electrical panel, usually labeled “WELL PUMP” or “WELL.” Leave it off for the entire thawing process. This is non-negotiable — no thawing method on this list is safe if the pump can start up mid-thaw.
- Open the tap farthest from the well inside the house. This gives meltwater a path to escape as the ice breaks up, and it relieves pressure trapped in the house side of the line. A bathroom sink on the far end of the house works well.
- Close the shutoff valve at the well head or pit if you can reach it safely. This isolates the house plumbing from the well side so meltwater drains toward the well instead of back toward your floor. Skip this if the valve is buried and frozen solid — do not break a valve trying to close one.
- Do not restart the pump until you see water actually moving at the open tap. The moment you restore power while even a short section of ice remains, you are back to the damage scenario in step one.
Stop Here if You Smell Burning
If the well house smells like hot plastic or burnt insulation, the motor may already be overheated. Keep the breaker off, ventilate the space, and jump to the damage check section before you apply any heat. A pump that has been running against ice for hours is often a professional repair at that point.
Step-by-Step: Safe Thawing Methods for a Frozen Well Pump
Now that the pump is safely shut down, the goal is to melt the ice with gentle, controlled heat. The two rules that separate a safe thaw from a repair bill are: work from the house side toward the well (so meltwater flows away from your house and toward the open tap or well head), and never use open flame. PE polyethylene supply line melts around 200°F, and a flame can crack cast iron fittings or ignite pipe insulation. Here is the full procedure:
- Trace the supply line and locate the frozen section. Follow the line from the well house to the house. Look for frost, damp insulation, a section that feels noticeably colder, or a slight bulge where water is expanding behind ice. In an uninsulated well house, the frozen section is almost always where the line enters the house or where it bends near a cold wall.
- Wrap the frozen section with self-regulating heat tape. Self-regulating (self-limiting) heat tape is the right product here: it generates heat only where the tape is cold, so it cannot overheat and scorch the pipe even if you leave it on. Follow the manufacturer’s spacing instructions (usually 1 inch gaps between wraps), keep the tape off the pump and electrical boxes, and plug it into a GFCI-protected outlet. Expect 2 to 6 hours for a fully iced supply line.
- Use a hair dryer or low-heat heat gun on short, exposed sections. For a few feet of accessible line, moving a hair dryer back and forth is the fastest DIY method — 30 to 90 minutes for a short section. Keep the heat source moving at all times, keep it at least a few inches from any pump housing, and never leave it unattended. A heat gun works faster but at higher temperatures, so hold it farther away than you would a hair dryer.
- For a frozen pit or well head, use hot — not boiling — water. If the ice is at the pit, the pitless adapter, or the well head, carefully pour hot water (around 140°F, the hottest your tap will give you) around the base of the well head and down the pit opening. Boiling water can crack cast iron fittings and the sanitary seal. Repeat every 10 to 15 minutes until you see water move.
- Warm the well house itself. If the whole well house is below freezing, set up a portable well house heater with a thermostat and close the door. This thaws the line slowly (a full day or more) but also fixes the root cause. If you use a propane or kerosene heater, ventilate the space — carbon monoxide in a sealed well house is a real hazard.
- Check progress every 20 to 30 minutes at the open tap. The first sign of success is a slow drip, then a weak stream, then full flow. Do not close the tap or restore power at the drip stage — a half-thawed line refreezes within the hour and traps the pump again.
- Once full flow returns, let the line run for five minutes, then restore the breaker. Watch the pressure gauge (or listen at the pressure tank): the pump should start, build pressure to the cutout setting (typically 40 to 60 PSI), and shut off. A build time of 2 to 4 minutes is normal for a typical residential well.
- Expect 24 to 48 hours for the ice to fully melt out of insulated sections. Surface flow returns long before the last ice inside the pipe wall is gone. Keep the heat tape on, keep the well house warm, and do not turn the system off and on repeatedly during that window.
Pro Tip: Patience Is a Thawing Tool
In our experience, the difference between a $40 heat-tape thaw and a $3,000 pump replacement is almost always time. Homeowners who escalate from heat tape to torch in two hours because the tap is still dry are the same homeowners who end up with a dead motor. Gentle heat applied consistently wins every time.
Thawing Methods Compared: Speed, Cost, and Risk
Every thawing method trades speed against cost and risk. Here is how they line up for a typical residential well system with a 1.5-inch PE supply line:
| Method | Typical Thaw Time | Cost | Risk Level | Best For |
|---|---|---|---|---|
| Self-regulating heat tape | 2–6 hours | $25–$60 | Very low | Exposed supply line in a well house or crawlspace |
| Hair dryer / low-heat heat gun | 30–90 minutes | $30–$90 (tool) | Low if kept moving | Short accessible sections of pipe |
| Hot water on pit / well head | 1–3 hours (repeated pours) | ~$0 | Medium (cracking if boiling) | Frozen pit, pitless adapter, or well head |
| Well house heater | 12–48 hours | $60–$200 | Low (ventilate fuel heaters) | Whole well house below freezing; doubles as prevention |
| Professional thawing service | 1–2 hours | $250–$800 | Low | Buried lines, no access, or suspected pump damage |
| Open flame / torch | Fast | $0 | Catastrophic | Never — melts PE pipe, cracks iron, ignites insulation |
Cost ranges reflect typical 2026 US residential well repair pricing for a 1.5-inch PE supply line; deep-well systems with pitless adapters run at the higher end of professional service ranges.
What Freezing Actually Damages in a Well Pump System
Here is the part most guides skip: the ice itself rarely kills a well pump. The damage comes from what the pump does while the line is blocked, and from the mechanical forces of expanding water. Ice expands roughly 9% as it forms, and that expansion acts on everything in its path.
The Submersible Motor
With the line iced over, the pump keeps trying to move water against a near-total blockage. Head pressure rises, the motor draws current well above its rated full-load amps (FLA), and the windings heat up. The built-in thermal overload trips in many cases — which is why the breaker or pump appears “dead” after a freeze. But a motor that ran blocked for 30 minutes or more, or that ran dry and hot after the thaw, can suffer winding damage or a failed shaft seal. A hum-without-turn at startup is the warning sign of a seized rotor.
The Check Valve, Foot Valve, or Pitless Adapter
Ice forces water backward through the system as it forms and thaws. A check valve or pitless adapter that is forced open against its seal can fail to reseal once things thaw. The symptom: the pump short-cycles, the well water level drops over the following days, and the system loses prime. If your pump starts and stops every few seconds after a freeze, suspect the check valve before anything else.
The Pipe and Fittings
PE polyethylene pipe is flexible enough to survive most freezes, but cast iron fittings, old galvanized joints, and rigid PVC are not. Ice expansion can crack a brittle fitting at the well head or in the pit, and the leak may not appear until the ground thaws in spring. If you have cast iron at the pit, add a visual inspection to your spring checklist.
How to Verify Your Pump Survived the Freeze
After the thaw, run this five-point check before assuming the system is fine:
- Run the pump and listen. A normal start-up hum with water flow within seconds is a good sign. A hum that never develops into running current means the rotor may be seized — stop and call a professional.
- Measure the amp draw. A clamp-on amp meter on the hot wire tells the truth: the reading should be at or below the FLA number on the motor nameplate. A reading 30% or more above FLA at steady state is a motor that is working against something — or is dying.
- Watch the pressure build. From pump start to cutout should take 2 to 4 minutes on a normal residential well. A build that takes 10+ minutes or never reaches cutout points to a check valve failure, a leak, or a weak pump.
- Check for short cycling. If the pump restarts within a minute or two of shutting off, the check valve or pitless adapter seal is likely compromised.
- Inspect the pit. Look for standing water, a damp well head, or seepage at the sanitary seal. A slow leak here will show up as declining water levels over the next two weeks.
When to Stop and Call a Pro
Pulling a submersible pump to inspect a suspected dead motor is a $1,200 to $2,000 job, and if the motor is truly dead you will add another $1,500 to $4,500 for the replacement pump and installation. If you see burning smell, a hum-without-turn, amps far above FLA, or a check valve that will not hold, call a well contractor rather than running the system to “test it.”
How Much Does It Cost to Thaw a Frozen Well Pump?
The cost of a freeze event is almost entirely determined by how quickly you act and whether the pump survived. Here is what the scenarios actually run in 2026:
| Scenario | Typical Cost | Notes |
|---|---|---|
| DIY thaw with heat tape | $25–$150 | Tape plus hair dryer or heater; pump survives intact |
| Professional thaw, accessible line | $250–$500 | Contractor thaws well house or crawlspace line in 1–2 hours |
| Professional thaw with excavation | $500–$800 | Frozen buried line; includes dig and patch |
| Submersible pump replacement | $1,500–$4,500 | Motor burned out; pump, cable, labor, and new seal |
| Pitless adapter replacement | $300–$700 | Check seal failed; parts plus labor to pull and set a new adapter |
Ranges reflect typical 2026 US pricing for residential wells; remote areas and very deep wells (400+ ft) trend toward the upper end.
Notice the jump from a few hundred dollars to several thousand: it happens the moment the motor is involved. That is exactly why the shutdown-first, gentle-heat procedure above is the cheapest repair you will ever do on your well system.
How to Keep Your Well From Freezing Again in 2026
If you just thawed your system, or if you want to skip this guide next January, here is the prevention checklist we install on every northern residential well we service:
- Keep the well house above 40°F. A thermostat-controlled well house heater set to 40–50°F is the single most effective freeze defense. The well house is where the line, the pitless adapter, and the check valve all live — keep it warm and those parts rarely freeze.
- Insulate the supply line end to end. Foam pipe insulation on the exposed run, plus weatherstripping on the well house door and window, slows heat loss enough to matter in marginal climates. For underground line protection, see our well line insulation kit guide.
- Run self-regulating heat tape on the supply line. The same heat tape you used for the thaw is the permanent fix for exposed sections. Size it to the run length plus 20% for bends, and route it away from the pressure tank and pump housing.
- Verify your line is below the frost depth. Typical frost depths range from 4 feet in mild climates to 8 feet or more in the northern US. If your supply line crosses above the frost depth in an unheated space, that crossing is your freeze point — insulate and tape it specifically.
- Inspect the pitless adapter and sanitary seal every fall. A leaking or cracked seal lets cold air and water into the pit. A 15-minute visual check in October prevents a January emergency.
- Run the pump briefly during deep cold snaps. On nights forecast below 20°F, running the pump for a few minutes keeps water moving in the line — moving water does not freeze. Set a timer or simply open a tap for a minute during the coldest hours.
- Protect the pump electrically. A properly sized breaker, GFCI protection, and a pump protector keep an overloaded or short-cycling pump from cooking itself in the middle of the night. See our well pump protector buyer’s guide for sizing details.
- Winterize before the first hard freeze, not after. If your system has already frozen once, do not wait for a second freeze to act. Our winterize a well guide covers the full fall preparation sequence.
Essential Freeze-Prevention Gear: Where to Buy
| Product | Purpose | Typical Price |
|---|---|---|
| Self-Regulating Heat Tape | Keeps supply line and pit above freezing | $25–$60 |
| Well House Heater with Thermostat | Holds the well house at 40–50°F | $60–$200 |
| Foam Pipe Insulation | Slows heat loss on exposed runs | $15–$40 |
| Clamp-On Amp Meter | Verifies normal pump current after a thaw | $30–$90 |
| Submersible Well Pump | Replacement if freeze damage killed the motor | $800–$3,000 |
FAQ: Frozen Well Pump Questions
How long does it take to thaw a frozen well pump?
With self-regulating heat tape, plan on 2 to 6 hours for a fully iced supply line. A hair dryer on a short exposed section can work in 30 to 90 minutes. A professional thawing service typically completes the job in 1 to 2 hours. Note that the pump motor itself is rarely the frozen part — the supply line and the pit are. The motor’s problem is what it does while the line is blocked.
Can a well pump be damaged by freezing?
Yes, but usually indirectly. The ice in the line does not reach the submersible motor, which sits 30 to 300 feet down where the earth keeps it above freezing. The damage comes from the pump running against a blocked line (overheat and overcurrent) or running dry after the thaw. A pump that was shut down before the freeze and thawed gently almost always survives; a pump that ran against ice for an hour or more is a coin flip.
Can I use a torch or open flame on a frozen well line?
No. PE polyethylene supply pipe softens and melts around 200°F, open flame can crack cast iron fittings, and it can ignite pipe insulation. The few dollars saved versus a $1,500+ pump replacement and a repaired or replaced line are not the math. Gentle, controlled heat — tape, hair dryer, hot water, or a room heater — is the only safe approach.
The line is thawed but the pump still will not run. What now?
Work the electrical list first: confirm the breaker is not tripped, check the pressure switch and float switch at the tank, and listen for a hum. If you hear a hum but the motor will not turn, the rotor may be seized — stop and call a well contractor. If there is no hum at all, the problem is power delivery or the capacitor; our well pump not turning on guide walks through all 10 causes with diagnostic steps.
When is it worth calling a professional instead of thawing it myself?
Call a professional if the frozen section is buried with no access point, if the well house is unsafe to enter, if the pump shows any burn signs (smell, hum-without-turn, breaker that trips immediately), or if your system uses a deep pitless adapter you have never worked on. The service cost of $250 to $800 is small compared to a $1,500 to $4,500 pump replacement caused by a DIY thaw gone wrong.
See Also
If you are dealing with freeze damage or preparing for winter, these guides go hand-in-hand with thawing a frozen well pump:
- How to Winterize a Well 2026: 9-Step Guide + Costs
- Best Self-Regulating Heat Tape for Well Pipe Freeze Protection in 2026
- Well Pump Not Turning On 2026: 10 Causes & How to Fix It
#FrozenWellPump #WellWater #WellPump #FreezeProtection #WellMaintenance #PrivateWell #WellSystem #WaterWell #WellHouse #HeatTape #WinterWell #WellPumpRepair #HomeownerGuide #FrostLine #2026Guide