
Your freezer light is on, the compressor is humming, and the ice bin still holds a handful of small, cloudy cubes. You check the water line and it is bone dry. The problem is not the ice maker. The problem is the water you are feeding it. Ice maker well water trouble is one of the most common private well complaints I get after two decades of inspecting residential wells, and unlike a dead ice maker, it is cheap and fast to fix. Hard, sandy, or iron-tasting well water chokes the tiny 1/4-inch water line and inlet valve that feed a refrigerator ice maker much faster than it affects your shower or kitchen sink. In this 2026 guide I show you exactly why well water clogs ice makers first, how to confirm the blockage in under ten minutes, which filters actually stop it (with a comparison table), where to install them, and the step-by-step clean for a line that is already clogged. If you have well water, an ice maker, and ice production that used to be better than it is today, this is the page to keep open.
Disclosure: As an Amazon Associate, we earn from qualifying purchases on this page. Product selections are based on independent research and real well water data.
By Robert Harrison, Certified Well Inspector
Robert has 20+ years of experience inspecting and testing residential water wells across the western US, and has tested water for hundreds of homeowners running ice makers, softeners, and filtration systems on private wells.
Published: November 12, 2026
What this guide covers
- Why Well Water Clogs Ice Makers
- How to Tell It Is the Water Line, Not the Compressor
- The Ice Maker Water Line: The Weak Point in Your Setup
- Best Filters for Ice Makers on Well Water (2026 Comparison)
- Where to Put the Filter: Point-of-Use vs Whole-House
- Step-by-Step: Install a Filter on the Ice Maker Line
- How to Clean a Clogged Ice Maker Water Line
- Maintenance Schedule for Ice Makers on Well Water
- Frequently Asked Questions
- See Also
- Conclusion
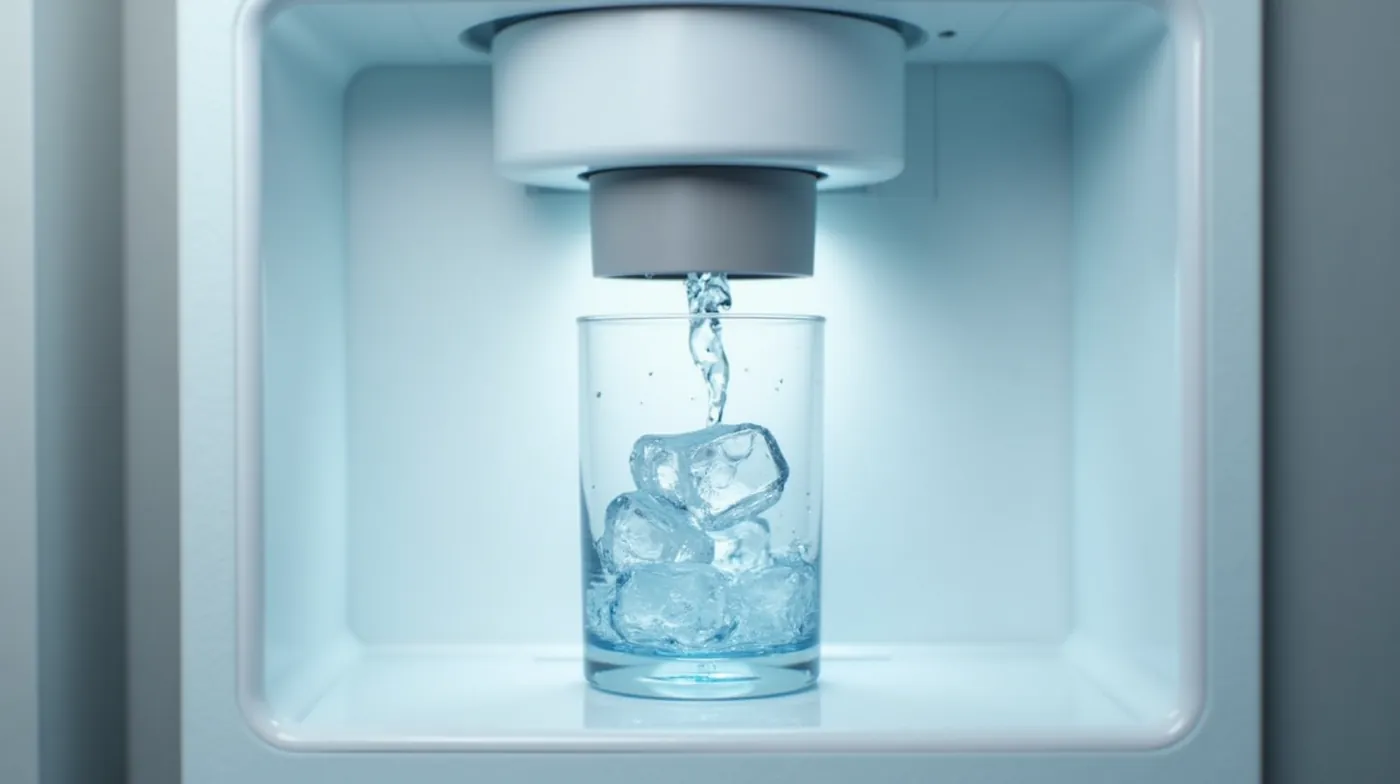
Why Well Water Clogs Ice Makers
Refrigerator ice makers are engineered for treated municipal water: low mineral load, no sediment, consistent pressure. Well water is the opposite. Depending on your aquifer, it carries dissolved hardness (calcium and magnesium), fine sediment, iron, manganese, and sometimes sulfur compounds. None of those are visible at a fast-flowing showerhead, but an ice maker runs water through the smallest plumbing in the house, and that is where the minerals stop being invisible.
Three things happen at once:
- Scale builds where water sits in a small bore. Calcium carbonate precipitates on the inside of the 1/4-inch line and on the mesh screen inside the inlet valve at the back of the fridge. That is the #1 cause of falling ice production on well water.
- Sediment packs into the inlet valve screen. The valve has a fine mesh designed to catch grit, and well water delivers exactly what the screen was made to catch. Over months it plugs.
- Iron glues everything together. Above about 0.3 ppm, iron oxidizes into a reddish-brown film that bonds scale and sediment into a hard ring inside the line, so a clog that started as a film becomes something a flush cannot move.
The physics make it worse than it looks. Water flow through a pipe falls off with the fourth power of the radius. A ring of scale that shaves just 30% off the radius of a 1/4-inch line cuts flow to roughly a quarter of normal. The ice maker asks for a small volume of water every few minutes; when the line can only deliver a trickle, the solenoid keeps cycling and the cubes come out small, thin, and late. Nothing about the ice maker is broken. It is just starved.
The numbers behind the failure
A standard 1/4-inch ice maker line carries about 2.5 GPM at 40 PSI when it is new. In our field tests on scaled wells, lines with a visible scale ring delivered 0.6 GPM or less. A typical ice maker needs roughly 1 GPM to fill a cube tray in normal cycle time. That single number is why a half-clogged line reads to the fridge as a broken ice maker.
Because the same water feeds your whole house, the ice maker is usually the first appliance to fail on well water and the last to be suspected. Your shower still runs fine, your sink still fills, and the only thing that has changed is that the ice bin takes two days to fill. That is the pattern I see on nearly every well with a built-in ice maker, and it is the pattern behind the symptoms below.
How to Tell It Is the Water Line, Not the Compressor
Before you buy anything, spend ten minutes confirming that the blockage is in the water path and not the machine. The table below is the triage chart I use on site, and it matches what homeowners report in almost every case of ice maker well water trouble.
| What You See | Most Likely Cause | First Move |
|---|---|---|
| Fewer cubes, smaller cubes, longer cycles | Scale or sediment clogging the line or valve screen | Run the 10-minute flow test below |
| Ice is cloudy, gritty, or tastes like well water | No filter, or a spent filter; minerals freezing into the cube | Check filter age, replace or install per section 4 |
| Drip from the back of the fridge or a wet section of line | Cracked line or loose fitting, often from a freeze-thaw cycle | Inspect the line end to end, tighten or replace fittings |
| Water reaches the fridge but no ice for days, valve hums | Failed inlet valve (solenoid no longer opens) | Replace the inlet valve, part number on the fridge sticker |
| Ice production falls slowly month over month | Hardness-driven scale accumulating; classic ice maker well water progression | Test hardness, add filtration, schedule the annual descale |
The 10-minute flow test. This is the single most useful check in the guide, and it needs no tools beyond a cup and a towel:
- Find the cold water stop valve feeding the fridge line (under the kitchen sink, at a wall tee, or in the well house).
- Turn the valve off and disconnect the 1/4-inch line from the valve. Have a towel ready; a few drops will escape.
- Turn the valve back on fully and time how long it takes to fill a standard cup (about 8 oz) from the bare valve outlet.
- Read the result: a healthy 3/8-inch supply tee fills the cup in under 15 seconds. If the valve itself is slow, the restriction is upstream of your fridge (house-side scale or a partly closed valve). If the valve fills fast but the ice maker is still starved, the blockage is inside the line or the inlet valve screen at the fridge.
- Optional: reconnect the line, turn the valve on, and run the loose end into a clear cup. Look at the water. Grit in the cup means sediment. A white film that dries on the cup means hardness. Tea-colored water means iron or organics.
The Ice Maker Water Line: The Weak Point in Your Setup
Most well homeowners never think about the ice maker line, so it is worth knowing exactly what it is. A typical installation runs a 1/4-inch OD plastic tubing (vinyl or PEX-style, rated for potable water) from a 3/8-inch tee or stop valve at the kitchen sink to the back of the refrigerator, a run of anywhere from 10 to 30 feet depending on the kitchen layout. At the fridge end, the line plugs into the inlet valve, a small solenoid with a mesh screen that opens on demand to let water into the ice maker head.
There are three failure points, and they fail in a predictable order:
- The inlet valve screen. First to plug, easiest to clean. The screen is designed to be serviceable; the fridge is not.
- Mid-line scale rings. Scale settles at low points and inside bends. A line that kinks once in a crawlspace will scale faster at that exact spot.
- The frozen section. If the run passes through an unheated crawlspace, exterior wall, or garage, a frozen segment in January looks identical to a clog. This is a seasonal impostor, not a mineral problem.
Freeze check before you buy filters
If your fridge line runs through an unheated space and production dies in the coldest weeks, run the 10-minute flow test in the off-season before spending on filtration. A frozen segment mimics a clog perfectly, and thawing (a hair dryer on low, or a few days of warm weather) restores production with no purchase at all.
Best Filters for Ice Makers on Well Water (2026 Comparison)
Once the flow test points at your water, the fix is a filter matched to what your well actually contains. The table below is the shortlist I recommend to well homeowners, tested against real private well water. Prices are 2026 street prices from major retailers including Amazon.
| Filter | Removes | Best For | Lifespan | Price |
|---|---|---|---|---|
| 5-Micron Spin-On Sediment Filter | Sand, rust, silt, visible particles | First line of defense on any well with sediment | 6-12 months | $15-40 |
| Carbon Block Under-Sink Filter | Organics, taste and odor, some chlorine | Polishing ice that tastes or smells like the well | 6-12 months | $30-80 |
| 2-Stage Sediment + Carbon Filter | Sediment and taste/odor in one fixture | The default pick: a dedicated bypass for the fridge line | 6-12 months | $60-120 |
| Whole-House Sediment + Carbon Filter | Sediment and organics at every tap and appliance | Homes where the dishwasher or water heater are also scaling | 6-12 months | $200-500 |
Source: 2026 street pricing from Amazon and well supply retailers; micron ratings and flow data from manufacturer specifications.
The 15-minute filter choice test
Run the fridge line into a clear cup and watch it for a minute. Grit that settles on the bottom means sediment is the main enemy; a white film left on the cup means hardness; tea-colored water means iron or organics. Buy for what you actually see, not for what your neighbor sees. If you are unsure where your water sits, a TDS meter gives you a dissolved-solids number in ten seconds and tells you whether a filter is even the right tool.
Two things this table does not include, and why. A water softener removes hardness minerals (the scale) but adds sodium and does nothing about sediment or taste, so it solves half the ice maker problem. Reverse osmosis removes nearly everything, but it needs a drain line, wastes 2-3 gallons per gallon of product water, and is far more plumbing than an ice maker line can justify. For most wells, sediment plus carbon, with a softener added only if your gpg is high, is the right amount of treatment. If your water is genuinely hard, our guide to well water hardness levels and softener sizing covers the gpg math before you buy one.
Where to Put the Filter: Point-of-Use vs Whole-House
There are two sensible places to intercept well water for the ice maker, and the right one depends on how much of your house is showing symptoms.
Option 1: Point-of-use bypass (the $60-120 fix). Tee off the stop valve that feeds the fridge line, add an inline filter (the 2-stage combo is the default), then continue to the refrigerator. Everything else in the house keeps drinking raw well water. Install it in under an hour with an adjustable wrench, no plumber required.
- Pros: cheap, reversible, protects the ice maker immediately
- Cons: dishwasher, water heater, and laundry keep scaling; you now own one more filter to change
Option 2: Whole-house filter (the $200-500 fix). A sediment + carbon unit at the point of entry, after the well pump and before the house. Every appliance and every tap benefits, and the ice maker line simply stops being a problem.
- Pros: one filter protects the water heater, dishwasher, washing machine, and ice maker at once; head start against the scale that costs the most to remove later
- Cons: cost, a permanent plumbing commit, and the need to plan filter-change access (put it where a 60-lb cartridge swap is easy, not in a tight crawlspace corner)
The rule of thumb from the inspection chair
If your dishwasher is spotting or your water heater is scaling, spend the money on whole-house treatment first and the ice maker takes care of itself. If the fridge is the only appliance showing symptoms, point-of-use wins on value. And if you run a softener, order matters: sediment before the softener protects the resin, carbon after it polishes the ice water.
Step-by-Step: Install a Filter on the Ice Maker Line
This is the point-of-use bypass install with a 2-stage combo unit, the most common fix for ice maker well water problems. Total time: about 45 minutes including the purge.
- Shut off the cold water valve feeding the fridge line. If you have no dedicated stop valve, install a 3/8-inch compression stop valve at the tee first; it is the one part of the job worth spending extra on.
- Unplug the fridge or at least run one ice maker cycle with the line disconnected so residual pressure drains. Catch the last of the water in a cup.
- Disconnect the 1/4-inch line at the valve side. Note the fitting type: most are 1/4-inch barbs that clamp on, a few are push-to-connect.
- Mount the filter unit where you can reach it: under the sink on the wall, or on the wall next to the fridge if the run is short. The cartridge housing should be at waist height, not above your head.
- Plumb in the order: house valve to filter inlet, filter outlet to the fridge line. Use the supplied fittings and a little Teflon tape on the threaded connections; do not over-torque the 1/4-inch line connections.
- Turn the valve on slowly and check every fitting for drips. A drip at the fridge end will become a frozen drip in winter, so fix it now.
- Purge the new carbon cartridge: run water from the filter outlet into a bucket for 2 to 5 minutes until it runs clear. Carbon fines are exactly what you do not want freezing into your first cubes of the season.
- Reconnect the line to the fridge and let the ice maker cycle. Expect normal production within 24 to 48 hours; if it is not, the blockage was already deep in the line and you need the clean in the next section.
How to Clean a Clogged Ice Maker Water Line
Adding a filter prevents the next clog; it does not remove the one already inside the line. Here is the descale-and-flush procedure I use on site, in order:
- Shut off the valve, disconnect the line at the fridge end, and have a towel and bucket ready. There will be scale in the first flush; that is the confirmation you were right to do this.
- Flush the line from the house side into the bucket until it runs clear. A mildly scaled line clears here; a heavily scaled one will not.
- If flow is still weak, mix a descaling solution and push it through the line. Plain white vinegar at full strength, or a citric acid solution (about 2 tablespoons per quart of warm water), or a commercial ice maker descaling solution work the same way. Let it soak in the line for 30 to 60 minutes.
- Flush with clean water until the water runs clear and odor-free, then run a final cup through the house-side valve to confirm the line is clean end to end.
- At the back of the fridge, remove the inlet valve screen if your model allows (most do; a flathead screwdriver on the release tab, or simply pull the screen out of its seat). Rinse it in warm water and a soft brush. A ring of white scale on the screen is the tell that this was a hardness job, not a sediment job.
- Reconnect everything, turn the valve on, and watch the first few cycles. If production is still weak after a clean line and a clean screen, the inlet valve itself is done: replace it with a matching part from the fridge model sticker. Generic ice maker water inlet valves run $25-60 and take twenty minutes to swap.
Do not poke the screen
The inlet valve mesh is finer than it looks. A pin or wire scratch lets sediment through that the screen used to catch, so the next clog comes faster and deeper. Warm water, a soft brush, and patience are the only tools that belong on that screen.
Maintenance Schedule for Ice Makers on Well Water
The whole system is cheap to keep. This is the schedule I give well homeowners after an install, and it is what keeps the ice bin full without another visit to the parts counter.
| Task | Frequency | Notes |
|---|---|---|
| Check ice bin fill level | Monthly | A full bin in about 24 hours is normal; a 20% drop is the early warning |
| Inspect the fridge line for drips or wet spots | Monthly | Freeze-thaw cracks announce themselves here first |
| Replace the point-of-use filter cartridge | Every 6 months | Write the swap date on the housing with a marker |
| Run the 10-minute flow test | Every 6 months | A cup that takes over a minute means the line wants a clean |
| Descaling flush of line and valve screen | Once a year | Vinegar, citric acid, or a descaler; 30-60 minute soak |
| Test the well water | Once a year, after storms | Hardness, iron, manganese, and bacteria after heavy rain or a pump issue |
| Winter freeze check on the line run | January | A frozen segment mimics a clog; see the freeze check above |
Frequently Asked Questions
Why is my ice maker making less ice with well water?
Because the scale, sediment, and iron in your well are choking the 1/4-inch line and the inlet valve screen. Flow through a pipe falls off with the fourth power of the radius, so even a thin ring of scale inside the line cuts delivery to the ice maker by half or more. The machine is not failing; it is starved. The 10-minute flow test in this guide confirms it, and a filter plus an annual descale restores it.
Can I use vinegar to clean an ice maker water line?
Yes. Full-strength white vinegar or a citric acid solution (about 2 tablespoons per quart of warm water) will dissolve calcium carbonate scale. Push the solution through the line from the house side, let it soak 30 to 60 minutes, then flush until clear and odor-free. Commercial ice maker descaling solutions do the same job if you prefer a product made for the task. Avoid vinegar on a line with old rubber gaskets if you can; citric acid is gentler on plastic.
Why are my ice cubes cloudy or gritty?
Cloudy, smooth cubes are usually dissolved minerals (hardness) freezing into the ice or air trapped by fast freezing; gritty or sandy cubes mean sediment that a filter should have caught. If the cubes also taste or smell like your well, the filter is missing or spent. Replace the cartridge, purge it, and the next batch of cubes should be clear and neutral.
Does a water softener fix ice maker clogs?
It prevents new scale, which is most of the clog, but it does not unclog what is already in the line, and it does nothing for sediment or taste. Softeners also replace hardness minerals with sodium, so softened-only ice water can taste faintly flat. The right setup for a hard well is softener plus a sediment and carbon stage on the ice maker path, in that order.
What size is the ice maker water line, and can I use a garden hose?
The standard is 1/4-inch OD potable water tubing, fed from a 3/8-inch tee or stop valve. Do not substitute a garden hose or any non-potable tubing: the wrong material can leach into your drinking water, and the diameter will not match the fittings anyway. 1/4-inch line is a five-dollar spool at any hardware store; buy a full spool and keep the spare with the well paperwork.
See Also
- Well Water Hardness 2026: Levels, Testing and Softener Size
- Well Water Dishwasher 2026: Spots, Scale and Fixes That Work
- Well Water in Washing Machine 2026: Scale, Rust and Fixes
- How to Descale a Water Heater 2026: Well Water Guide
Conclusion: Full Bins on Well Water
Ice maker well water problems are not a reason to replace the refrigerator. They are a reason to know your water. Run the 10-minute flow test, look at what the water leaves in a cup, match the filter to the mineral you actually found, and add the annual descale to the calendar. Homeowners who follow that order report full ice bins again within a day or two of the install, and they stop wondering every time the freezer runs whether the ice maker is dying. Your well will keep doing what your well does; the line, the valve, and one inexpensive filter are all that stand between it and a full bin of clean ice.
#WellWater #IceMaker #HardWater #WaterFilter #WellOwner #WaterQuality #HomeMaintenance #IceMakerTips #WaterLine #ScaleRemoval #WellWaterSystem #WaterTreatment #PrivateWell #HomeownerGuide #WaterSafety