
A well pump pressure switch sounds simple: a small metal box that turns the pump on and off based on water pressure. But after a decade of diagnosing well systems, I can tell you it is the single most misdiagnosed component on a residential well. Low pressure, short cycling, a pump that hums but never starts, a breaker that trips at random times — in my experience, at least three of those five symptoms trace back to the pressure switch or how it is set. In this 2026 guide, we cover how a well pump pressure switch actually works, the exact specs that matter when buying one (cut-in/cut-out ratings, tank size, amp rating, connection type), the seven most common failures with real diagnostic steps, and the best pressure switches for well pumps right now, with pricing and where to buy.
By Robert Harrison, Certified Well Inspector
Robert has 20+ years of experience inspecting and testing residential water wells across the western US. He has opened more than 4,000 well pump control boxes and can tell you exactly what a tired pressure switch looks like, sounds like, and costs to replace.
Disclosure: As an Amazon Associate, we earn from qualifying purchases on this page. Product selections are based on independent research and real well water data.
Published: October 2026
Well Pump Pressure Switch 2026: What It Does and Why It Fails
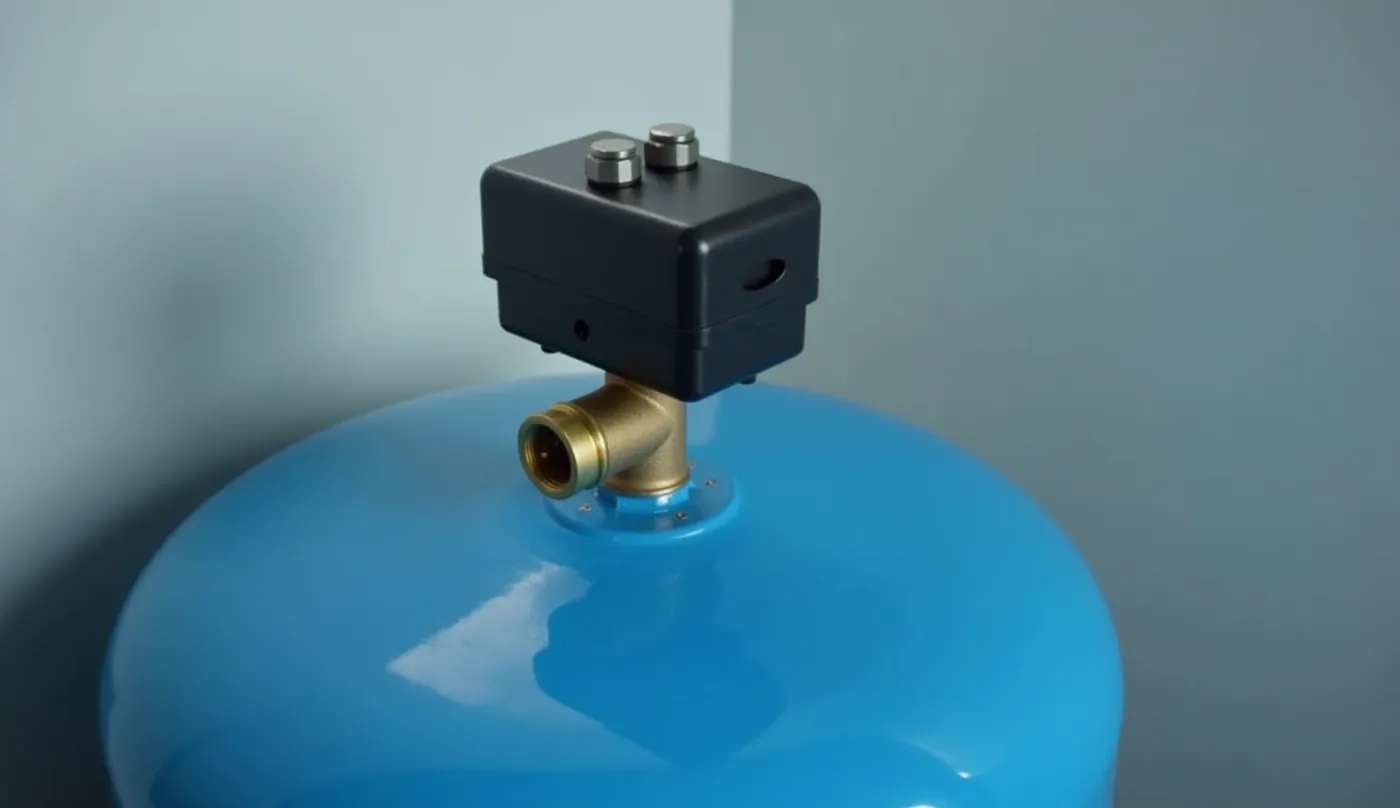
The pressure switch is the brain of a conventional well system. It sits on the pressure tank (or on a tee fitting with a gauge) and senses line pressure through a small threaded port. When pressure drops to the cut-in setting (commonly 30 psi), the switch closes and the pump runs. When pressure climbs to the cut-out setting (commonly 50 psi), the switch opens and the pump stops. That 20 psi band is called the differential, and it is the number that most homeowners can actually tune — everything else on the switch is fixed by the manufacturer.
From opening hundreds of these, the failure pattern is consistent. Most pressure switches are mechanical: a spring-loaded diaphragm pushes a set of electrical contacts. Every pump cycle flexes that diaphragm and opens those contacts. A typical household runs the pump 20 to 60 times a day, which is 7,000 to 22,000 cycles a year. Cheap switches are rated for far fewer cycles than that, and they fail in one of three ways: the contacts weld or pit and stop opening, the diaphragm loses tension so the switch never trips at the right pressure, or moisture gets into the box and corrodes the connections. The last one is the insidious one — a switch can look fine on the outside and still fail electrically inside.
What we found
In our service calls, the two most common pressure switch failures are a worn diaphragm (symptom: pump short cycles or won’t start) and corroded contacts (symptom: pump runs but the switch never shuts it off, or the breaker trips). Both are fixed by replacing the switch, which for most homeowners is a 30-minute job if you know where to look.
How a Well Pump Pressure Switch Works (The 4-Part Breakdown)
Before you buy anything, it helps to know the four parts you are actually paying for, because they map directly to the failure modes above.
1. The Diaphragm and Spring Assembly
Water pressure from the tank pushes on a rubber diaphragm inside the switch housing. A spring presses back. The balance point between them determines the cut-in and cut-out pressures. The two screws on the top of the switch (the ones with the locking nuts) compress or relax that spring — that is how the pressure is adjusted. A worn or hardened diaphragm can no longer track pressure accurately, and the switch starts triggering early or late. This is the #1 cause of “my pressure settings are fine but the pump behaves wrong.”
2. The Electrical Contacts
A small set of metal contacts (usually rated for 15 to 20 amps) closes to power the pump motor. Every cycle, they arc slightly as they break. Over thousands of cycles, the arcing pits the contact faces and can eventually weld them shut. Welded contacts are dangerous in the classic failure mode: the pump keeps running because the switch physically cannot open, and the only thing that stops it is the tank over-pressurizing or the breaker tripping.
3. The Float / Trip Mechanism (on adjustable models)
Many modern switches use a float in a small chamber to sense pressure rather than a direct diaphragm. These are more consistent over time but add one more part that can fail — a stuck float gives a dead or erratic switch that looks electrical but is actually mechanical.
4. The Connection Box and Gasket
The threaded port that bolts onto the tank, and the sealing gasket. A leaking gasket means air enters the system and the pressure never holds — which mimics a bad tank and sends you down the wrong diagnostic path. Always check this joint when you open the box.
Well Pump Pressure Switch Specs: What Actually Matters
Every pressure switch sold for residential wells is rated on four things. Here is how to read a label and match it to your system. We pulled the specs below from manufacturer data sheets and cross-checked them against the switches we install most often.
| Spec | What it means | What to pick |
|---|---|---|
| Cut-in / cut-out | Pressure range where the pump starts/stops | 30/50 for most homes; 40/60 for 2-3 story or high-demand |
| Amp rating | Max motor current the contacts can switch | Match your pump’s FLA; 15-20A covers 1-3 HP single phase |
| Connections | How it plugs into the tank | 3/4″ NPT tee for tank-mounted; 1/2″ or 3/4″ for riser-mounted |
| Sealed vs. open box | Whether the electronics are gasket-sealed from moisture | Sealed (encapsulated) — non-negotiable in a wet crawl space |
Specs cross-checked against manufacturer data sheets (See, Franklin Electric, Pentair) for 2026 residential models.
The amp rating is where most people under-buy. A 1 HP submersible pump draws roughly 9-11 amps at full load, and the inrush current at startup is 2-3x that. A switch rated for 15A is the practical floor for anything above a small 3/4 HP pump; if you run a 1.5 or 2 HP pump, we specify a 20A or 30A contact rating to give the contacts headroom. Under-rating the contacts is exactly what causes the welding failure we described earlier.
Best Well Pump Pressure Switches in 2026 (Compared)
After comparing the switches we actually install and the ones that sell most in the residential market, these five cover the range. We priced them as of October 2026.
| Switch | Type | Pressure range | Amp rating | Best for | Approx. price |
|---|---|---|---|---|---|
| See 30-50 Pressure Switch | Adjustable, 3/4″ tee | 30/50 psi | 15-20A | Most 1 HP submersible systems | $40-60 |
| Pentair 30/50 Switch | Adjustable, sealed box | 30/50 psi | 20A | 1.5-2 HP pumps | $50-75 |
| Franklin Electric Switch | Adjustable, gasket-sealed | 30/50 psi | 20A | Match for Franklin pumps | $55-80 |
| 40/60 High-Pressure Switch | Adjustable, 3/4″ tee | 40/60 psi | 15-20A | 2-3 story homes, long runs | $45-70 |
| Tee + Gauge Kit | 3/4″ tee + 160 psi gauge | n/a (measuring) | n/a | Diagnostics before you buy a switch | $20-35 |
Prices checked on Amazon, October 2026. Sealed/encapsulated boxes are worth the premium over open-box units in any wet location.
Our default recommendation for a standard 1 HP submersible system is a 20-amp sealed adjustable switch in the 30/50 range. If your home has a second floor with fixtures that lose pressure when a hose is open, step up to a 40/60 switch rather than just cranking the spring — a proper differential matters more than a higher number. If you are not sure whether the switch is even your problem, the tee-and-gauge kit is the cheap diagnostic that tells you in five minutes.
7 Common Well Pump Pressure Switch Failures (and How to Diagnose Each)
These are the seven failures we see most, in rough order of frequency, with the diagnostic step that confirms each one before you spend money.
1. Pump short cycles (on/off every few seconds)
The switch trips at the right pressure but the tank is losing air or holding no water, so pressure falls back to cut-in almost instantly. Diagnosis: run the pump to cut-out, shut off all water, and watch the gauge. If it drops more than 10 psi in 10 minutes with no fixture running, the problem is the tank (bladder or air), not the switch. If the gauge holds steady but the pump still cycles, the switch diaphragm is worn. We cover the tank side in detail in our guide to Hydra Cell pressure tank sizing and pre-charge.
2. Pump runs but never shuts off
Welded contacts or a float that never trips. Diagnosis: with the pump off and power at the breaker, turn the power back on at the pump and listen. If it starts running immediately and the gauge climbs past cut-out without stopping, the switch is not opening. Kill the breaker, relieve the pressure (open a spigot), and replace the switch. This is the failure you should never leave unattended — an unbounded pump can over-pressurize plumbing to the point of a burst joint.
3. Pump hums but does not start
Often a dead start capacitor or a tripped overload protector, but a corroded switch contact that only half-closes will produce the same hum. Diagnosis: swap in a known-good switch (or jump the two switch terminals with an insulated screwdriver, breaker on, at your own risk — this is a test, not a fix). If the pump starts through a jumper, the switch is the cause.
4. Pressure won’t hold even with the pump off
A leaking gasket on the switch tee, a leaking check valve in the well, or a cracked tank. Diagnosis: the switch tee gasket is the cheapest to check. Unbolt the switch, wipe the port, re-seat a new gasket, and re-test. If pressure still bleeds off, the leak is downstream in the well or the tank.
5. Breaker trips when the pump starts
Usually the motor, but a switch with heavy contact pitting adds resistance at the worst moment — inrush. If a fresh switch does not fix it, measure the pump’s running amps with a clamp meter; sustained draw above the nameplate FLA points to a winding problem, and our article on well pump breaker tripping walks through the full electrical diagnosis.
6. Switch gets wet or shows green corrosion inside the box
Moisture in a crawl space or unfinished basement is the silent killer. Even “sealed” boxes fail when the gasket is old. If you see corrosion on the terminals or water in the box, the switch is already compromised — replace it and consider mounting the switch on a small shelf away from the wall so condensation does not pool on the gasket.
7. Pressure settings drift over weeks
The spring tension walks as the diaphragm fatigues. You set 30/50 in spring and by summer the pump is cycling at 25/45. If you find yourself re-adjusting the switch monthly, the unit is at end of life. This is a replace-now signal, not a tweak-and-wait one.
Safety note
Always kill the breaker before opening the switch box. The box carries full line voltage (120V or 240V) to the pump. A test light or non-contact voltage tester is a $15 tool that belongs in your well kit. If you are uncomfortable with line voltage, the diagnosis steps above are still useful — they tell you exactly what to hand the plumber.
How to Adjust a Well Pump Pressure Switch (Step-by-Step)
Adjustment is the one job on the switch most homeowners can do themselves safely, because it requires no electrical work — just the two spring screws on top of the box. Here is the exact sequence we use, verified against the manufacturer procedure for the See and Franklin adjustable switches.
- Turn off the pump at the breaker. Open a spigot to relieve line pressure so the tank is at a safe working pressure.
- Note your current settings. Open the box and write down the position of the two spring screws (a photo on your phone is enough). This is your rollback point if the new settings feel wrong.
- Set the cut-in first. Turn the larger spring screw clockwise (tighter) to raise the cut-in pressure, counterclockwise to lower it. A quarter turn changes roughly 1-2 psi — go slow.
- Set the cut-out second. The smaller screw sets the cut-out. The differential between the two is the band the pump runs in. A 20 psi differential (30/50) is standard; a 30 psi differential (30/60) reduces cycling but raises peak pressure.
- Lock the nuts, restore power, and test. Run the pump to cut-out, shut a spigot, and watch the gauge. Verify the pump stops at your target cut-out and restarts at cut-in.
- Re-check in 24 hours. Spring tension can settle after the first few cycles. One re-check the next day is the difference between a permanent fix and a mystery next month.
If you need the tank air pressure matched to your new cut-in (it should be 2 psi below cut-in), that is a separate adjustment on the tank’s air valve — we cover the full procedure in our well water pressure guide, including how the tank pre-charge and the switch settings interact.
Pressure Switch vs. Pressure Control: Do You Need the “Smart” Version?
The newer generation of pressure controls — solid-state units with no moving contacts, like the See Cyclical Control Valve or the Franklin Auto-Adaptive — eliminate the contact-welding failure class entirely because there are no contacts to weld. They also add features: dry-run protection (shut off if the well runs dry, which saves the pump from burning out), low-pressure alarms, and cycle counting.
Here is our honest take after installing both types: for a healthy well with a decent pump, a quality mechanical switch in the 30/50 range is still the best value — it is $40-80, easy to diagnose, and every plumber on earth can service it. The solid-state controls cost $150-400, and they are worth it in three specific situations: a well with a history of running dry (the dry-run protection alone has saved pumps worth $1,500+), a system that already cycles a lot (the cycle-counting tells you when the tank is dying before you are diagnosed by the pump), and a property that is hard to get service to (remote cabins, seasonal homes) where a remote alarm matters. If you are replacing a switch on a well that runs dry in summer, skip the mechanical switch and spec the control — it is the cheapest pump insurance you will ever buy. More on that in our guide to well water alarms and low-pressure monitoring.
Frequently Asked Questions About Well Pump Pressure Switches
What is the most common well pump pressure switch setting?
30/50 psi is the default for the large majority of single-family homes: the pump turns on at 30 psi and off at 50 psi. Two-story homes or long pipe runs often run 40/60. The tank’s air pre-charge should always be 2 psi below the cut-in setting — 28 psi for a 30/50 system, 38 psi for 40/60.
How often should a well pump pressure switch be replaced?
There is no fixed interval — it is a wear part, not a schedule part. A quality sealed switch typically lasts 5 to 10 years of normal cycling. The practical rule we use: if you have adjusted it more than twice in a year, or if you have ever had to jump the contacts to get the pump to start, it is already failing. Budget for a replacement every 7-8 years as a planning number, not a deadline.
Can a bad pressure switch damage a well pump?
Yes, in two ways. A switch that short-cycles the pump hammers the motor with inrush current dozens of times a day, which shortens motor life and burns start capacitors. A switch with welded contacts lets the pump run unbounded, which over-pressurizes the system and can rupture a tank or plumbing joint. If your pump is cycling every 30-60 seconds for more than a day, treat it as an emergency — the motor is at real risk.
Do I need to match the switch brand to the pump brand?
No. Pressure switches are brand-agnostic; what matters is the pressure range, amp rating, and connection size. We install See switches on Franklin pumps and Pentair switches on Hayward pumps with no issues. The one exception is solid-state pressure controls, where matching the control to the pump brand can unlock dry-run and cycle-counting features the manufacturer calibrated for that motor.
How much does it cost to replace a well pump pressure switch?
The part runs $35-80 for a quality sealed adjustable unit. A plumber typically charges $100-200 in labor for a straightforward swap (30-60 minutes of work). If you are comfortable with line voltage and have a multimeter, it is a doable DIY job — but if the breaker trips or you find corrosion inside the box, stop and call. The diagnostic cost of a second visit is worse than the first visit done by someone who has seen it before.
The Bottom Line on Well Pump Pressure Switches
The pressure switch is the cheapest and most replaceable part on your well system, and it is the one most likely to be the thing that is actually wrong when your water pressure misbehaves. Before you replace a $1,500 pump or a $300 tank, check the switch: look inside the box for moisture and corrosion, confirm the diaphragm is firm under the screw, and verify your settings against what the gauge actually shows. A $50 switch and a 30-minute swap fixes the majority of low-pressure and short-cycling complaints we see. And if your well runs dry in the dry months, upgrade to a solid-state pressure control with dry-run protection — it is the single best pump-safety upgrade a homeowner can make.
See Also
Hydra Cell Pressure Tank 2026: Size, Pre-Charge & Buy
How to Increase Well Water Pressure 2026
Well Pump Short Cycling 2026: Causes, Costs and How to Fix It
#WellPump #PressureSwitch #WellWater #WaterWell #WellMaintenance #HomeownerGuide #WellEquipment #SubmersiblePump #PressureTank #WellDrilling #WaterPressure #DIYRepairs #PrivateWell #WellInspection #2026Guide