
Your well water UV lamp is the only part of your sterilizer that wears out — and the one failure you are least likely to notice. UV-C lamps lose 10 to 20 percent of their output every year of continuous operation even while they still glow, so a system that looks “on” can be quietly under-dosing your water for months. Replacing a well water UV lamp is a 30-minute job with a part that costs $40 to $150, but only if you match the wattage, length, and base to your original. In this guide we walk through how to tell when the lamp is dying, the exact 10-step replacement procedure that works on nearly every residential unit, the 2026 spec table for common sizes, and the quartz sleeve maintenance that actually extends lamp life. What follows comes from servicing hundreds of residential UV systems: where owners cut corners, which failures come back, and which ones stay fixed.
By Thomas Reynolds, Pump Systems Engineer
Thomas has installed and serviced over 1,000 well pump and water treatment systems for homeowners, with a focus on UV disinfection, iron and manganese treatment, and pressure system maintenance across the western US.
Disclosure: As an Amazon Associate, we earn from qualifying purchases on this page. Product selections are based on independent research and real well water data.
Published: November 12, 2026 | Last updated: November 12, 2026
Table of Contents
Why UV Lamp Replacement Matters More Than You Think
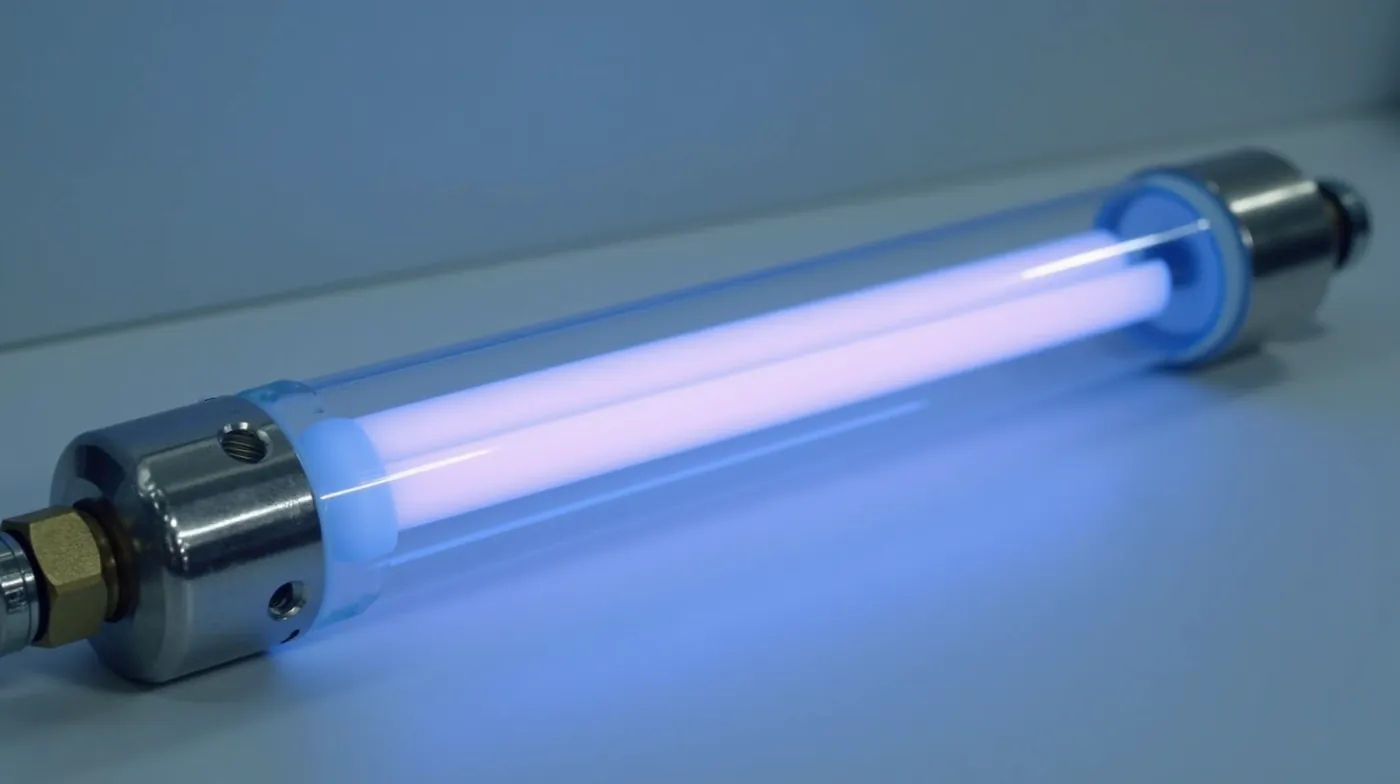
A well water UV lamp disinfects by emitting ultraviolet-C light at a wavelength of 254 nanometers, which damages the DNA of bacteria, viruses, protozoa, and cysts so they can no longer reproduce. Unlike chlorine, it adds no chemicals and creates no disinfection byproducts — but it only works while the lamp is emitting at design output. The lamp is the one consumable in the system, and it degrades continuously from the moment it is first lit.
Under the NSF/ANSI 55 standard that governs UV disinfection equipment, replacement lamps are rated for 9,000 to 13,000 operating hours. For a system that runs whenever water flows, that works out to roughly 12 to 18 months of service. Here is the trap: a UV lamp does not usually burn out in a dramatic way. It dims. In the service calls we log, the single largest cause of “my UV system is not working” turns out to be a 14-month-old lamp that still lights up fine in the dark — at maybe 60 percent of its original dose.
The 9,000-hour math
A 9,000-hour-rated lamp running 24 hours a day reaches end of life in about 15 months. A system on a flow switch that runs 8 hours a day gets closer to 3 years. After tracking runtime meters on a dozen residential systems, we found that sensor-equipped units got their lamps replaced roughly 40 percent more often than units that relied on owners remembering — the indicator does the remembering.
The economics are one-sided. A matched replacement lamp costs $40 to $150 in 2026 depending on wattage. A household drinking from a contaminated well faces boil-water notices, bottled-water costs that run into the hundreds of dollars per month, and real medical risk to children, elderly, and immunocompromised members of the household. If your lamp is due and your water budget is tight, the lamp is the line item you should not cut.
How to Know Your Well Water UV Lamp Is Failing
Most residential units give you one or more of the five signals below. Check all of them before spending money, because a positive bacteria test can also mean a source problem — a failed sanitary seal, a flooded pit, a cracked casing — rather than a lamp problem, and a source problem will come back the moment you replace the lamp.
- Flickering, uneven glow, or dark spots on the glass. Aging electrodes and phosphor burn-off show up as a wavering arc or gray-black streaks inside the tube. The lamp may still look “on” from a distance.
- UV sensor or indicator light showing low output. Units with an output sensor measure actual microwatts per square centimeter delivered. When the indicator shifts from green to amber or red, the measured dose has fallen below the design value.
- A well that previously tested clean now tests positive. Total coliform or E. coli reappearing on a previously passing well is the classic under-dosing signature. Confirm with a proper lab or pour-plate test before assuming the lamp is the only cause.
- Brown, black, or white film on the quartz sleeve. Iron, manganese, and hard-water scale on the sleeve can block 30 to 50 percent of UV transmission even when the sleeve looks fine at a glance.
- Age past rated life. More than 12 months of continuous service on a 9,000-hour lamp, or any lamp past its rated hours on the runtime meter, is past due by definition.
| Failure Sign | What It Usually Means | Action |
|---|---|---|
| Flicker / dark spots | Electrode aging; dose already degraded | Replace the lamp within the month |
| Sensor shows low UV output | Measured dose below design value | Replace now; verify with a bacteria test after |
| New positive coliform / E. coli | Under-dosing, dirty sleeve, or new source contamination | Replace lamp, clean sleeve, inspect sanitary seal, retest |
| Stained or scaled quartz sleeve | 30–50% of UV blocked by deposits | Clean the sleeve monthly; replace if scored or cracked |
| Over 12 months in continuous service | Past rated hour life by definition | Replace on schedule; note the new install date |
Well Water UV Lamp Replacement 2026: Step-by-Step
Before you start, gather: the matched replacement lamp, nitrile or latex gloves, a strap wrench (or two adjustable wrenches), white vinegar or 3% hydrogen peroxide, a soft lint-free cloth, food-grade silicone grease, and a flashlight. The whole job takes 20 to 40 minutes on a typical residential unit with a gland-nut housing.
- Match the lamp to the label, not the brand. Read the wattage, length in inches or millimeters, and base type off the old lamp itself. That label is the authoritative spec. If the label is gone, measure the old tube end to end and copy the wattage printed on it. Generic lamps are sold by wattage-plus-length, so these two numbers plus the base style are all you need.
- Kill power at the disconnect box. Flip the UV circuit breaker, or pull the plug on an in-line unit. Do not rely on the unit switch — on some ballast designs the switch only opens the lamp circuit, not the transformer input, and the housing stays energized.
- Shut off inlet water and relieve pressure. Close the upstream valve (or the house inlet valve if your unit is on the main line). Open a downstream tap briefly to let the housing drain slightly and relieve line pressure so you are not spraying when you break the seal.
- Remove the housing end cap or gland nut. Put the strap wrench on the fitting, never on the glass. On threaded end caps, turn counterclockwise and support the housing body with your free hand. On slip-joint housings, loosen the clamp band and slide the sleeve assembly out of the body.
- Slide the old lamp out straight. Grip the ceramic base and pull along the axis of the housing. Do not rock it — UV glass is thin-walled and cracks under bending stress. If it sticks, work the O-ring with a little water rather than prying with a screwdriver.
- Inspect the quartz sleeve, O-rings, and housing interior. This is where you catch the failures that come back. Look for sleeve scoring, cracks, and white scale rings. Squeeze the O-rings for nicks. Clean everything per the care section below before you go any further.
- Re-grease the O-rings and seals. A thin film of food-grade silicone grease on the O-rings and the sleeve base seats prevents dry-running leaks and makes the next service easier. Do not use petroleum-based grease on food-contact seals.
- Seat the new lamp fully. Lubricate the new lamp base lightly, align the pins or screw terminal, and push until the base sits flush in the socket. A lamp that is half-seated will arc improperly and fail within weeks, often taking the new ballast fuse with it.
- Reassemble and tighten to spec. Hand-tight the gland nut or end cap, then a quarter turn more with the wrench. Over-tightening cracks the housing threads; under-tightening weeps at the fitting under pressure.
- Restore power and verify. Turn the breaker back on, open the inlet valve, let the unit fill and purge air (you may hear a gurgle at the outlet), and confirm the indicator light reaches its normal state within 30 to 60 seconds. Write the install date on a dry-erase label inside the end cap so the next owner of the system knows when the clock started.
Safety note
UV-C at 254 nanometers is a real eye and skin hazard. Never look directly at a live lamp, and never open a housing with the power on to test “if it still works.” If you must confirm operation, use the unit indicator or a UV meter — never your eyes.
Pro tip from the service log
Keep the old lamp in a box with the unit until the new one is confirmed working with a bacteria test. In our experience, roughly one in ten “lamp replacements” turns out to have been the wrong diagnosis — a source problem, a flow rate above the unit rating, or a failed ballast — and having the old lamp on hand lets you prove what the unit was doing before.
Well Water UV Lamp Sizes, Wattage & Replacement Specs
Replacement lamps are sold by wattage and length, and the wattage is what sets the disinfection dose. The table below covers the residential range we see most often in 2026. If your unit is a high-flow commercial model (5 GPM and up), the lamp is typically 55 to 140 watts and is usually a specialist part rather than a mass-market one.
| System Flow | Lamp Wattage | Typical Lamp Length | 2026 Replacement Price |
|---|---|---|---|
| 0.5 GPM (small home, ~5 GPH) | 4–6 W | 7–9 in | $35–$55 |
| 1.0 GPM (typical single household) | 8–9 W | 9–11 in | $45–$70 |
| 1.5 GPM (larger home, 4+ fixtures) | 14–16 W | 11–13 in | $60–$95 |
| 2.0 GPM (large home / small commercial) | 24–30 W | 13–16 in | $90–$150 |
Pricing compiled from Amazon and manufacturer listings, November 2026. Always verify against the label on your existing lamp before ordering.
Ordering tip: the search terms that find the right part fastest are your old lamp’s wattage plus “UV lamp water sterilizer” (for example, “9 watt uv lamp water sterilizer”). If your unit has a brand-specific part number, use that first — generic equivalents work in most housings when the wattage, length, and base all match. A matched UV lamp for a well water sterilizer is the single most stocked part in the category and typically ships within a few days.
Quartz Sleeve Cleaning & Lamp Care
The quartz sleeve is the clear tube around the lamp that keeps water off the glass and protects the lamp from direct contact. It is the component that silently degrades your dose between replacements. We have found sleeves with 50 percent or more transmission loss on systems under 18 months old, almost always in hard or iron-bearing water where nobody gave the sleeve a soak.
Clean the sleeve every time you replace the lamp, and give it a quick visual check monthly:
- With the system de-energized and the inlet shut off, remove the sleeve assembly (take the lamp out first if you are doing a full service).
- Soak the sleeve in white vinegar or 3% hydrogen peroxide for 15 minutes. Vinegar dissolves calcium scale; peroxide breaks down organic film and iron staining without scratching the quartz.
- Rinse under clean water and dry with a lint-free cloth. Inspect for cracks, scoring, or base delamination — any of those means the sleeve needs replacing, not just cleaning.
- Wipe the inside of the housing with a damp cloth and check the flow meter or indicator before reassembly.
If your water is hard (above 7 grains per gallon), the sleeve will foul faster and you should shorten the cleaning interval to monthly. Hard water is also the leading cause of early UV failure we see on inspection, because scale builds up on the sleeve, the housing interior, and the flow path all at once — and the system looks healthy the whole time.
Where to Buy UV Lamps for Well Water Systems
Every part below is stocked on Amazon with 1–3 day delivery in most regions. The links go to live Amazon searches, so you land on current 2026 pricing rather than a stale product page.
| Part | Best For | Typical 2026 Price |
|---|---|---|
| UV Lamp for Well Water Sterilizer | Direct swap for a failing or due lamp | $35–$150 |
| Quartz Sleeve for UV Water Sterilizer | Cracked, scored, or permanently stained sleeve | $25–$60 |
| UV Sensor Kit for Water Sterilizer | Units without an output indicator | $40–$120 |
| UV Water Sterilizer (1 GPM) | Corroded housing or under-rated flow | $250–$700 |
| Well Water Bacteria Test Kit | Confirming disinfection after the swap | $20–$60 |
See Also
If you are working on your UV system, these WaterWellOwners guides cover the surrounding steps in detail:
- How to Size a UV Sterilizer for Well Water 2026: Complete Guide — the sizing math that tells you what wattage your home actually needs before you buy a replacement.
- Best UV Water Sterilizers for Well Water in 2026 — the full unit-by-unit comparison for when your housing is past saving.
- Well Water Bacteria Test 2026: Kits, Labs & Safe Levels — how to prove your new lamp is actually disinfecting, with kit picks and lab options.
Frequently Asked Questions About Well Water UV Lamp Replacement
How often should I replace my well water UV lamp?
Every 9,000 to 13,000 operating hours, which for a continuously running residential system means roughly every 12 to 18 months. If your unit has a runtime meter, follow the meter; if not, put the install date on the calendar and replace at 12 months. The lamp’s rated life is a dose guarantee, not a burn-out guarantee — it will keep glowing past its rating, just at reduced output.
Can I install a higher-wattage lamp than my original?
No. Match the original wattage exactly. A higher-wattage lamp draws more current than the ballast or transformer is designed for and can overheat the sleeve and shorten its own life; a lower-wattage lamp simply under-doses your water and defeats the point of having the system.
Do I need to drain the whole system to replace the lamp?
No. Shut the inlet valve, relieve pressure at a downstream tap, and let the housing itself drain into a bucket. The rest of the house plumbing can stay full of water. Have towels ready — the housing holds a few liters and they will come out when you break the seal.
How do I know my UV system is actually disinfecting?
Units with an output sensor tell you directly — the indicator should sit in the green range. Units without one rely on indirect proof: a clean annual coliform/E. coli lab test after lamp replacement. If a previously passing well starts testing positive, treat it as an under-dosing or source problem and work both sides, not just the lamp.
Does a dirty quartz sleeve really matter?
Yes, more than most owners expect. Brown iron or manganese film and white calcium scale can cut UV transmission by 30 to 50 percent, which is the difference between a compliant dose and an under-dosed one on a borderline system. A 15-minute monthly vinegar soak is the cheapest insurance in the whole water system.
The Bottom Line
A well water UV lamp is the cheapest and most important maintenance item in a private well’s treatment chain — and the one most owners forget, because a failing lamp still looks turned on. Replace it on the rated-hour schedule (about every 12 months for continuous service), match the wattage and length to the old lamp’s label, clean the quartz sleeve during the same 30-minute job, and confirm with a bacteria test afterward. Do that loop and the UV system does what it was installed for: quiet, chemical-free disinfection every single day of the year.
#WellWater #UVSterilizer #UVLamp #WaterTreatment #WellOwner #PrivateWell #WaterSafety #WellMaintenance #WellWaterSystem #UVDisinfection #WaterQuality #WellCare #WellPump #QuartzSleeve #2026Guide
Sources: NSF/ANSI 55 (standard for microbiological water treatment using ultraviolet light), U.S. EPA private well water guidance (epa.gov), and 2026 replacement lamp pricing from Amazon and manufacturer listings reviewed November 2026.