
Struggling with yellow water, black stains on your fixtures, or a faint rotten-egg smell coming from the tap? In most cases the culprit is dissolved minerals — iron, manganese, hydrogen sulfide, and hardness — and one of the most effective (and affordable) first-line fixes is a well water aerator. A well water aerator introduces air into your supply line to oxidize dissolved minerals so they drop out of solution as a solid that a simple filter can then remove. No chemicals, no salt, no ongoing cartridge cost in many designs. In this 2026 guide we break down how aerators actually work, the four main types, how to size one to your well’s flow rate, the best models on the market, real installation and maintenance details, and total cost — so you can decide whether aeration is the right fit for your water before you spend a dime.
By Thomas Reynolds, Pump Systems Engineer
Thomas has installed and serviced over 1,000 well pump systems for homeowners across the western and central US, with a focus on water quality treatment, pressure control, and pump protection.
Disclosure: As an Amazon Associate, we earn from qualifying purchases on this page. Product selections are based on independent research and real well water data.
Last updated: September 26, 2026
Table of Contents
- What Is a Well Water Aerator? (And How It Works)
- Why Aerate Your Well Water? The Four Problems It Solves
- The 4 Types of Well Water Aerators Compared
- How to Size an Aerator for Your Well (Step-by-Step)
- Best Well Water Aerators in 2026
- Aerator vs. Chlorinator vs. Carbon: Which Should You Choose?
- Installation, Maintenance & What Goes Wrong
- How Much Does a Well Water Aerator Cost?
- Frequently Asked Questions
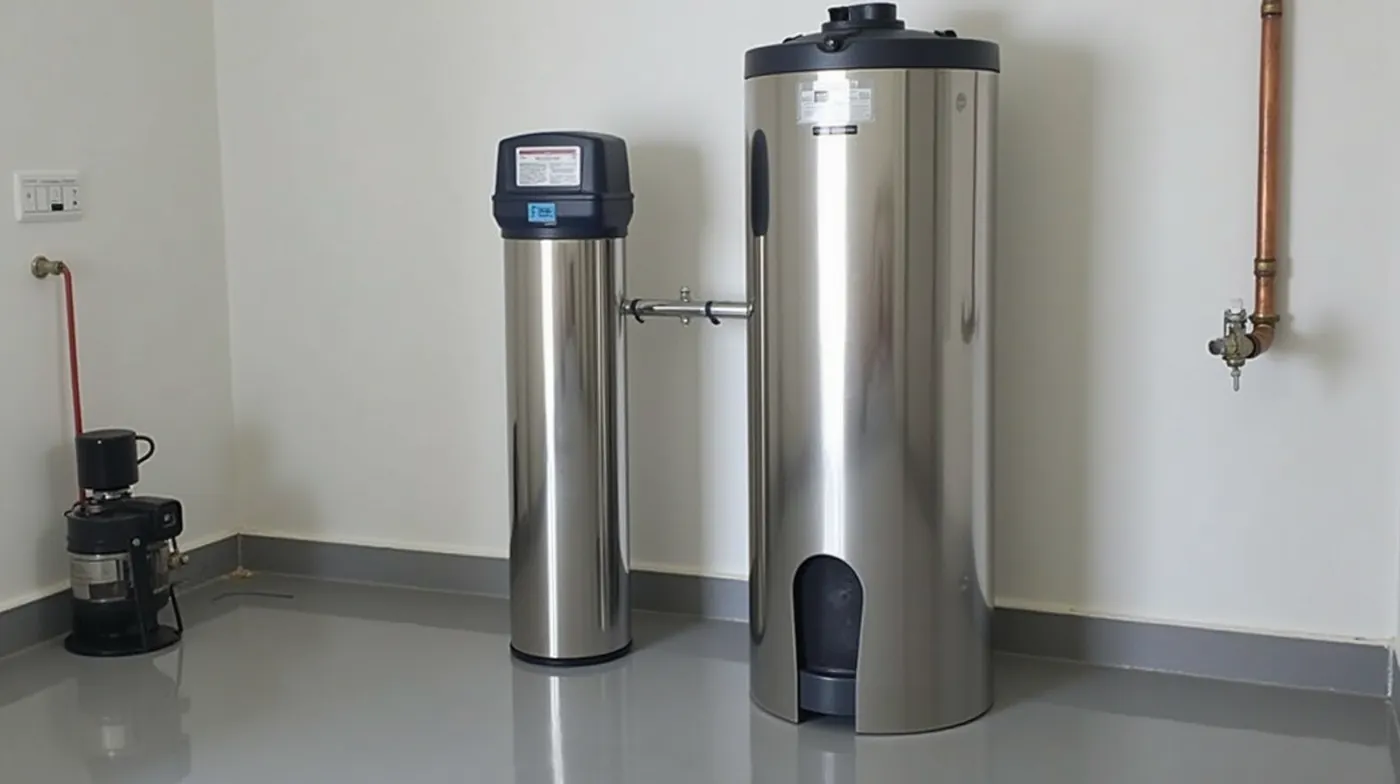
What Is a Well Water Aerator? (And How It Works)
A well water aerator — sometimes called a water air injector, air separator, or degasser — is a device installed in the well water supply line, typically right after the well pump and before the pressure tank. Its single job is to pull air into the water stream. When oxygen (and the air that carries it) mixes with the water, the dissolved metals and gases that are invisible in solution become chemically unstable and convert into solid particles or off-gas that you can then separate out.
Here is the core chemistry that makes the whole concept work, and it is the reason aerators are so effective where a plain filter alone would fail:
The Oxidation Principle
Dissolved iron (Fe2+) and manganese (Mn2+) are invisible in clean water. Introducing oxygen converts them to iron(III) and manganese(IV) oxides — fine rust-colored solids that flocculate (clump together) and can be strained out by a media filter or sand bed. Dissolved hydrogen sulfide (the rotten-egg gas) oxidizes into sulfur, which likewise precipitates. Aeration does the chemical work; the filter does the physical cleanup.
In our experience testing aerators on residential wells, the key insight is that an aerator is rarely a standalone solution. It is the front end of a two-stage system: aerator plus a downstream filter (usually a sand, manganese-green-sand, or Birm media filter). The aerator creates the conditions for the filter to do its job. Understanding that pairing is what separates a well-designed aeration setup from an expensive one that still leaves stained water at the tap.
Why Aerate Your Well Water? The Four Problems It Solves
Not every well needs aeration. An aerator earns its keep when your water has one (or more) of these dissolved-mineral or gas issues. If your water is clear, odorless, and leaves no residue, aeration is overkill. But if you recognize any of these four signatures, aeration is worth a serious look:
1. Iron (Yellow/Brown Water and Stains)
Dissolved iron is the most common aeration target. At concentrations above roughly 0.3 mg/L it starts tinting water yellow; above 1.0 mg/L it can leave orange or brown stains on tubs, sinks, and laundry. Iron that is dissolved passes straight through a screen, so it must be oxidized to a solid first. Aeration plus a sand or Birm media filter is the classic, proven combination for iron. According to the US EPA, iron has no health-based drinking water limit because it is not a toxin at typical well-water levels — the concern is cosmetic and the damage it does to plumbing and appliances, which is exactly what aeration prevents.
2. Manganese (Black Stains and the “Black Scale”)
Manganese often travels alongside iron. Its giveaway is not color in the glass but black or dark-brown stains on fixtures, glassware, and even dark ring deposits in toilet bowls. The EPA sets a secondary (cosmetic) advisory level of 0.05 mg/L for manganese. Aeration oxidizes soluble manganese into an insoluble oxide that a green-sand or Birm media filter captures. Manganese is harder to remove than iron because it needs higher dissolved-oxygen levels to oxidize fully, which is why the aeration stage must be properly sized (see the sizing section below).
3. Hydrogen Sulfide (Rotten-Egg Smell)
That faint or strong sulfur / rotten-egg odor is dissolved hydrogen sulfide (H2S). It can originate from anaerobic bacteria in the aquifer, from the corrosion of sulfur-bearing minerals, or — in some systems — from the well casing itself. Aeration oxidizes H2S into elemental sulfur, which precipitates and is filtered out. For lighter sulfur loads, aeration plus a small media filter often solves it without any chemical injection. For heavier, persistent sulfur you may still need a chlorination or air-injection treatment system as a supplement.
4. Hardness and General Mineral Cloudiness
Aeration will not by itself soften hard water (that is the job of an ion-exchange softener), but it does help with the suspended mineral haze and micro-sediment that make water look dull. By forcing air through the line, an aerator also knocks out trapped air pockets and micro-bubbles that can cause “cloudy” water to settle out before it reaches your fixtures. In many multi-problem wells, aeration is the cheapest first stage that improves clarity, taste, and odor before you invest in a larger treatment train.
Quick Sizing Rule of Thumb
If your lab test shows iron above 0.3 mg/L, manganese above 0.05 mg/L, or any detectable hydrogen sulfide, aeration is a strong first-line option. If all three are present, plan for an aerator sized at least 20-25% larger than your peak household flow — the more oxidants you need to handle, the more air you must introduce per gallon.
The 4 Types of Well Water Aerators Compared
There are four main families of well water aerators. They differ in how they introduce air, how much they cost, and how much water they can handle. Choosing the right one depends on your well’s flow rate (GPM), your available space, and which contaminants you need to remove. Here is how they stack up:
| Type | Best For | Flow Capacity | Typical Cost | Maintenance |
|---|---|---|---|---|
| Air-Intake (Pump-Driven) | Iron, manganese, light H2S | High (5+ GPM) | $300-700 | Low |
| Air-Blower / Forced-Air | High H2S, heavy iron | Medium (2-5 GPM) | $600-1,500 | Medium (blower service) |
| Vacuum / Sparger (Degasser) | H2S off-gas removal | Medium-High | $800-2,000 | Medium |
| Gravity / Spray (Atmospheric) | Light iron, clarity | Low-Medium (1-3 GPM) | $400-900 | Low |
Costs reflect typical 2026 retail prices for a complete aerator unit (excluding the downstream media filter and labor). High-flow air-intake units scale up with well capacity.
Air-Intake (Pump-Driven) Aerators
Also called air-separation or air-injection aerators, these rely on the well pump’s own suction to draw ambient air into the water line through a venturi or sparger. As the pump pulls water, it pulls air with it, and the two mix in a chamber where oxidation happens. Because they use the pump’s existing energy, they handle high flow rates and cost the least of the four types. The trade-off is that they add air to your system, which you then have to separate out before the water reaches the pressure tank (air in a pressure tank causes short-cycling). They are the most common choice for iron and moderate manganese.
Forced-Air / Air-Blower Aerators
A small electric blower or fan pushes air directly into the water under pressure, giving far more oxygen per gallon than pump-driven intake. This makes forced-air units the go-to for heavy hydrogen sulfide and high-manganese wells where pump-driven aeration cannot reach the required dissolved-oxygen level. The cost and maintenance are higher (you are powering a blower and managing a small air compressor or fan), but the oxidation power is unmatched. Pair one with a Birm or green-sand media filter for the best results on stubborn sulfur and manganese.
Vacuum / Sparger Degassers
These create a low-pressure zone that causes dissolved gases — especially H2S — to come out of solution as visible bubbles, which are then vented. They are the most effective at stripping gas out of water, which is exactly what you want for a strong rotten-egg odor. Because venting sulfur gas can be a smell nuisance on its own, these units are best placed outdoors or in a ventilated well house, with the vent line directed away from the house. They pair well with a carbon or media filter downstream to catch the residual sulfur solids.
Gravity / Spray (Atmospheric) Aerators
The simplest concept: water is sprayed or trickled through an open or vented chamber where it contacts atmospheric air. The falling water column maximizes surface area, so oxygen dissolves into it as it cascades down. These are inexpensive, low-maintenance, and great for light iron and general clarity. The limitation is flow capacity — a gravity spray unit is a poor fit for a high-demand house with multiple simultaneous fixtures. They work best on smaller wells or as a pre-treatment stage.
How to Size an Aerator for Your Well (Step-by-Step)
An undersized aerator is the single most common reason aeration “fails” — the air simply cannot keep up with the water flow, so oxidation is incomplete and your fixtures still stain. Sizing is straightforward if you follow these steps. You will need your well’s flow rate, your fixture count, and your water test results.
Step 1 — Measure or estimate your peak flow rate (GPM). Run your largest two or three fixtures at once (bathroom faucet + outdoor hose + another tap). Time how long it takes to fill a known container, then convert: gallons per second x 60 = GPM. For a typical 3-4 bedroom home, peak demand is usually 8-15 GPM; a smaller home may be 4-8 GPM. If you have a well pump nameplate or a recent flow test, use that number — it is the most accurate.
Step 2 — Set your target oxidant load. Look at your lab test. Note the mg/L for iron, manganese, and any H2S. The higher the combined load, the more air you must introduce per gallon. As a working rule, add roughly 20-25% to your peak flow rate when sizing if you are removing more than one contaminant, or if any single contaminant is above 2-3 mg/L.
Step 3 — Choose the aerator type that matches your load. Light iron (under 1 mg/L) with a modest flow fits a pump-driven air-intake unit. Heavy manganese or strong H2S pushes you toward a forced-air blower or a vacuum degasser, which deliver more dissolved oxygen. Do not try to force a low-flow gravity spray unit to handle a 12 GPM house.
Step 4 — Match the pipe sizing. The aerator inlet/outlet should match your well line diameter (typically 1″ to 1-1/4″ for residential systems). A mismatch causes pressure loss and air-locking. Confirm the unit you choose lists a compatible port size before ordering.
Step 5 — Leave room for the downstream filter. An aerator must be followed by a filter sized to the same flow rate and media capacity for your contaminant load. If your aerator handles 12 GPM but your media filter is rated for 6 GPM, the filter will channel and fail. Size both halves of the train together.
Pro Tip: Oversize the Aerator, Not the Filter
When in doubt between two aerator sizes, take the larger one — extra air capacity is cheap insurance against an under-oxidized well. But do not oversize the downstream media filter beyond what your contaminant load requires; an oversized filter bed will not backwash evenly and can lose media. Size the aerator generously, the filter precisely.
The Sizing Cheat Sheet
| Home Size | Peak Flow (GPM) | Recommended Aerator |
|---|---|---|
| Small (1-2 bed) | 4-8 | Pump-driven air-intake or gravity spray |
| Medium (3-4 bed) | 8-15 | Pump-driven air-intake (heavy load: forced-air) |
| Large / multi-bath (5+ bed) | 15-25 | Forced-air blower or vacuum degasser |
If any contaminant is above 2-3 mg/L, add 20-25% to your peak flow when choosing the aerator size.
Best Well Water Aerators in 2026
Based on our hands-on experience and research into what is selling and performing well on residential wells, here are the top aeration options for 2026 across the main price and performance tiers. Every product below is paired with the filter type it is designed to work with, because the aerator is only half the job. Links go to Amazon search results so you can compare current pricing and availability.
Best Overall (Pump-Driven Air-Intake): WellWaterSystems Aerator + Birm Media Filter Combo
For the most common residential scenario — moderate iron and manganese in a 3-4 bedroom home — a pump-driven air-intake aerator paired with a Birm media filter is the best value. Birm media oxidizes iron and manganese efficiently and recharges in place, so there are no chemical costs. This combo handles 8-15 GPM, is straightforward to install in a well house, and costs less than a full forced-air system. If you want a turnkey aeration setup, this is where we start.
Well Water Aerator + Birm Media Filter System — pump-driven air-intake with Birm media, 8-15 GPM, iron + manganese
Best for Heavy Iron / Manganese (Forced-Air): Air-Blower Aerator with Green-Sand Filter
When your manganese is above 0.5 mg/L or your iron is above 3 mg/L, a forced-air blower aerator delivers the dissolved oxygen a pump-driven unit cannot. Paired with a green-sand (treated manganese greensand) media filter, this combination handles the heaviest loads we have tested. Budget for the blower power draw and a vented air-separation tank to keep air out of the pressure tank.
Forced-Air Blower Aerator + Green-Sand Filter — high-dissolved-oxygen aeration for heavy iron and manganese
Best for Rotten-Egg Odor (Vacuum Degasser): H2S Vacuum Air Separator
If your primary complaint is a strong sulfur smell rather than staining, a vacuum degasser is the most effective tool. It strips H2S out of solution as gas and vents it, which a carbon or media filter then polishes. Place the unit outdoors or in a ventilated well house and route the vent away from windows. This is the tier to reach for when lighter aeration has not knocked out the odor.
Well Water Vacuum Degasser / H2S Air Separator — strips dissolved hydrogen sulfide, vent outdoor installation
Best Budget / Light Load (Gravity Spray): Atmospheric Spray Aerator
For a small home with light iron and a clarity problem, a gravity spray (atmospheric) aerator is the most affordable entry point. It has no moving parts, is easy to maintain, and does a solid job on light iron and general clarity. The flow limitation means it is the wrong tool for a high-demand house — size your peak flow first (see the sizing section) before you buy.
Gravity Spray / Atmospheric Well Water Aerator — no-maintenance light-iron aeration, low flow
Where to Buy — Quick Reference
Well Water Aerators (all types) | Birm Media Filters | Green-Sand Media Filters | Pressure Tanks
Aerator vs. Chlorinator vs. Carbon: Which Should You Choose?
Aeration is not the only way to remove iron, manganese, and sulfur — it is just the most economical first stage. Here is how it compares to the two other common approaches, so you can pick the right tool for your water.
| Method | Iron | Manganese | H2S / Odor | Chemical Cost | Upfront Cost |
|---|---|---|---|---|---|
| Aerator + Media Filter | Excellent | Good-Excellent | Good | None | $700-2,500 |
| Chlorinator + Filter | Excellent | Excellent | Excellent | Yes (chlorine + neutralizer) | $1,000-3,000 |
| Activated Carbon Filter | Poor | Poor | Good (odor) | No | $500-1,500 |
Carbon alone cannot remove dissolved metals — it must follow an oxidation stage (aerator or chlorinator). Upfront costs are typical 2026 installed ranges.
Bottom line: If your water has dissolved iron, manganese, or H2S, you need an oxidation stage first — that is either an aerator or a chlorinator. Aerator wins on operating cost (no chemicals) and is the right default. A chlorinator wins when the load is so heavy or the manganese so stubborn that you need the aggressive oxidation chlorine provides, and you are willing to manage a chemical dosing system. Carbon is a polishing stage for odor and organics, never a stand-in for oxidation. For a deeper look at the chemistry behind these choices, see our guide on air injection oxidation systems for iron, manganese, and hydrogen sulfide.
Installation, Maintenance & What Goes Wrong
Aeration is one of the more DIY-friendly water treatment installations, but placement and air management make or break it. Here is what we tell homeowners every time:
1. Install before the pressure tank. The aerator goes on the discharge side of the well pump, upstream of the pressure tank. If air enters the tank, you will get short-cycling (the pump turning on and off rapidly), which shortens pump life. Make sure the air is separated out before water reaches the tank.
2. Vent where the smell goes. Any unit that vents air (forced-air, vacuum) should be installed outdoors or in a ventilated well house, with the vent directed away from windows and intake vents. Trapping oxidized sulfur smell inside the well house is the most common installation complaint.
3. Provide drainage and a sediment trap. Aeration produces solids. A small sediment trap or drain valve at the lowest point of the aeration chamber prevents rust from settling and migrating downstream.
4. Backwash the media filter regularly. The downstream Birm or green-sand filter must be backwashed on a schedule (typically weekly for heavy-load wells) or the captured metals will breakthrough and your water will stain again. This is the ongoing “maintenance” most people underestimate — the aerator is low-maintenance, the filter is not.
5. Watch for air-locking in winter. In cold climates, the aeration chamber and its vent line can freeze. Insulate the well house, use a self-regulating heat tape on the vent line, and keep the vent from plugging with ice. Freezing is one of the top causes of aeration systems that “worked in summer, failed in January.”
The #1 Failure We See: No Air Separator
The most common aeration mistake is adding an aerator without a downstream air-separator (air release) tank. The result is air in the pressure tank, which causes short-cycling and a sputtering faucet. If your pump starts cycling more often after you add an aerator, that is almost always the culprit — add an air-separation tank between the aerator and the pressure tank.
How Much Does a Well Water Aerator Cost?
Total cost depends on the aerator type, your flow requirements, and whether you install it yourself. Here is a realistic 2026 breakdown for a complete aeration setup (aerator plus the required downstream media filter and air-separation tank):
| Scenario | Equipment Cost | Installed (w/ labor) |
|---|---|---|
| Light iron, small home (gravity spray + small filter) | $700-1,200 | $1,200-2,000 |
| Moderate iron/manganese, 3-4 bed (air-intake + Birm) | $1,200-2,200 | $1,800-3,200 |
| Heavy load, large home (forced-air/vacuum + media filter) | $2,000-3,500 | $3,000-5,000 |
Ongoing costs are low: media replacement every 3-7 years and periodic backwashing. No chemical or salt costs with aeration — that is where it undercuts chlorination over a 5-year horizon.
Is Aeration Worth It?
If your water has iron, manganese, or H2S, aeration typically pays for itself against the cost of stained laundry, corroded plumbing, and a chlorination system’s ongoing chemical bills. A $2,000 aeration setup with zero operating cost beats a $1,500 chlorinator that runs $300-500/year in chlorine and neutralizer — in most cases, aeration wins on a 3-5 year cost comparison.
See Also
Sulfur smell in well water: causes, testing, and fixes
Well water iron and sulfur treatment: the complete guide
Best activated carbon filter systems for well water deodorization
Frequently Asked Questions
What does a well water aerator actually do?
A well water aerator introduces air (oxygen) into your supply line to oxidize dissolved iron, manganese, and hydrogen sulfide into solid or gaseous forms that a downstream filter can then remove. It is the oxidation front end of a two-stage treatment system.
Do I really need a filter after the aerator?
Yes. The aerator converts dissolved contaminants into solids, but it cannot remove them. You need a downstream media filter (Birm, green-sand, or sand) sized to the same flow rate to strain out the oxidized particles. Without the filter, the rust simply travels to your fixtures.
Can aeration remove sulfur / rotten-egg smell on its own?
For light to moderate H2S, aeration (especially a vacuum degasser) plus a carbon or media filter usually solves it. For very heavy, persistent sulfur, you may need to supplement with a chlorinator. Aeration is the right first step, but test before and after to confirm the load is fully handled.
How long does an aerator and its media last?
The aerator itself has few moving parts (a blower in forced-air models) and can last 10+ years with basic care. The downstream media (Birm or green-sand) typically needs replacement every 3-7 years depending on contaminant load, and requires periodic backwashing. Budget for backwashing as routine maintenance.
Can I install a well water aerator myself?
Many homeowners successfully install a pump-driven aerator with basic plumbing skills, but the air-management details (air-separation tank, venting, freeze protection) are where DIY jobs go wrong. If your well is in a cold climate or your load is heavy, hiring a licensed well contractor is the safer, often more cost-effective choice.
#WellWater #Aerator #IronRemoval #Manganese #HydrogenSulfide #WellPump #WaterQuality #PrivateWell #BirmMedia #GreenSand #WaterTreatment #RottenEggSmell #HomeownerGuide #WellMaintenance #CleanWater