
Wondering how to test well water pressure without guessing? Most homeowners have no idea whether their pump is running at a healthy pressure until the water starts trickling, the pump hums nonstop, or the gauge reads something that looks wrong. The good news: a proper well water pressure test takes about fifteen minutes, costs under $20 in tools, and tells you far more about your system than any guess. This guide walks you through the exact steps, what a healthy PSI reading actually looks like, how to read the gauge correctly, and the six pressure problems the numbers reveal.
By Thomas Reynolds, Pump Systems Engineer
Thomas has installed and serviced over 1,000 well pump systems for homeowners. He specializes in pressure tanks, pressure switches, and short-cycling diagnostics across the western US.
Published: September 26, 2026
Disclosure: As an Amazon Associate, we earn from qualifying purchases on this page. Product selections are based on independent research and real well water data.
Table of Contents
- Why You Should Test Your Well Water Pressure
- What You Need to Test Well Water Pressure
- How to Test Well Water Pressure: 8 Steps
- How to Read Your Gauge and What Healthy PSI Looks Like
- 6 Pressure Problems and What the Reading Tells You
- When Low Pressure Means You Need a Booster Pump
- FAQ: How to Test Well Water Pressure
Why You Should Test Your Well Water Pressure
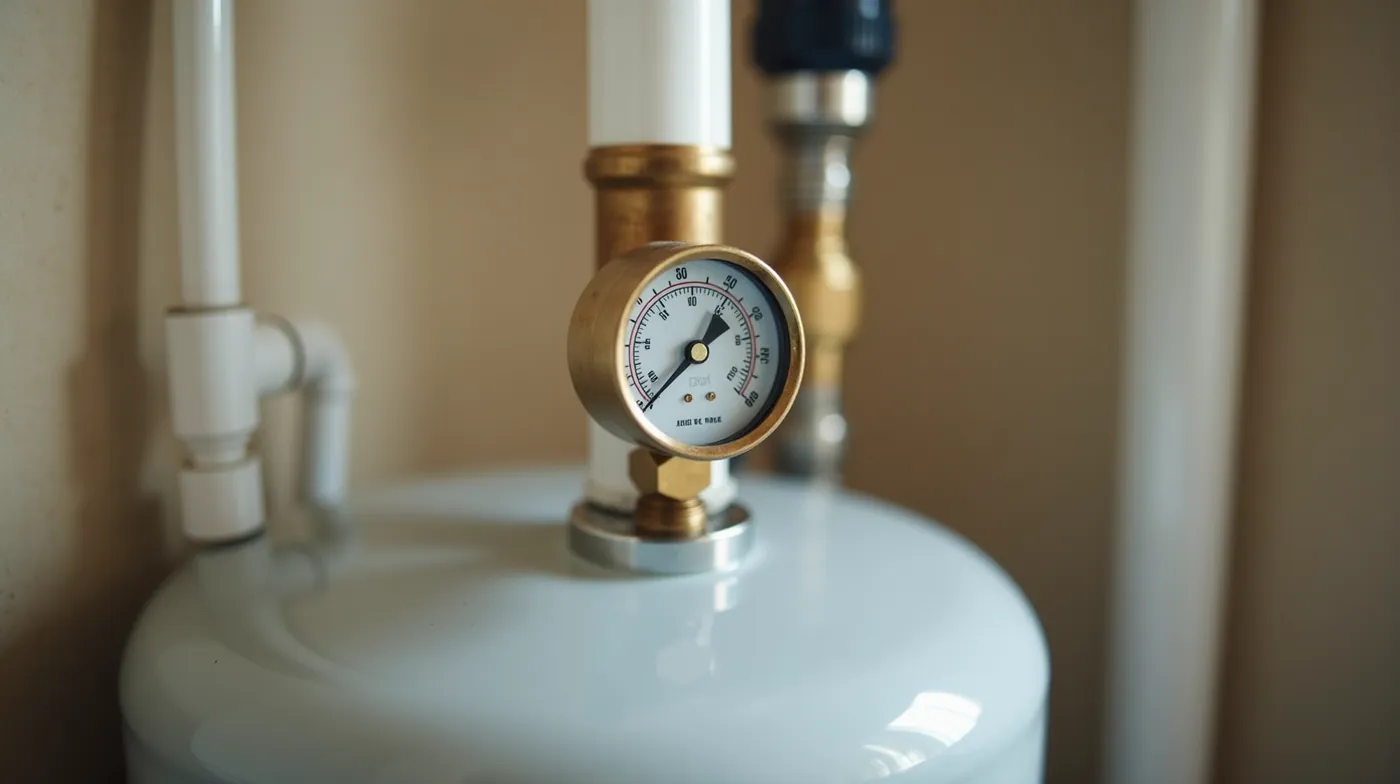
Your well water pressure system has a target window: the pump kicks on at a cut-in pressure (commonly 30 psi), fills the tank, and shuts off at a cut-out pressure (commonly 50 psi). That 20-psi swing is the healthy band most residential systems run in. When the readings drift outside it, something is wrong — a leaking bladder, a stuck switch, a worn pump, or a hidden leak — and the symptom usually shows up as low pressure at the farthest faucet, a pump that cycles every few minutes, or a gauge that will not hold a number.
Testing well water pressure is the single fastest way to separate a small, cheap fix from a big, expensive one. In our field work, a pressure check catches a $40 pressure switch or a $90 bladder replacement before the homeowner pays for a $900 pump swap they never needed. It also tells you whether a complaint about “weak water” is actually a pressure problem at all, or a flow problem (a partially closed valve or a clogged screen) that no amount of pump adjustment will solve.
What we noticed in the field
About a third of the “my well pump is dying” calls we get are really a pressure problem. The pump is fine; the switch or the tank bladder is not. A fifteen-minute gauge test is the difference between a $40 fix and a $900 replacement you did not need.
What You Need to Test Well Water Pressure
You do not need a technician to run a pressure test. You need three things, and if your system already has a gauge on the tank, you have most of it.
- A pressure gauge. Most well pressure tanks already have one mounted on the top or side. If yours is missing, corroded, or stuck, a well water pressure gauge for a 1/2-inch pipe thread costs about $12 to $25 and screws on in a minute. For a full breakdown of gauge types and ranges, see our best pressure gauges for well pump systems guide.
- A tire pressure gauge or a second test gauge (optional but recommended). The tank gauge can stick. A cheap independent gauge gives you a second opinion when the readings do not match your experience.
- A place to shut the system off. You will turn the pump off at the breaker before taking your baseline readings, so know where the well-pump breaker is (usually labeled in the main panel).
That is the whole tool list. No special well equipment, no pressure-pump test rig, no draining the tank. The next section walks through the eight steps in order.
How to Test Well Water Pressure: 8 Steps
These eight steps give you a complete picture: your resting (precharge) pressure, your pump’s working pressure, and whether the pump is holding it. Do them in order — each reading depends on the one before it.
- Close every faucet and turn off water-using appliances. Shut off the dishwasher, washing machine, and ice maker. Any fixture still open will pull pressure and make your numbers meaningless.
- Let the pump finish its cycle. Wait until the pump is fully off and the system is at rest. You will hear it stop; give it another 30 seconds.
- Note the resting (cut-out) pressure on the tank gauge. With the pump off and no water running, the gauge should read your cut-out — typically 50 psi on a 30/50 switch. Write it down. This is your starting number.
- Turn the pump off at the breaker. This isolates the system so the next step (driving pressure out) does not just restart the pump and top the tank back up.
- Open one faucet — the one closest to the tank — and let it run until the gauge drops, then closes. You are draining the stored water in the tank. Watch the gauge fall and note the pressure at which the pump would have kicked back on (the cut-in, typically 30 psi). If the gauge drops to zero or nearly zero and stays there with the pump off, the bladder is likely waterlogged.
- Turn the pump back on at the breaker and close the faucet. Watch the gauge climb. Note the pressure it stops at (cut-out) and how long the pump takes to get there. A healthy 1/2- to 3/4-HP pump should refill in roughly 20 to 60 seconds on a normal tank.
- Check the tank precharge with the system drained and the pump off. If you did not see the gauge bottom out around 28 psi in step 5, the air precharge is off. On a bladder tank the precharge should sit 2 psi below your cut-in (28 psi for a 30/50 switch). See our how to precharge a well pressure tank guide for the exact procedure.
- Repeat the run-and-watch two or three times. Consistency matters. If the pressure swings widely between cycles, or the pump runs on almost every cycle, you have a cycling problem, not just a pressure one — our well pump short cycling guide covers the eight causes.
The 10-second rule
If the pump starts again within 10 seconds of shutting off, the system is short cycling. That alone is a red flag worth chasing, even if every individual pressure reading looks normal.
How to Read Your Gauge and What Healthy PSI Looks Like
A healthy residential well system, per the most common factory setting, runs a 30 psi cut-in / 50 psi cut-out band. Here is what the numbers should do at each stage of the test:
| Measurement | Healthy Value | What It Means |
|---|---|---|
| Resting / cut-out pressure | 48–52 psi (for a 30/50 switch) | Pump shut off, system at rest. Should hold steady. |
| Cut-in pressure | 28–32 psi (for a 30/50 switch) | Pressure at which the pump restarts as you drain water. |
| Pressure swing (cut-out minus cut-in) | 18–22 psi | Your usable band. Too small = short cycling. |
| Bladder precharge (pump off, tank drained) | 28 psi (for a 30/50 switch) | Cut-in minus 2 psi. Sets the free-water baseline. |
| Refill time | 20–60 seconds | Pump off-to-cut-out. Much longer = weak pump or leak. |
If your switch is set to a different band (some systems run 40/60), shift the whole table up 10 psi. The relationships stay the same: precharge is 2 psi below cut-in, and the swing is roughly 20 psi. If you need to change the band itself, our how to adjust a well pressure switch guide walks through the settings and the risks of setting it too high.
6 Pressure Problems and What the Reading Tells You
The numbers from your test point to one of a handful of causes. Match your readings to the table below, then follow the fix for that row.
| What Your Gauge Shows | Most Likely Cause | Typical Fix |
|---|---|---|
| Pressure drops to near 0 with pump off, pump runs on every faucet use | Waterlogged bladder (tank lost its air cushion) | Recharge the precharge; replace bladder if it will not hold air |
| Gauge holds pressure but pump restarts within seconds | Stuck pressure switch or worn contacts | Clean or replace the well pump pressure switch |
| Pump runs but pressure at the farthest faucet is weak | Partially closed valve, clogged well screen, or undersized pump | Open the main valve; check the screen; consider a well booster pump |
| Refill time is 90+ seconds or the pump never reaches cut-out | Weak or failing pump, or a leak in the line | Check for leaks; test pump amperage; plan a well pump replacement |
| Gauge reads fine but water is loud, pipes bang when valves close | Water hammer (pressure shock) | Slow-closing valves or an arrestor — see water hammer in a well |
| Gauge needle is stuck or does not move at all | Bad gauge, not the system | Replace the gauge with a 100 psi well water pressure gauge and retest |
Pro tip: test with the tank empty
The single most diagnostic moment in the whole test is the instant the gauge bottoms out with the pump off. If it holds around 28 psi, your bladder is healthy. If it falls to 10 psi or lower, the bladder has failed and the air is escaping into the water side. That one reading rules out half the causes.
When Low Pressure Means You Need a Booster Pump
If your gauge holds a healthy 30/50 band, the refill time is normal, and the farthest fixture still runs weak, the problem is not the tank or the switch — it is available flow. A booster pump sits after the pressure tank and adds a fixed amount of pressure to the water the main pump delivers, so the farthest faucet sees a usable psi instead of a trickle.
Two rules before you buy one. First, size it to your actual peak demand (shower plus a second fixture, roughly 8 to 12 gpm in a typical home), not to the biggest unit on the shelf. Second, confirm the main pump is genuinely weak or the line is restricted first — a booster on top of an already-healthy pump just adds cost and electricity for no gain. For the full sizing math and which booster types fit different well depths, see our low well water pressure guide, which covers boosters in depth.
FAQ: How to Test Well Water Pressure
What is normal well water pressure?
Most residential systems run a 30 psi cut-in and 50 psi cut-out, a 20-psi swing. Some are set to 40/60. Anything that holds inside its own band, with a precharge 2 psi below cut-in, is normal.
How often should I test my well water pressure?
Once a year is enough for a healthy system, and any time you notice low pressure, a pump that cycles too often, or water that takes a long time to build. Testing takes about fifteen minutes.
Do I need to drain the tank to test pressure?
No full drain. You only need to open one faucet briefly to let the stored water out enough to see the cut-in and the bottom-out reading. You never have to empty the tank or the well.
My gauge says 0. Is my well dry?
Not necessarily. A gauge that reads zero with the pump off usually means a waterlogged bladder or a bad gauge, not an empty well. Retest with a spare gauge and check the precharge before you worry about water level.
Can high pressure damage my system?
Yes. Setting the cut-out above about 60 psi can stress pipes, fittings, and water heaters that are rated for lower pressure. If you raise the band, keep the cut-out at or below 60 psi and make sure your tank and tank precharge match the new setting.
See Also
If you are diagnosing your pressure system, these guides go hand-in-hand with testing:
- Best Pressure Gauges for Well Pump Systems in 2026
- How to Size a Well Pressure Tank 2026: The Complete Guide
- Low Well Water Pressure 2026: How to Fix It Fast (8 Causes)
#WellWaterPressure #WaterPressureTest #WellPump #PressureTank #WellMaintenance #HomeownerGuide #WellWater #PSI #WaterPressure #2026Guide #PumpRepair #PrivateWell #WellSystem #DIYHomeowner #PressureSwitch