
A dirty well pressure tank is one of the most overlooked maintenance tasks in private well systems, and it is the reason more than a few homeowners replace a perfectly good tank that simply needed an hour of cleaning. If you have been searching for how to clean a well pressure tank, chances are you are noticing one of three things: your pump is short-cycling, your water is coming up cloudy or stained, or the tank feels suspiciously heavy and the pressure gauge is swinging. This 2026 step-by-step guide walks you through exactly how to clean a well pressure tank, both in place and removed, how to disinfect it with a simple chlorine procedure, and how to tell when cleaning is no longer worth the effort and a replacement is the honest answer.
By Lisa Martinez, Water Quality Specialist
Lisa holds a degree in Environmental Science and specializes in private well water safety and treatment, with a focus on biofilm, corrosion, and disinfection in residential well systems.
Disclosure: As an Amazon Associate, we earn from qualifying purchases on this page. Product selections are based on independent research and real well water data.
Published: October 2026
Table of Contents
- Why Your Pressure Tank Gets Dirty
- Signs Your Well Pressure Tank Needs Cleaning
- What You Need to Clean a Well Pressure Tank
- How to Clean a Well Pressure Tank: 9-Step Guide
- How to Disinfect a Well Pressure Tank (Chlorine Procedure)
- How Often Should You Clean Your Pressure Tank?
- Clean It or Replace It: When a Tank Has Passed Its Prime
- Where to Buy Pressure Tank Cleaning Supplies
- FAQ: Cleaning a Well Pressure Tank
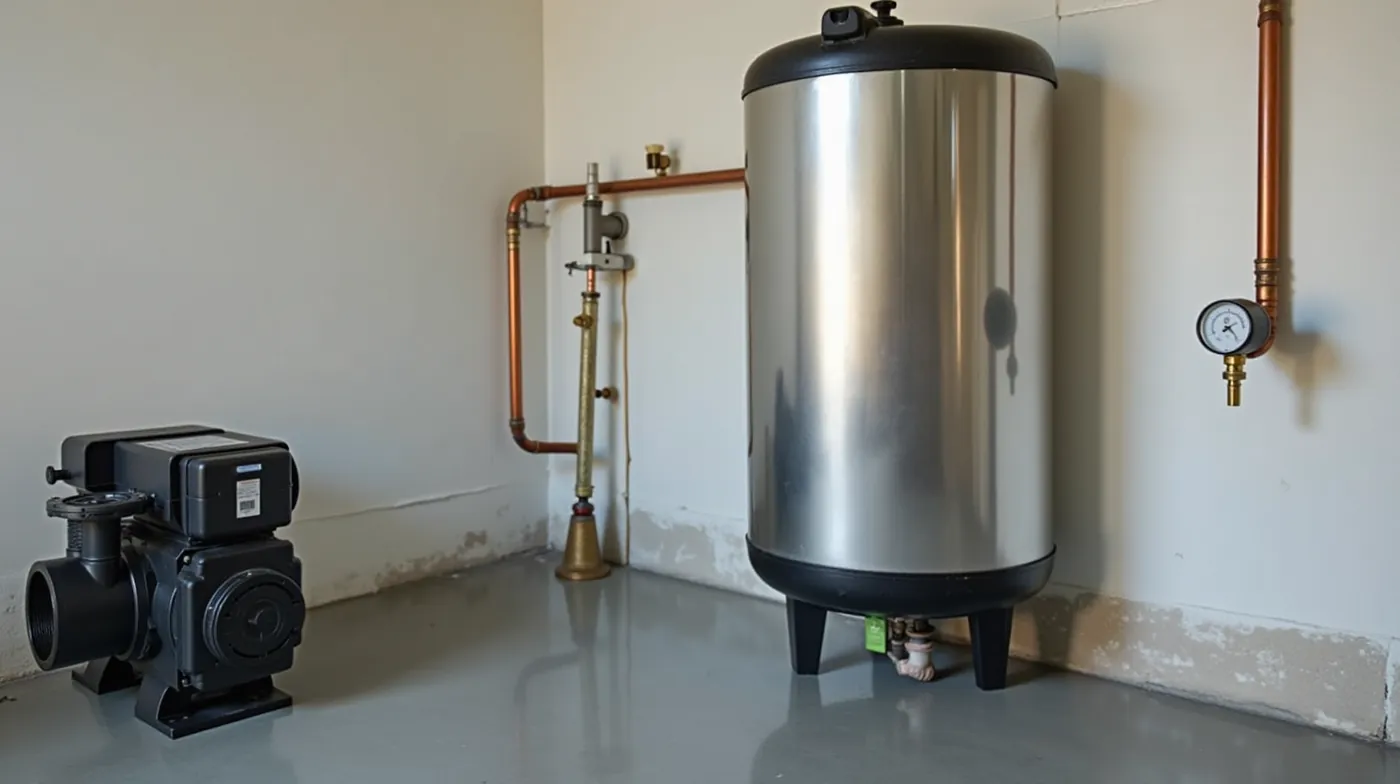
Why Your Pressure Tank Gets Dirty
Your well pressure tank is a sealed steel vessel, and everything that reaches it eventually settles inside. In the tanks I have opened over the years, the typical find after five to seven years of service is a sludge layer of silt, rust flakes (in steel-shell tanks), and a thin biofilm coating the interior walls. In a bladder or diaphragm tank, the water side is a smaller share of the volume, but that water side still collects sediment from the well and any debris the foot valve or strainer did not catch.
Three things drive the buildup:
- Sediment from the well. A well that has never been developed, or a well near farm or septic activity, feeds fine silt into the system. It settles in the lowest point of the plumbing, which is almost always the bottom of the tank.
- Biofilm. Stagnant water in a tank that sees long off periods (a house in winter, a rental property) lets bacteria form a slimy film. This is the source of that “dirty water” smell after the pump kicks on.
- Corrosion products. Even in a rubber-lined bladder tank, the steel shell and the pipe connections rust slowly. Flakes and pinhole rust are what turn a tank brown over time, and they feed the biofilm problem.
None of this is a safety emergency on its own, but it compounds. A waterlogged tank that is also dirty loses both its air cushion and its water quality at the same time, and the pump takes the punishment. That is why cleaning the tank is a 30-minute job you should do on a schedule instead of a 200-dollar replacement you discover at the worst moment.
Signs Your Well Pressure Tank Needs Cleaning
Based on what I have seen in inspections, these are the signals that a pressure tank is due for a clean, in rough order of how often I see them:
- The tank is heavier than it should be. A 44-gallon bladder tank that is properly charged should weigh roughly the same as a new one plus a few gallons of water. If it weighs noticeably more, it is holding water it should not, which is both a waterlogging sign and a cleaning sign at once.
- Cloudy or slightly discolored water when the pump starts. The pump stirs up settled sediment every cycle. If the first gallon after a long off period is cloudy and it clears in a minute, the tank is holding loose sediment.
- A musty or “old pipe” smell after the pump runs. That is biofilm. Chlorine disinfection is the fix, and it is part of the cleaning procedure below.
- Short-cycling or pressure swings. Sometimes the cause is a dead air charge; sometimes it is sediment compressing the bladder unevenly. Cleaning the tank is a diagnostic step worth doing before you spend money on a new one.
- The tank is more than three years old with no maintenance. If you have never opened, flushed, or disinfected it, assume it is due regardless of symptoms. Most well service programs I have seen treat a three-year flush as baseline, and shorter where the water is sediment-heavy.
If your symptoms instead point to a broken bladder specifically, our guide on how to replace a well pressure tank bladder covers the test and the swap. Cleaning and bladder replacement are different jobs, but you will want the same tools.
What You Need to Clean a Well Pressure Tank
The good news: this is a modest kit. Everything below is something a well owner can buy for a small total, and most of it comes in handy for other well system work later.
- Pipe wrench or adjustable wrench (for the tank connections and the drain plug) — pipe wrench on Amazon
- Bucket and garden hose for flushing water out
- A 160-psi air pressure gauge to check and reset the pre-charge after the job
- Air compressor (rentable from any hardware store) if the air charge is low after flushing
- Household chlorine bleach (unscented, 5-8.25 percent) for the disinfection step — chlorine bleach on Amazon
- Zip ties or a small clamp to keep the drain hose from falling out
- PPE: safety glasses and gloves. Chlorine splash stings, and rust flakes are sharp.
Safety first
Before you touch the tank: shut off the pump at the breaker, close the valve between the tank and the house (if you have one), and open a downstream faucet to bleed the line pressure. A live 50-psi line behind your wrench is the classic well-system injury.
How to Clean a Well Pressure Tank: 9-Step Guide
Here is the procedure I use on residential bladder tanks, in the exact order. The same sequence works for diaphragm and conventional tanks; for conventional (open-water) tanks, skip the bladder-specific notes.
- Isolate the tank from the system. Break the pump circuit at the breaker. Close the isolation valve on the tank side. Open the lowest house faucet to dump the line pressure. You want a dead system with no backflow path into the tank.
- Drain the water side. Remove the small drain plug (or open the drain valve) at the bottom of the tank and let the water run into a bucket. A 44-gallon tank holds roughly 20 gallons of water when charged at 28-38 psi. Note the water color as it comes out — the first run is the most telling. Clear water means light duty; brown or milky water means the disinfection step is mandatory.
- Flush with the hose. With the drain open, run a garden hose into the tank inlet for a few minutes to agitate the settled sediment, then let it run out the drain. Repeat two or three times until the outflow is clear. This step alone often fixes cloudy-first-gallon water completely.
- Open the tank properly (in-place clean, advanced). On a tank you have fully removed from the wall, you can open the top access or the inlet fitting and reach in with a long-bristle brush to scrub the walls. Most homeowners never need to remove the tank — the hose flush and the disinfection below cover 90 percent of cases. Removal is only worth it when you are also replacing the bladder or the shell is corroding.
- Disinfect the water side. This is the part that kills biofilm and the musty smell. Fill the tank about one-third full with clean water, then add 1 quart of 8.25-percent bleach per 10 gallons of water (roughly one quart in a 44-gallon tank). Cap it, let it sit 4 to 8 hours, then drain and flush until you cannot smell chlorine at the open faucet — usually 10 to 15 minutes of running water. Details in the next section.
- Inspect what you can see. If you opened the inlet, look at the threads and the first few inches of pipe: rust, pitting, or a swollen fitting is a repair job, not a cleaning job. Check the tank shell for weeping or paint blistering — both mean the tank is dying.
- Check the air charge. With the tank isolated and drained, put your air gauge on the Schrader valve and read the pressure. It should be 2 psi below your pump cut-in pressure (for a 30/50 switch, that is 28 psi). If it reads at or near zero, the bladder is failing and no amount of cleaning will fix it — see our well pump short cycling guide for the symptom side of that problem.
- Re-pressurize the air charge. Top it up with the compressor to the correct pre-charge. Over-pressurizing is the most common mistake here: an air charge above the cut-in pressure steals your water volume and makes the system feel like it has no capacity. Our pressure tank precharge guide walks through the math for any switch setting.
- Reconnect, cycle, and verify. Open the isolation valve, close the drain, restore power, and run the pump through a full cycle. Then draw water at the lowest faucet for a few minutes. The water should be clear, the smell should be gone, and the gauge should sit between cut-in and cut-out without hunting. If the pump still short-cycles after a clean tank and a good air charge, the tank has moved up the replacement list — and sizing a replacement correctly is covered in how to size a well pressure tank.
From isolation to verification, an in-place clean and disinfection takes 45 to 75 minutes for one person. The flush alone is 20 minutes and worth doing even when you skip the bleach.
How to Disinfect a Well Pressure Tank (Chlorine Procedure)
Flushing removes sediment. Disinfection removes biofilm, which is what causes the smell and keeps the tank from getting dirty again so quickly. The procedure below is the same shock dose I use when a tank has been idle through the winter or a septic event pushed coliform into the system.
- Drain the tank to the lowest practical level. You want the water side accessible and the air side dry.
- Measure the working volume. A 44-gallon bladder tank holds about 20 gallons on the water side; a 30-gallon holds about 14. Use the smaller number if unsure — a slightly higher chlorine concentration is safe, a much higher one is a waste of bleach.
- Make the dose. For a tank-only shock, use 1 quart of 8.25-percent household bleach per 10 gallons of water. That puts you at roughly 100 ppm of available chlorine, which is a full shock level. For a milder routine clean, 4 ounces per 10 gallons (about 50 ppm) is plenty. I default to the 100 ppm dose whenever there was a smell or the water looked off.
- Introduce the solution. With the tank isolated, pour the bleach solution into the inlet or top access, then close everything. Let it contact for a minimum of 4 hours; overnight is better for heavy biofilm. The contact time matters more than the concentration.
- Drain and flush to clear. Run water out the drain until the tank is empty, then open the isolation valve and run the lowest house faucet until you cannot detect chlorine by smell — typically 10 to 15 minutes, sometimes longer. If the smell lingers, run the pump a few short cycles and keep flushing. You do not want residual chlorine sitting in the tank when the household starts drinking from it.
Do not mix
Never combine bleach with vinegar, ammonia, or any other cleaner in the tank. Chlorine plus ammonia produces chloramine gas, which is dangerous in an enclosed pump room. Bleach only, then flush until clear.
How Often Should You Clean Your Pressure Tank?
There is no universal schedule because it depends on your water, but here is the range I recommend and the reasoning behind it. The table below summarizes the typical cadence by well condition.
| Well Condition | Recommended Cleaning Interval | Disinfection Interval |
|---|---|---|
| Clean, well-developed well | Every 3 years | Every 3 years, or after any contamination event |
| Sediment-heavy or undrilled well | Every 12 to 18 months | Every 12 months |
| Seasonal or idle property | Before each season of use | Every time you restart after idle |
| After septic overflow or flooding | Immediately | Full 100 ppm shock, then retest water |
Intervals are field-of-experience guidelines for residential bladder and diaphragm tanks. Shorten them if your water is visibly sediment-loaded or if you have a history of coliform positives.
The single most reliable trigger is not a calendar date but a symptom: cloudy first-gallon water, a musty smell, or short-cycling that a fresh air charge does not fix. When any of those show up, clean the tank before you spend money elsewhere. It is the cheapest diagnosis in the system.
Clean It or Replace It: When a Tank Has Passed Its Prime
Cleaning restores a sound tank. It cannot fix a failing one. After doing the procedure above, you will know which side of the line your tank is on. Here is how I make the call.
Cleaning is worth it when: the shell is dry and free of active rust, the air charge holds at the correct pressure after you set it, and the water runs clear once flushed. In that case a clean and disinfection resets the tank for another several years of service, and you have saved yourself a few hundred dollars in replacement cost.
Replacement is the honest answer when:
- The air charge will not hold. If it reads at or near zero with the tank drained, the bladder has failed. You can re-charge it for a season, but a ruptured bladder is a slow leak and the tank will waterlog again within months. See our best pressure tanks for well water systems to pick the right replacement.
- The shell is corroding. Weeping at the seams, paint blistering, or rust flaking off the outside means the steel is going. A tank you are about to replace is not worth a full clean — drain it, swap it, and move on.
- It is the wrong size for the system. If the pump still short-cycles after a good clean and a correct air charge, the tank is simply too small for your fixtures and pump. Sizing it properly is the fix, not cleaning it again. Our well pressure tank sizing guide covers the math and the common sizing mistakes.
- The tank is past 12 to 15 years of hard service. Rubber and steel both age. A tank that has cycled hard for over a decade is a replacement candidate even if it looks fine, and cleaning it is money spent on a tank that will fail within a couple of years anyway.
The rule of thumb I use
If the air charge holds and the shell is sound, clean it. If either one is failing, replace it. A cleaned failing tank is the most expensive mistake in well maintenance, because you paid for a clean you did not need on a tank you were going to replace anyway.
Where to Buy Pressure Tank Cleaning Supplies
Everything you need for a clean and disinfection is available online. The table below lists the specific supplies from the procedure, with what each one is used for and what to look for when buying.
| Supply | Used For | What to Look For |
|---|---|---|
| Pipe Wrench (Adjustable) | Removing the drain plug and isolation fittings | 14-inch minimum; smooth jaw if the fitting is painted |
| Air Pressure Gauge (160 psi) | Checking and resetting the tank pre-charge | 160 psi range, brass fittings, reads to 1 psi |
| Household Chlorine Bleach (8.25 percent) | Disinfecting the tank water side | Unscented, no additives; check the date — bleach weakens after 6 months |
| Portable Air Compressor | Topping up the air charge (or rent at a hardware store) | 150 psi working pressure is plenty for a 40-psi charge |
If you are replacing the tank rather than cleaning it, our best pressure tanks for well water systems guide covers the 2026 models worth buying by size and tank type.
FAQ: Cleaning a Well Pressure Tank
Do I have to take the pressure tank off the wall to clean it?
No. An in-place clean — drain, hose flush, and chlorine disinfection — handles the vast majority of tanks and takes under an hour. Removal is only needed when you are replacing the bladder, the shell is corroding, or you want to scrub the interior walls directly, which most homes never require.
How much bleach do I use to disinfect a 44-gallon pressure tank?
About one quart of 8.25-percent household bleach for a full shock (roughly 100 ppm against the ~20 gallons on the water side), or 4 ounces per 10 gallons for a milder routine clean. Contact time of 4 to 8 hours matters more than exact concentration, and you must flush until the chlorine smell is gone before the system is back in service.
My tank still short-cycles after I cleaned it. What now?
Cleaning fixes sediment and biofilm, not a failed bladder or a tank that is too small. Check the air charge with the tank drained: if it reads near zero and will not hold, the bladder has failed and the tank needs a bladder replacement or a new tank. If the charge is fine and the pump still cycles every few seconds, the tank is undersized for your system — see our well pump short cycling guide to confirm.
Can cleaning a pressure tank remove a coliform (E. coli) positive?
It can help, but it is not a substitute for a proper well disinfection and retest. A tank shock clears the plumbing-side biofilm, but a coliform positive means bacteria are entering the well itself — usually at the casing seal or from surface runoff. Disinfect the whole well, then retest 5 to 10 days later. If it stays positive, you have a casing problem that needs a well contractor.
How often should I clean my well pressure tank?
Every 3 years is the baseline for a clean, well-developed well; every 12 to 18 months if your water is sediment-heavy; and before each season on a property that sits idle. The real trigger is a symptom: cloudy first-gallon water, a musty smell, or pressure swings that a fresh air charge does not fix.
See Also
→ How to Size a Well Pressure Tank 2026: The Complete Guide
→ How to Replace a Well Pressure Tank Bladder 2026: Step-by-Step Guide
→ Well Pump Short Cycling 2026: Causes, Costs and How to Fix It
#PressureTank #WellPressureTank #CleanWellTank #PressureTankMaintenance #WellWater #PrivateWell #WellPump #BladderTank #WellCare #WaterPressure #WellMaintenance #HomeownerGuide #2026Guide #DIYWell #WellSystem