
Wondering how to flush a well when your water turns cloudy, tastes flat, or flow suddenly drops? Flushing is the fastest first response a private well owner has: it pushes out stagnant water, suspended silt, and anything loose in the pipe and casing, and it tells you in minutes whether the problem is sediment or something deeper. In this step-by-step guide we cover when to flush a well, what to expect from the first minutes of clear water, the exact sequence for flushing your well at the house and at the pit, and how many gallons you will actually need based on well depth and flow rate. The numbers below come from residential well work across the western US, and we explain where flushing helps and where it does not, so you do not waste a weekend pumping your water down a ditch.
By Lisa Martinez, Water Quality Specialist
Lisa holds a degree in Environmental Science and specializes in private well water safety and treatment. She has evaluated hundreds of wells after storms, power outages, and pump failures, and teaches well owners how to read what the first flushed water tells them.
Published: October 10, 2026
Disclosure: As an Amazon Associate, we earn from qualifying purchases on this page. Product selections are based on independent research and real well water data.
📊 Key Data Point
A typical 4-inch well pipe holds about 3.4 gallons per foot of depth. A 100-foot well therefore contains roughly 340 gallons of water sitting in the pipe and casing. That is the baseline you must pump out before water drawn from the aquifer, not from the pipe, starts coming through the tap.
Table of Contents
- When You Should Flush a Well
- What Flushing a Well Actually Removes (and What It Does Not)
- What You Need Before You Flush Your Well
- How to Flush a Well: Step-by-Step
- Flushing After a Power Outage, Flood, or Dry Spell
- How Long Should You Flush a Well?
- After the Flush: Test Your Water
- Where to Buy
- Frequently Asked Questions
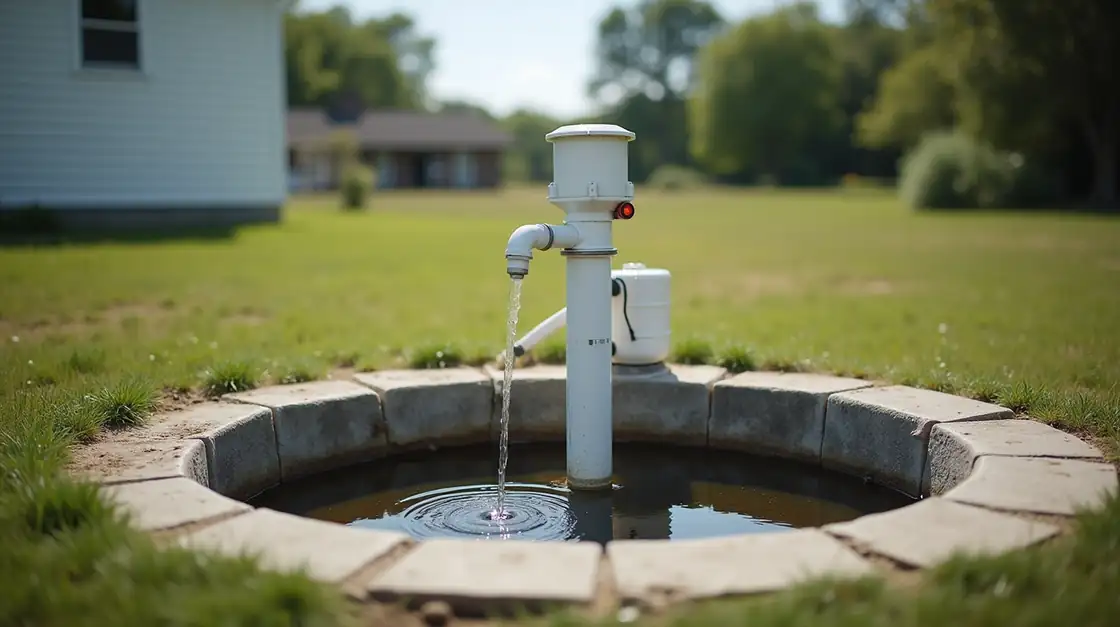
When You Should Flush a Well
Flushing is a low-cost diagnostic and a real fix in the same gesture. Based on the wells we have worked with, these are the situations where pulling a few hundred gallons through the system is the right first move:
- Cloudy or milky water after a storm, earthquake, or heavy rain nearby. Silt has settled into the well screen and pipe, and it usually clears on its own once the water column is cycled.
- A drop in flow or pressure that started gradually. Loose sand and fine sediment packing the screen will often wash out, restoring most of the lost flow.
- A flat, stale taste after the well has sat idle for weeks. Water that has stood in the pipe for a long time picks up a metallic or off flavor that flushing removes entirely.
- A recent power outage or pump shutdown that lasted several days. The standing water has warmed, lost dissolved oxygen, and may carry bacteria from the surface zone.
- After pump or wiring work in the well pit. Dust, insulation particles, and debris from the job get stirred into the pipe and should be flushed out before the system goes back to full use.
⚠️ Warning
If your water is brown, tastes like sulfur, or a lab panel shows elevated bacteria, flushing alone is not the fix. Cloudy water clears with flushing. Dissolved minerals and biological contamination need treatment and disinfection. Our well disinfection guide covers the shock-chlorination step when the water is contaminated rather than just dirty.
What Flushing a Well Actually Removes (and What It Does Not)
It is worth being precise about what a flush does, because the answer determines how you read the results. When you run the pump and discharge water, three things are coming out of the system:
- Standing pipe water. The water that was sitting in the well pipe, casing, and pressure tank. It is the first to leave and the first to go stale, so it is usually the first to look off.
- Suspended sediment. Sand, silt, and clay particles that are loose around the well screen and inside the pipe. These are visible as cloudiness, a gritty feel, or a sand ring in the toilet, and they wash out as the water column cycles.
- Dissolved oxygen imbalance and mild biological growth. Water that has sat for days can accumulate harmless bacterial film near the surface zone of the pipe. Cycling fresh aquifer water through displaces it.
Flushing does not remove dissolved minerals such as hardness, iron in solution, nitrates, or radon. If the water looks clear but still tastes bad or stains fixtures, the problem is dissolved, not suspended, and no amount of flushing will change it. That distinction is the single most useful thing to learn from a flush: clear water that still tastes metallic means dissolved minerals; cloudy water that clears means sediment. We cover the dissolved-side options in our metallic taste in well water guide.
What You Need Before You Flush Your Well
A flush produces a lot of water that has to go somewhere, so plan the logistics before you start the pump. You will want the following on hand:
- A discharge path. A heavy-walled garden hose run to a dry area, or better, direct access to the well pit or a pitless adapter access so you can bypass the house plumbing entirely. Discharging through the house is fine for the first pass, but for a full flush the pit route is faster and keeps silt out of your pipes and tank.
- Capacity to handle the volume. A full flush can mean 500 to 2,000 gallons depending on well depth. Do not discharge onto the ground directly beside the well casing. Keep the water away from the wellhead, drain field, and any surface infiltration path so you are not re-introducing what you just pumped out. A dry gravel area, a dry creek bed, or a spot that naturally absorbs water is ideal.
- A way to observe the water. A clear jar or glass so you can watch the water clear in real time. We use a simple quart jar. As the cloudiness fades, you will know the sediment is coming up.
- Electrical access to the pump. Confirm the pump circuit is on and the pressure switch is accessible. You will be running the pump continuously for a while, so make sure the breaker will not trip. If it does, the motor can overheat. Our well pump not turning on guide covers the electrical side if the pump will not stay running.
- Time and a plan for the day. A full flush is a half-day job. Set aside the time and make sure the household will tolerate the water being out of service for a few hours.
💡 Pro Tip
Before you start, open the lowest and highest faucets in the house and run them for a minute. That clears the house plumbing first, so the water you watch clearing at the well is genuinely from the well and not from a stuck sediment plug in your own pipe. It also lets you compare the two: if the house line clears quickly but the well stays cloudy, the sediment is in the well, not your plumbing.
How to Flush a Well: Step-by-Step
Here is the exact sequence we use on residential wells. It works the same for shallow-well jet pump systems and deep-well submersible systems, with one difference noted in step 3.
- Clear the house plumbing first. Open the lowest and highest faucets and run them until the water runs clear. Close them again. This separates house-plumbing issues from well issues.
- Route the discharge. For a full flush, connect a heavy-walled hose from the pressure tank drain or the well-pit bypass so the pump discharges directly to your safe disposal area, bypassing the house. If you do not have pit access, you can flush through the house using an outdoor spigot, but expect to move the hose as it clogs.
- Run the pump at full flow. Start the pump and open the discharge fully. Do not throttle the flow. You want maximum velocity through the pipe so it carries sediment up out of the screen. On a submersible well the pump runs automatically once flow is available. On a shallow-well jet pump, make sure the check valve and priming pot are holding water. If the pump runs dry or cavitates, stop it and re-prime. Our well pump priming guide walks through restoring the prime.
- Watch the first 30 to 60 gallons closely. This is usually the worst of it: standing water, then a pulse of the loosest sediment. Note the color and cloudiness in your clear jar. If it is heavily sandy, keep a close eye on the pump so it does not lose prime.
- Let it run until the water clears, then keep going. Once the visible cloudiness is gone, keep the pump running for an additional 15 to 30 minutes at full flow. This cycles fresh aquifer water through and displaces the standing column. Do not stop at the first clear glass. The pipe is still full of water that needs to turn over.
- Check the pressure tank. After the flush, the tank will have cycled down and back up. Confirm the pre-charge is still correct. A bladder that has been waterlogged will make the pump short-cycle after a flush. Our well water pressure testing guide covers reading the cut-in and cut-out numbers and checking the pre-charge.
- Shut the pump down and re-prime if needed. Turn the pump off, close the discharge, and confirm the system holds pressure. If the pressure drops within a few minutes, you have a leak or a failing check valve to chase before you call the flush done.
- Sample and test. Draw a fresh sample from the faucet once the water is clear and send it for a standard bacteria panel. This is not optional after a storm or power outage. We explain what to test in the next section.
🚨 Urgent
If the water stays cloudy after 500 gallons, or the pump keeps losing prime, stop and do not force it. You likely have a screen that is partially clogged, a sand seal that is failing, or a drop in the static water level. Forcing a pump to run dry burns out the motor and, in a submersible, can overheat the windings. Call a well service professional to inspect the screen and water level before continuing.
Flushing After a Power Outage, Flood, or Dry Spell
Each common trigger needs a slightly different emphasis, so here is how we adjust the basic procedure:
After a power outage
When the pump sits for a day or more, the water in the pipe warms up and bacterial activity near the surface zone increases. Flush the full standing volume, then send a bacteria sample. If the outage was during cold weather, also check the pit for a frozen section before running the pump hard. If the water has a rotten-egg or sulfur character, flush and then review our sulfur smell in well water guide, because hydrogen sulfide can come from both bacteria in the pipe and from the aquifer itself.
After a flood or heavy rain
This is the scenario where flushing matters most for health, not just taste. Surface water can carry bacteria, nitrates, and debris toward the wellhead. Flush thoroughly to clear suspended material, and treat the flush as a diagnostic. If the water was standing over the wellhead or the pit flooded, assume surface contamination and follow up with disinfection in addition to the flush. A bacteria panel is essential here, and do not drink the water until it comes back clean.
After a dry spell
During drought, the static water level can drop. If your flow is low and the water is sandy, the well is drawing from a lower, looser zone. Flush gently rather than at full blast, because aggressive pumping can pull more sand down toward the screen. If low flow persists after the rain returns, the aquifer itself may be stressed, and a well professional should measure your static and pumped water levels to see how much drawdown you are experiencing.
How Long Should You Flush a Well?
The honest answer is: until the water clears, plus a turnover margin. There is no fixed timer, but the volume math gives you a realistic target. The table below shows how much water sits in a 4-inch pipe at common well depths, which is the minimum you will move through the system before the tap is drawing fresh aquifer water.
| Well Depth | Water in 4-Inch Pipe | Practical Flush Target |
|---|---|---|
| 60 feet | About 205 gallons | 300-500 gallons |
| 100 feet | About 340 gallons | 500-800 gallons |
| 150 feet | About 510 gallons | 800-1,200 gallons |
| 200 feet | About 680 gallons | 1,000-1,500 gallons |
Source: 4-inch pipe holds about 3.4 gallons per foot. Targets assume the flush continues until water is visually clear, plus one full pipe-turnover margin. A 1.5 gpm pump at 1,000 gallons takes roughly 11 hours, so most homeowners flush in stages over a day rather than one continuous run.
If your well is drawing heavily and the water has been sandy for more than an hour at a time, stop and let the well recover. A well that is being pumped faster than it recharges will keep pulling sand, and the more you pump, the worse the sanding gets. Give it several hours, or a full night, and then resume at a gentler flow.
After the Flush: Test Your Water
A flush is a mechanical fix, and the way to confirm the well is healthy is a lab result. Our standard recommendation after any flush triggered by a storm, power outage, or contamination concern is a full bacteria panel (total coliforms, E. coli) plus a general chemistry panel if the taste or color is not back to normal. Collect the sample from the faucet closest to the pressure tank after flushing the line clear, using a sterile container from your lab or county health department. The EPA and state health agencies publish the secondary standards for taste, odor, and staining, and your county extension office will usually tell you what they want to see on a re-test after a contamination event. For the full process of sampling and reading results, see our complete guide to testing well water.
Where to Buy: The Flush Kit Essentials
Everything you need to flush a well is inexpensive. The five items below cover discharge, observation, pressure verification, and the follow-up water test. We have used all of them on residential jobs and linked the exact categories on Amazon so you can order them in one trip.
| Item | Why You Need It | Typical Price |
|---|---|---|
| Heavy-Walled 1-Inch Garden Hose | Routes the pump discharge to a safe disposal area without kinking or clogging | $35-$60 |
| Well Pump Pressure Gauge | Verifies cut-in/cut-out and that the system holds pressure after the flush | $15-$30 |
| Well Water Bacteria Test Kit | Confirms the well is microbiologically safe after a storm or power-outage flush | $30-$50 |
| Jet Pump Priming Pot | Restores prime on shallow-well systems that lose water during the flush | $40-$90 |
| Well Pump Protector | Shuts the pump off if it runs dry, protecting the motor during long flush cycles | $60-$120 |
Prices reflect 2026 Amazon listings for the linked search categories at the time of writing; check current pricing before ordering.
The Bottom Line
Knowing how to flush a well is the closest thing a well owner has to a universal first aid kit. Flush the standing volume, keep the water moving until it is clear, verify the system holds pressure, and confirm with a bacteria panel when contamination is possible. If the water clears and your pressure is back, you have likely saved yourself a service call. If it does not, the flush has told you exactly where to look next: the screen, the water level, or the treatment side. Flush with a plan for the water, not just for the well, and it is one of the most useful things you can do in a single afternoon.
Frequently Asked Questions
How many gallons do I need to flush a well?
At minimum, pump out the volume of water sitting in your well pipe, which is about 3.4 gallons per foot for a 4-inch pipe, then keep going until the water is visually clear. For a 100-foot well that is roughly 340 gallons in the pipe, and a realistic total flush of 500 to 800 gallons. If the water is heavily sandy, expect more.
Will flushing a well make it produce more water?
It can, if the loss of flow was caused by loose sediment packing the well screen. Flushing washes that material out and often restores flow. It will not increase the natural yield of a well that is genuinely low. If flow stays low after a full flush and the well has had time to recover, the aquifer itself is the limiting factor.
Can flushing damage my well?
Flushing at or near the pump’s normal flow rate is safe. The risk comes from pumping harder than the well can recharge, which pulls more sand down toward the screen, or from running a submersible pump dry, which overheats it. If the water is very sandy, flush at a gentler flow and let the well recover between sessions.
Where should I send the flushed water?
To a dry, absorbent area away from the wellhead, such as a gravel bed or dry creek. Never discharge directly beside the well casing or into a surface depression that drains toward the well, and never into a storm drain. The goal is to keep what you pump out from finding its way back in.
How long should I wait to drink the water after a flush?
If the flush was triggered by a storm, flood, or power outage, wait for a bacteria panel to come back clean before treating the water as safe to drink. In the meantime, boil it or use bottled water. If the flush was only for cloudiness or taste with no contamination event, clear water from a previously healthy well is generally fine once the line is running clear.
See Also
- How to Disinfect a Well 2026: Step-by-Step Guide — the shock-chlorination procedure to follow when flushing reveals bacteria rather than just sediment.
- How to Prime a Well Pump 2026: Step-by-Step Guide — restore the prime if your shallow-well pump loses water during the flush.
- How to Test Your Well Water — Complete Guide 2026 — sampling, panels, and what the results mean after you flush.
🔗 #WellFlush #HowToFlushAWell #WellWater #PrivateWell #WellMaintenance#WellCare #WaterQuality #WellPump #WellWaterTest #HomeWell#SandyWater #WellOwner #WaterWellOwners #WellSafety #RuralLiving