
Learning how to pump out a well is one of the most useful skills a private well owner can develop — and it is almost always needed at the worst time: a failed pump in January, a move out of the house, or a slow leak pooling around the well house. Unlike a city water line, a private well is an open system: water sits in the casing, the pit or well house, the pressure tank, and in the hundreds of feet of supply pipe between them, and all of it can be drained. In this 2026 guide we walk through the whole process — the three draining methods and when to use each one, a numbered walkthrough of the most common utility-pump method, how to drain the pressure tank and the house lines without flooding the basement, the winterizing checklist that makes the job worthwhile, and the safety rules we insist on with every homeowner we train. Whether you are draining a well for the first time or prepping a system for chlorination, this is the same process we use in the field.
By Robert Harrison, Certified Well Inspector
Robert has 20+ years of experience inspecting and testing residential water wells across the western US. He has opened, measured, drained, and re-sealed hundreds of pits and well houses, and specializes in keeping DIY well work safe and code-compliant.
Disclosure: As an Amazon Associate, we earn from qualifying purchases on this page. Product selections are based on independent research and real well water data.
Last updated: October 17, 2026
Table of Contents
- Why You Might Need to Pump Out Your Well
- How to Pump Out a Well: 3 Methods Compared
- Step-by-Step: How to Pump Out a Well with a Utility Pump
- Draining the Pressure Tank, Well House & Water Lines
- How to Pump Out a Well Before Winter: Checklist
- Safety Warnings & Common Mistakes
- Where to Buy: Draining Tools & Pumps
- See Also
- Frequently Asked Questions
Why You Might Need to Pump Out Your Well
Most well owners never think about draining their system until a problem forces them to. In our inspection work, the same five situations account for nearly every drain job we see:
- Winterizing. Water left in an unheated pit, well house, or exposed supply line freezes in place and expands enough to crack cast iron fittings, split tank welds, and rupture buried pipe. Draining the system before the first hard freeze is the single most effective freeze-protection step a homeowner can take.
- Pump failure or replacement. When a submersible pump dies, the pit below it is often full of water. You cannot safely work on the riser, check valve, or contactor with a flooded pit — the pit has to be emptied first so you can see what you are working on.
- Disinfection or repair prep. Chlorinating a well, replacing the pressure switch, or resealing a riser all require a drained, accessible system. A standing-water pit makes every one of those jobs slower and messier.
- Home sale or move-out. Draining the tank and lines is standard practice when leaving a property, both to prevent freeze damage over a vacant winter and to leave the system in a clean state for the next owner.
- A flooded pit after a storm. Heavy rain can push groundwater into a shallow pit faster than the well can absorb it. Draining it back down restores normal operation and lets you check for debris before it settles on the intake.
Field note
A standing-water pit is one of the most common findings in our inspections — and it is always bad news. Water in the pit accelerates corrosion on the contactor, pressure switch, and wiring terminals, and it provides a direct path for soil water to wick back up around the riser seal. If you find water in the pit at any point in the year, drain it and find out why it is there.
How to Pump Out a Well: 3 Methods Compared
There are three practical ways to drain a residential well, and the right choice depends on your well configuration — how deep the water sits, whether you have an accessible pit or a sealed well head, and how much time you have. Based on the systems we service, the table below is the general comparison we give homeowners:
| Method | How It Works | Best For | Typical Time |
|---|---|---|---|
| Utility pump at the pit | A portable pump lifts water out of the pit or well house into a hose | Standard wells with an accessible pit or dry well house; most drain jobs | 1–3 hours |
| Submersible pump in the casing | A small submersible is lowered on a line and pulls water up from the well itself | Deep-water wells, sealed well heads with no accessible pit, total emptying | 3–6 hours |
| Hand pump (manual) | A manual hand pump on the riser moves water by muscle | Power outages, final dewatering, shallow water tables | 4–8 hours of labor |
Most homeowners will only ever need the first method — a utility pump in the pit covers the overwhelming majority of drain jobs. The second method is the one we reach for when a well has a sealed surface well head and the water is 20 feet or more below grade, because there is simply no accessible volume to pump out from above. The hand pump is the fallback that keeps you from calling a service company during a storm.
Method 1: Utility pump at the pit or well house
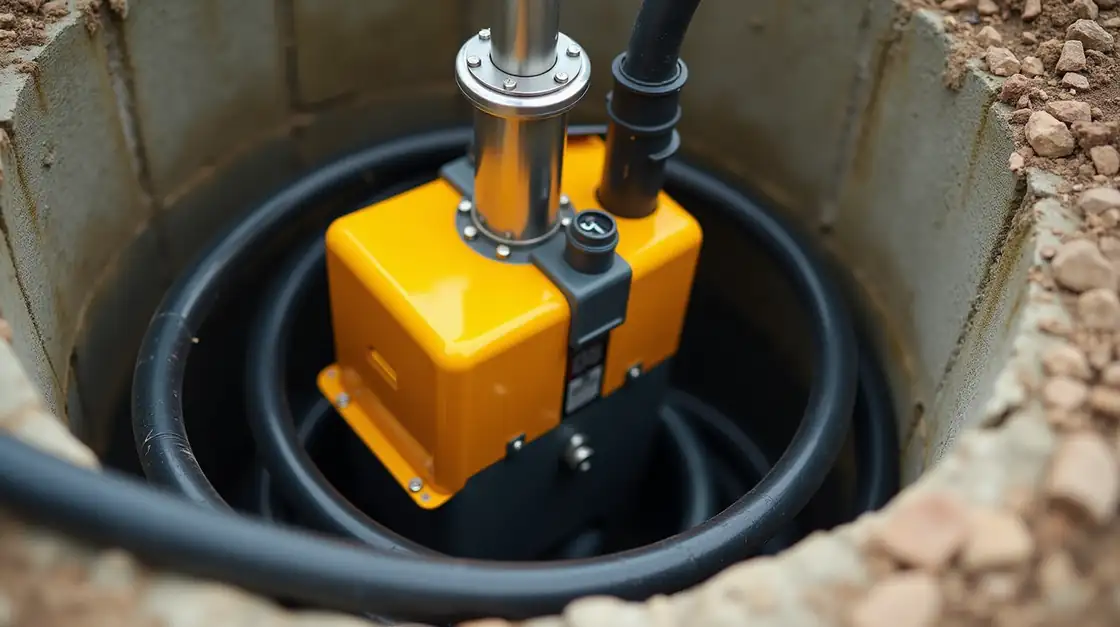
The standard approach. With the submersible pump powered off, you place a portable utility pump in the pit with its intake below the water surface and its discharge routed through a hose to a safe outlet. A 1/3- to 1/2-horsepower unit moves 400 to 600 gallons per minute at low lift, which empties a typical 50–150-gallon pit in under an hour. This is the method we detail step by step below.
Method 2: Submersible pump lowered into the well
When the water sits deep and the well head is sealed, you lower a small 1/4- to 1/3-horsepower submersible pump on a dedicated line into the casing, below the water surface but well above the screen and gravel pack. You pump out directly from the well. The discipline here is depth: we mark the line at the measured water level and never let the pump travel lower than necessary, because running a pump at or below the gravel pack starts pulling sand and can collapse the pack around the screen.
Method 3: Hand pump for emergencies
A manual hand pump connects to the riser above the check valve and moves 2 to 5 gallons per minute depending on stroke rate and lift. It is slow, but it requires no electricity, which is exactly the condition in which you will most often need it. For the last few inches of water in a pit after the main volume is gone, a wet-dry vacuum is faster and cleaner than any pump.
Step-by-Step: How to Pump Out a Well with a Utility Pump
This is the exact sequence we follow on a standard drain job. It assumes a residential well with a pit or well house where the water is accessible. Follow the steps in order — several of them exist to protect your pump and your water supply, not just to get the water out.
- Shut off power to the submersible pump. Flip the breaker that feeds the well pump contactor to OFF and tape a note on it. This is the non-negotiable first step: the submersible must not restart mid-job, and you do not want a live motor while you are working in a flooded pit. If the pump is fed through a well pump protector, switch that off as well.
- Close the house water supply. Find the main shut-off valve where the well supply line enters the house (or at the well house) and close it. This stops the pump from drawing through house plumbing and prevents water from backflowing from the house side into the system you are draining.
- Open the lowest outdoor faucet briefly. This vents pressure out of the house lines and gives any trapped water somewhere to go. Close it again before you start pumping.
- Measure the water level before you begin. Drop a weighted tape into the well (see our guide on how to measure well water level) and note the reading. Measuring before and after tells you how much water the well actually holds and gives you a baseline to compare against if the level looks wrong later.
- Set up the utility pump. Place the pump in the pit with the intake fully submerged — at least 4–6 inches of water above the inlet screen. If the pit is deep, use the pump’s lift height rating (usually 10–15 feet for a utility pump) to decide whether a single pump can reach; if the water is below its reach, start with a submersible instead.
- Route the discharge hose away from the foundation. Connect a 3/4- or 1-inch hose to the pump outlet and run it to a lawn area, a dry well, a drainage swale, or a set of containers. Do not discharge toward the house foundation, into a storm drain that feeds your own property’s drainage, or uphill into the pit you are trying to empty. Check the whole run for kinks and hose clamps before you turn anything on.
- Power the pump from a GFCI-protected outlet. Use a GFCI outlet or a GFCI adapter on a heavy-duty cord, with the cord routed so it cannot end up in the water. Never run a standard extension cord through a flooded pit — this is how well-drain jobs turn into electrocution stories.
- Run the pump and watch the level drop. As the water falls, the pump may lose prime if it sits above the surface. Either move the pump closer to the remaining water as it drops, or add a float switch that shuts the pump off automatically when the level gets low. Expect the flow to taper as the last of the water comes out.
- Pump to your target level. For winterizing or repair, pump until the pit is dry or the water is below the lowest fitting you need to access. For a full well drain, stop when the submersible pump is safely above the remaining water level — you do not need to empty the entire aquifer, only the system volume. Note the final level and the elapsed time; together they give you a rough measure of the well’s stored water.
- Shut down, disconnect, and record. Turn the pump off at the GFCI before lifting it, unplug it, and coiled-store the hose. Write down your before/after levels, the time it took, and anything you noticed (sand in the discharge, a slow drop, debris in the pit). That note is worth a lot if the well misbehaves in the weeks that follow.
If the water comes up sandy, stop.
Clear water turning to a sandy stream means you have reached the gravel pack or the screen. Keep pumping below that point and you will pull sand out of the pack that protects the screen — a problem that is far more expensive to fix than the water you were trying to move. Stop at the target level, not at “completely dry.”
Draining the Pressure Tank, Well House & Water Lines
Emptying the pit is only half the job. After the pit is dry, the pressure tank and the supply line to the house are still holding their water — anywhere from 15 gallons in a small 44-gallon tank and short line run to over 100 gallons in a long, upsloped installation. That water still has to come out for a proper winterizing drain:
- Drain the pressure tank. Most bladder tanks have a 1/4-inch NPT drain port at the bottom. With the tank isolated (main valve closed), open the drain valve and let the water flow into a bucket or the floor drain. Tanks without a drain port can be drained through the air stem at the top, though this is slower and sloppier.
- Open the lowest house-side outlet and let the line drain by gravity. With the main valve open again and the lowest outdoor faucet or spigot cracked open, water trapped in the supply line will run out toward the house. On a down-sloped line this is quick; on an upsloped or U-bent line, some water will sit in the low point.
- Push out trapped pockets. For water sitting in a buried low point, a wet-dry vacuum at the well house end can pull it out, and a brief, low-pressure burst of air (30–40 psi max, through a quick-connect fitting at the well head) will move the remaining volume. Never blow air down into the well itself — pressure applied to the casing can displace water against the aquifer and is a contamination pathway.
- Dry out the well house. Mop or vac the pit floor, and leave the lid open or the well house ventilated for a day or two before re-energizing the pump. Damp, enclosed well houses are where contactor corrosion starts in the off-season.
- Re-energize only when everything is dry and dry-sealed. Replace the well cap with its gasket fully seated before you restore power. An open, drained well left unattended overnight is an invitation for debris, animals, and rain water to enter the system.
How to Pump Out a Well Before Winter: Checklist
If your goal is freeze protection, the drain job is the foundation of a proper winterization. Here is the sequence we use on an unheated system before the first hard freeze:
- Drain the pit or well house using the utility-pump method above.
- Drain the pressure tank and the house supply line, including trapped low points.
- Leave the pressure tank empty and its air stem open (or the main valve cracked) so no water can freeze inside it.
- Insulate any exposed well-house fittings, or install a well-house heater if the pit is regularly below freezing.
- Do not add chemical antifreeze to the well, the tank, or the lines feeding the well — any chemical introduced into a private well is a contamination event, not a maintenance trick.
- When spring comes, re-seal the cap, re-charge the tank air to spec, restore power, and run the pump to waste until the water runs clear before reconnecting house plumbing.
For the full treatment — including heated versus unheated systems, what to do about the water heater, and cost breakdowns — see our companion guide, How to Winterize a Well 2026. The drain procedure above is the step every version of winterizing depends on.
Safety Warnings & Common Mistakes
Read this before you start
Water and electricity do not mix, and a well pit is the worst place for both to meet. De-energize the submersible before any work, use GFCI protection on anything that runs, and keep children and pets well away from an open pit. If your well is known to carry bacteria, nitrates, or other contamination, treat the water as unsafe to drink and dispose of it accordingly — do not route it into anything you would ever drink from.
After two decades of opening pits, these are the mistakes we see most often:
- Forgetting to de-energize the submersible pump. A pressure switch or a tripped-then-reset breaker can restart the pump while you are standing in the pit. The breaker stays OFF for the entire job.
- Leaving the house main valve open. Without it closed, the pump can draw water backward through house plumbing, the drain never finishes, and you can siphon water out of fixtures you did not mean to drain.
- Routing the hose back toward the pit. A hose end that drains within a few feet of the pit just recirculates the same water and the level never drops. Give the discharge at least a meaningful distance and a downhill grade.
- Running the utility pump dry. Once the pit is below the intake, the pump cavitates and the motor overheats. Move the pump as the level drops or use a float switch, and shut it off when you hit the target.
- Skipping the before/after measurements. The level data is the only objective record of how much water your system holds and whether the well is recovering — and it takes two minutes to capture.
- Blowing compressed air into the well. It sounds efficient, but pressurizing the casing is a contamination pathway and can disturb settled material around the screen. Air goes in the house lines only, at low pressure, with the well side sealed.
Where to Buy: Draining Tools & Pumps
Every tool in this job is a commodity you can buy at any home center, and you can complete a full drain for less than the cost of one service call. This is the kit we recommend for a standard residential well, with the specs that matter for each item:
| Tool | Role in the Drain Job | What to Look For |
|---|---|---|
| Utility Pump (1/3 HP) | Moves the bulk water out of the pit or well house | 1/3–1/2 HP, 400+ GPM at low head, 10–15 ft self-priming lift |
| Submersible Pump | Drains deep water from the casing when no pit is accessible | 1/4–1/3 HP, 1.5-inch discharge, rated for 15–20 ft submersion |
| Heavy-Duty Hose (100 ft) | Routes discharged water away from the foundation | 3/4–1 inch ID, kink-resistant, rated 150+ psi |
| GFCI Outlet (20 amp) | Powers the pump safely near standing water | 20 amp, in-use cover, tamper-resistant, outdoor-rated |
| Float Switch | Shuts the pump off automatically at low water | Submersible type, 5 ft+ cable, rated for continuous duty |
| Wet-Dry Vacuum | Removes the last water from the pit and well house floor | 5+ gallon tank, 4+ HP motor, submersible nozzle included |
| 100 ft Measuring Tape | Measures water level before and after the drain | Fiberglass or cloth, self-locking, marked every foot |
| Nitrile Work Gloves | Protects hands from debris, bacteria, and cold water | 12–18 inch length, chemical-resistant, textured grip |
Two notes on purchasing: buy the utility pump and submersible as a matched pair if you can afford it, because the submersible is what saves a deep-well drain job when the pit is not accessible; and if you only buy one item, make it the GFCI protection — it is the cheapest insurance in the whole kit. For the sizing side of the question, our well pump sizing guide covers how to match a pump’s output to your well’s actual yield.
See Also
Related Guides
How to Winterize a Well 2026 — the full 9-step freeze-protection sequence that this drain procedure plugs into, with costs for heated and unheated systems.
How to Measure Well Water Level in 2026 — the tape-and-float method for recording static and drawdown levels yourself, the data that makes a drain job diagnostic instead of just messy.
How to Size a Well Pump 2026: The Complete Guide — how to match pump output to your well’s real yield, including the total dynamic head math that determines whether a utility pump can reach your water level.
Frequently Asked Questions
How long does it take to pump out a well?
For a standard residential pit holding 50 to 150 gallons, a 1/3-horsepower utility pump empties it in roughly 30 to 90 minutes, depending on lift and hose length. Adding the pressure tank and supply line (another 20 to 100 gallons) typically adds one to two hours. A full deep well drain using a submersible pump can run three to six hours because the well’s stored water volume is much larger.
Can you pump out a well without electricity?
Yes — with a manual hand pump on the riser or by gravity drainage of the tank and lines. A hand pump moves only 2 to 5 gallons per minute, so it is realistic for shallow water tables and final dewatering, not for emptying a deep well. This is exactly why a hand pump belongs in the emergency kit for unheated wells.
Should I pump out my well every year?
Not every well needs an annual drain. If your pit or well house stays above freezing and your supply line is buried below the frost line, there is no freeze-protection reason to drain it yearly. Drain before winter if any part of the system sits exposed to sub-zero temperatures, and drain anytime the pit floods or you are servicing the pump. A quick pit check each fall tells you whether the drain is actually needed.
What do I do with the water after pumping out the well?
If the water quality is unknown or the well has a known contamination history, treat it as non-potable: discharge it to lawn or garden areas where local rules allow, or collect it in containers for safe disposal. Do not pour it into indoor drains, a swimming pool, or anything connected to a drinking-water system, and never route it back toward the well foundation.
Will pumping out a well damage it?
Done correctly, no — draining is routine maintenance, not a stress event. The two real risks are pumping below the gravel pack (which pulls sand and can collapse the pack around the screen) and leaving the well open and unattended after draining (which invites debris, animals, and rain water). Measure your levels, stop at the target, and reseal the cap immediately.
Figures in this guide are general guidelines for typical residential wells. Always confirm water level, pump depth, and electrical configuration with a licensed well contractor before making changes to your system.
#WellPump #PumpOutWell #WellMaintenance #WellWater #PrivateWell #WellDraining #WaterWell #Homeowner #WellCare #Winterization #WellPumpRepair #WaterLevel #WellOwner #WellSystem #WellCare2026