
Every November, the same emergency comes in: no water, a silent pump, and a thermometer reading single digits. If you live on a private well with an outdoor pump building, learning how to winterize a well house before the first hard frost is the single most cost-effective thing you can do for your water system. A properly sealed and insulated well house holds its interior 30 to 50 degrees above outside air — the difference between a quiet winter and a $2,000 pump replacement. It protects the pressure tank, the electrical wiring, and the first few feet of water line where ice forms first. This 2026 guide walks through the full 9-step checklist, insulation and vapor barrier details, heating options compared side by side, what everything actually costs, and the mistakes behind most winter well failures. The methods below come from 20+ years of inspecting residential wells across the western US, and they are ordered so you can finish everything in one Saturday.
By Robert Harrison, Certified Well Inspector
Robert has 20+ years of experience inspecting and testing residential water wells across the western US, with a focus on freeze damage and wellhead protection.
Disclosure: As an Amazon Associate, we earn from qualifying purchases on this page. Product selections are based on independent research and real well water data.
Published: November 2026 · Last updated: November 10, 2026
What Is a Well House — and Why It Freezes First
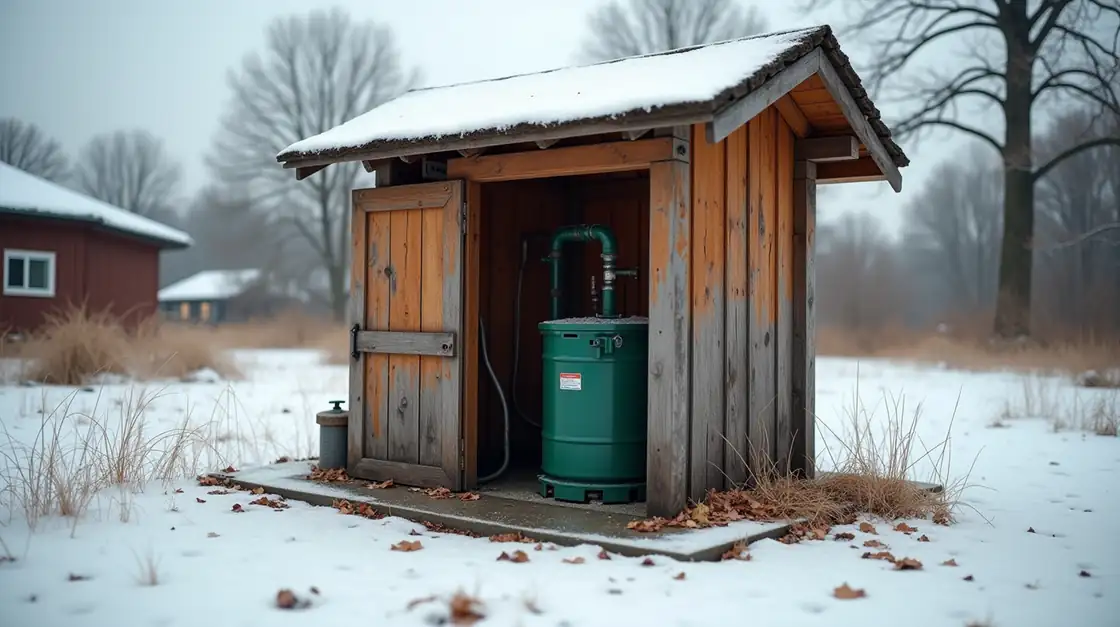
Most homeowners think of the well house as an afterthought: a small wooden shed over the wellhead, sometimes shared with the pressure tank, a valve assembly, and on shallow systems, the pump itself. That makes it the weakest point in the entire water system. The CDC’s private well guidance treats the wellhead area as the first line of defense against contamination, and the Water Well Endorsed Standards (WWES) exist precisely because poorly built well structures fail. In cold weather, they fail every winter.
In the 20+ years I have spent inspecting residential wells, the failure pattern is consistent. The well house is uninsulated, has a gap under the door, and sits exposed to wind. On a -10 degree night, the air inside can drop below 15 degrees within a few hours. Water in a pipe does not need to hit 32 degrees to start freezing — a slow-moving line can ice up at 25 degrees, and the first 3 to 5 feet of line inside the building are always the coldest run, because cold air pools at floor level and the line enters the house through the coldest wall.
If your system uses a pitless adapter, the well house is also where your only access point to the water column sits. Freeze damage there is not an inconvenience — it can force a full well repair or redrill if ice reaches the adapter. That is why winterizing the building itself is the foundation of every other freeze-prevention step.
How to Winterize a Well House: The 9-Step Checklist
Work top to bottom — structure first, heat last. Do all of this in late September or October, before the first freeze, when you can still find and fix problems dry. The steps below are the exact order I use on site.
- Inspect and repair the building shell. Walk the roof, look for sagging boards, split siding, or a warped door frame. Patch leaks with a few dollars of material before they become a thousand-dollar freeze problem. A roof leak over the pressure tank in January is the most expensive $20 repair you can make.
- Seal every gap and weatherstrip the door. The gap under the door is the number one air leak in most pump houses — cold air slides in at floor level, exactly where the water line and the tank legs live. Fit a door bottom sweep, add a weatherstrip gasket around the frame, and seal any crack over 1/4 inch with expanding foam.
- Insulate the walls with rigid foam board. Cut 2-inch rigid foam to fit each wall, overlap the seams, and seal the joints with foil or foam tape. Two inches of polyiso or XPS is enough for most pump houses, and it is the single highest-impact task on this list.
- Install a vapor barrier on the warm side. Staple a 4-mil poly vapor barrier over the foam with the seams taped. It stops interior humidity from condensing inside the wall. Without it, you can end up with ice and mold growing between the foam and the siding by February.
- Insulate the water line at the building wall. Wrap the first 2 to 3 feet of line where it exits the building with foam pipe insulation or self-regulating heat cable. In most freeze-ups I have seen, the ice starts exactly here.
- Add a heat source sized to the building. In most climates, self-regulating heat cable on the pipe plus a wrap on the tank is enough. If your winter low is below -10 degrees, add a guarded 250-watt heat lamp wired through a GFCI — the comparison table below shows power draw and cost for each option.
- Protect the pressure tank. A foam blanket over the tank, or heat cable wrapped around it, keeps the diaphragm from becoming brittle and the water inside from freezing solid. A tank that freezes can burst during the thaw even if the water itself is fine.
- Run a cold-night test. On the first night below freezing, cycle the pump on manually, then check the tank pressure with a gauge and confirm the heat cable is warm to the touch. This test catches wiring faults, dead lamps, and tripped GFCIs before they become emergencies.
- Plan your thaw response before you need it. Keep a heat gun, towels, and a local well driller’s number inside the well house. If ice does form, the safe thaw methods (and the ones to avoid) are covered in our guide to thawing a frozen well pump — read it in October, not at 2 a.m. in January.
Pro tip from the field
Label the inside of the well house door with your pump’s amp draw, the water line depth, and your driller’s phone number. In January you will be grateful — and so will the technician you call.
How to Insulate a Well House: Foam Board, Vapor Barrier, and Air Sealing
Insulation is the cheapest, most durable form of heat you will ever buy. A 4×8 sheet of 2-inch rigid foam costs about $25 and outlasts any heat lamp by a decade. The key is installing it correctly — foam that is not taped at the seams and not backed by a vapor barrier does far less than the R-value printed on the box. Here is how the common materials compare:
| Material | R-value / inch | Cost per 4×8 (2 in) | Best use |
|---|---|---|---|
| Polyiso (polyisocyanurate) | 6.0–6.5 | $30–40 | Walls in climates above -20°F |
| XPS (extruded polystyrene) | 5.0 | $25–35 | Walls and floors, moisture-resistant |
| EPS (foam board) | 4.0–4.2 | $15–20 | Budget builds, above grade only |
| Mineral wool batt | 3.1–3.3 | $20–30 | Framed walls, fire-rated builds |
R-values per 2026 manufacturer data; prices are typical 2026 retail for a 2-inch 4×8 sheet.
Most pump houses need 8 to 12 sheets of 2-inch board plus about 100 square feet of 4-mil vapor barrier. Install order matters: air seal first (step 2 above), foam second, vapor barrier third. If you reverse the order, you trap moisture between the wall and the foam — and trapped moisture becomes trapped ice.
Warning
Do not stack foam over existing condensation. If the walls are already damp or moldy, dry the building first — insulation over wet wood locks the problem in place.
Should You Heat Your Well House? Comparing Winterization Methods
Insulation slows the cold down; heat removes it. The right combination depends on how cold your winters actually get — not how cold they could ever get. Use the lowest temperature recorded for your ZIP code, not the all-time record. Here is how the four common approaches compare after we have watched them work (and fail) in the field:
| Method | How it works | Power draw | Installed cost | Best for | Main risk |
|---|---|---|---|---|---|
| Insulation + air sealing only | R10 walls, no active heat | 0 W | $150–350 | Winter lows above 0°F | Cold snaps below design |
| Self-regulating heat cable | Warms the pipe and tank | 15–40 W | $80–200 | Most climates | Improper install, no GFCI |
| Guarded 250-W heat lamp | Warms the whole building | 250 W | $150–300 | Lows below -10°F | Fire if unguarded |
| Hydronic floor heat | Water loop in the slab | 400–1,000+ W | $1,500+ | New builds | Overkill for small pump houses |
Typical 2026 retail costs. A 250-W lamp running 24/7 for a 90-day winter adds roughly $15–25 per month to a bill at $0.16/kWh.
The rule I use on site: if your nightly low stays above 0°F, full insulation plus heat cable on the pipe and tank is enough. Between -10°F and 0°F, add a guarded heat lamp. Below -20°F, insulate the whole building, heat-cable both the pipe and the tank, run the lamp — and seriously consider moving the pressure tank inside the house entirely.
By the numbers
A 250-watt lamp running 24/7 for a 90-day winter draws about 675 kWh — roughly $108 at $0.16/kWh. A single thaw-and-repair after a freeze-up typically runs $300–900. The math is rarely close.
How Much Does It Cost to Winterize a Well House in 2026?
Most homeowners can complete the full checklist for under $500 in materials. Here is what each task costs doing it yourself versus paying a professional — based on the 2026 quotes we collect from well contractors across the region:
| Task | DIY (materials) | Professional (labor + materials) |
|---|---|---|
| Structure and roof repair | $0–200 | $300–800 |
| Air sealing and door weatherstripping | $30–80 | $100–250 |
| Insulation + vapor barrier | $150–350 | $400–900 |
| Heat cable on pipe and tank | $80–200 | $250–500 |
| Guarded heat lamp installation | $150–300 | $400–800 |
| Total | $410–1,130 | $1,450–3,250 |
2026 national averages; rural labor rates vary by region.
Put that against the cost of doing nothing: a frozen-line thaw runs $300–900, a freeze-damaged pump replacement runs $800–2,500, and if ice reaches a pitless adapter the repair can run $3,000–7,000 or force a redrill. Winterizing is the cheapest insurance policy on your property — and it is the one most owners skip until the water stops coming out.
Common Well House Winter Mistakes That Cause Frozen Pipes
Most freeze-ups I investigate trace back to one of these eight mistakes. None of them are hard to avoid:
- Insulating without a vapor barrier. Condensation freezes inside the wall, and the “insulated” building gets worse, not better, by February.
- Running a heat lamp without a guard. Unguarded lamps near dry wood are the leading cause of well house fire I have seen in 20 years of inspections. Use a listed, guarded unit only.
- Leaving the door gap. Cold air pools at floor level — exactly where the pipe and the tank live. You can insulate the ceiling and still freeze the line.
- Insulating the pipe but not the tank (or vice versa). A frozen tank will take the whole system down even if the line stays warm.
- No GFCI protection for heat cable in a wet building. Well houses are damp and often sit on concrete. A leaking cable without GFCI protection is a shock hazard.
- Skipping the cold-night test. Most heat cable failures are wiring faults, and the first cold night is the only time you can find them cheaply.
- Using extension cords or non-listed heat tape. Non-listed tape degrades, short-circuits, and can start fires. Buy UL-listed cable.
- Sealing the building airtight while combustion equipment is inside. If a gas water heater or furnace lives in the well house, keep the combustion air vent — do not seal it.
When to Call a Professional
You can safely do every step of this checklist yourself, except these. Call a licensed well contractor or electrician when:
- The wellhead or pitless adapter is damaged or leaking — freeze damage there is a redrill risk.
- You need to run new wiring through the building — heat lamps and hardwired heat cable are electrical work.
- The water line is frozen and you cannot locate the blockage.
- Your well is older than 25 years with unknown construction details.
- The building is shared with septic or propane equipment.
If you are unsure about your well’s construction or local code, the EPA’s groundwater and drinking water pages are a good starting point for finding your state well program’s contact. A professional costs $150–300 per hour, and on a freeze emergency it is the cheapest call you will make all winter.
Where to Buy: Well House Winterization Products
The products below are the ones I specify on site. Each is linked to a current Amazon search so you can compare prices in real time:
| Product | What it does | Typical price | Buy |
|---|---|---|---|
| Self-regulating heat cable (100 ft) | Keeps the water line above freezing automatically | $40–70 | See on Amazon |
| Guarded 250-W heat lamp | Holds the building above 32°F in extreme cold | $60–110 | See on Amazon |
| Rigid foam insulation board (2-inch, 4-pack) | Walls of the pump house, R12 per layer | $90–130 | See on Amazon |
| 4-mil vapor barrier roll (100 sq ft) | Stops condensation inside the insulated wall | $20–35 | See on Amazon |
| Door weatherstrip and sweep kit | Seals the #1 air leak in most pump houses | $15–30 | See on Amazon |
| Pressure tank insulation blanket | Keeps the tank and diaphragm above freezing | $25–45 | See on Amazon |
Prices checked November 2026; Amazon search results show current offers.
Winterizing a Well House: Frequently Asked Questions
How cold is too cold for an unheated well house?
Sustained interior temperatures below 20°F will freeze a slow-moving water line, and an uninsulated, unsealed building drops to near outside air on clear, calm nights — the coldest conditions of all. If your winter lows dip below 20°F for more than a few nights a month, treat the building as needing active heat.
Do I need a heat lamp if I insulate the well house?
In most of the US, no. Full insulation plus heat cable on the pipe and tank is enough for winter lows down to about -10°F. Add a guarded heat lamp if you regularly see below -10°F, or if the building is larger than about 40 square feet.
My well house is already freezing — can I still winterize it?
Thaw it first, then winterize. Use the safe methods in our frozen well pump thawing guide — never open flame, never boiling water on a frozen pipe. Once the system runs again, do the 9-step checklist while the building is still accessible.
What temperature should a well house stay above?
Keep the interior above 32°F at all times, ideally 40°F or higher, so the pipe, the tank, and the wiring all stay in a safe range. A simple dial thermometer on the wall costs about $8 and is the best monitoring tool in the building. For the broader system-level protection steps, see our guide to winterizing a well.
Does a well house really need a vapor barrier?
Yes. Warm, moist air from inside the building condenses on cold walls in winter. Without a barrier, that condensation freezes inside the wall and becomes mold in the spring. The 4-mil poly sheet over the foam is cheap and solves it for good.
Can I leave the well house door open in winter for ventilation?
No. Cold air in, warm air out is exactly how the building loses its heat buffer. Keep the door closed all winter; use a small vent only if there is combustion equipment inside that needs it.
The Bottom Line
Knowing how to winterize a well house is the difference between a quiet winter and a 2 a.m. freeze emergency. Seal the building, add 2 inches of foam board and a vapor barrier, heat-cable the pipe and the tank, and add a guarded lamp only if your winters are truly brutal. It takes one weekend, it costs under $500 doing it yourself, and it protects the system that is the only water you have. Do it before the first hard frost — and if you are not sure where to start, the 9-step checklist above is the exact order I would use on my own well.
See Also
#WellHouse #WellHouseWinterization #WinterizeWell #WellPump #PrivateWell #WellWater #FreezeProtection #WellMaintenance #RuralHome #PumpHouse #WinterWellCare #WellInsulation #WellOwner #HomeWater #WellWaterSystem