
If you just bought a home with a private water well, the first question is often the simplest and the most frustrating: how to find my well on my property. Unlike a city water meter that sits in a handy basement meter box, a private well is usually buried ten to thirty feet underground, and the only thing above ground may be a small cast-iron cap, a buried valve box, or a hydrant you have never noticed. Without knowing where your well is, you cannot winterize the supply line, replace the safety seal, call a driller for a test, or even confirm which hydrant feeds your house. In this guide I will walk you through exactly how to find my well on my property using your well log, property records and a few proven field techniques — then show you what to do the moment you locate it, and how to make sure you never lose it again.
By Robert Harrison, Certified Well Inspector
Robert has 20+ years of experience inspecting and testing residential water wells across the western US. He has walked more than 1,500 well sites and has spent countless hours helping new homeowners locate wells that had gone missing under years of landscaping.
Disclosure: As an Amazon Associate, we earn from qualifying purchases on this page. Product selections are based on independent research and real well water data.
Published: November 9, 2026
Table of Contents
- Why Finding Your Well Matters
- What Actually Marks a Buried Well
- How to Find My Well on My Property: 8-Step Process
- Using Your Well Log and Property Records
- What to Do Once You Find Your Well
- When You Cannot Find It: Call a Professional
- How to Keep Track of Your Well’s Location
- Finding Your Well: Frequently Asked Questions
- See Also
Why Finding Your Well Matters
It sounds obvious, but a surprising number of well owners — especially recent buyers — have no idea where their well is. In our experience this is rarely an emergency on day one, but it quietly becomes one the first time you need the well. Freeze season is the classic trigger: you want to protect the supply line, but you cannot insulate or heat-tape a pipe you cannot locate. The same is true when the pump starts cycling, when a driller needs to test the well, or when the safety seal needs replacing. Every one of those jobs starts with the same first step, and every one of them gets more expensive the longer it goes undone.
From our inspection experience
In more than two decades of walking well sites, the most common “missing well” is one that was buried by a landscaping remodel, a new driveway, or a decade of mulch. The well itself is fine — the owner simply does not know it is sitting under the flower bed. A thirty-minute search, usually starting with the property records, finds it without any digging.
Beyond the practical reasons, knowing where your well is a matter of safety and liability. A well that is not marked is a hazard: a future landscaper, roofer or well driller can damage a hidden supply line, or even drill into the casing by accident. Locating and marking the well is one of the cheapest pieces of peace of mind you can buy, and it takes almost nothing once you know what to look for.
What Actually Marks a Buried Well
Before you start walking the yard, it helps to know what you are actually looking for. A private well is not a single object; it is a small system, and each part can have a different surface marker. In most homes you will find one of the four markers below, and a well that has been properly maintained usually has at least one clearly visible above grade.
The well cap and safety seal
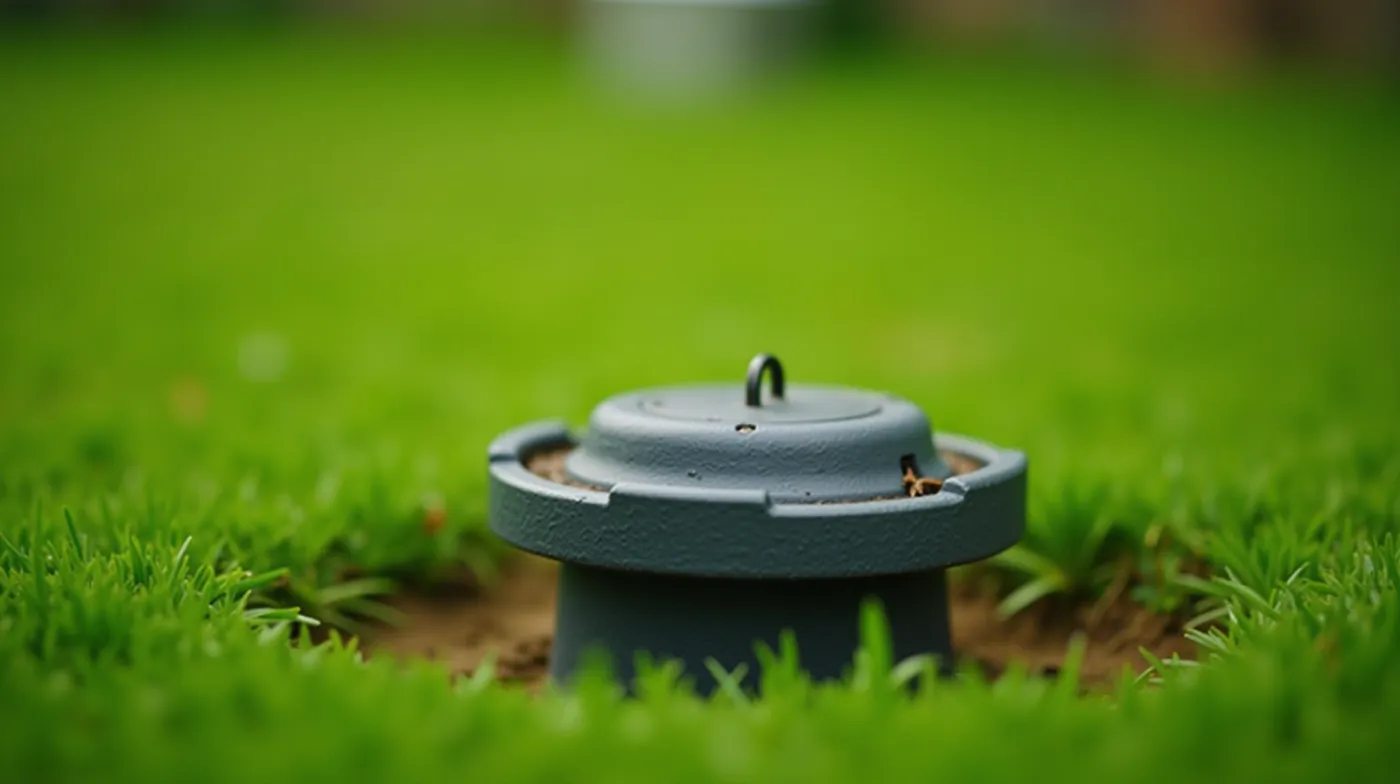
This is the most common marker. A short length of steel or fiberglass casing rises just above grade and is topped by a round cast-iron or plastic well cap that holds the well safety seal — the gasket that keeps surface water and contaminants out of the well. The cap is usually a few inches in diameter, often nearly flush with the ground, and is the first thing you check.
The buried valve box
Some systems, particularly older ones or those with a pitless adapter, have a buried concrete or plastic valve box (sometimes called a riser box). Only the top of the box pokes above ground, often just a small square or round lid. These are easy to miss under grass or a fresh layer of mulch.
The pitless adapter and well pit
On some shallow systems the well line and pitless adapter sit in a small concrete pit rather than being buried in a valve box. The pit has a vent and a removable lid, and it is usually the most obvious above-ground marker of all — a small concrete structure you can actually stand next to.
The pump house, well house or hydrant
In colder regions or on older properties the pump may live in a small above-grade well house, or the supply line may run out to a freeze-proof outdoor hydrant. If you have a small outbuilding or a hydrant you are not sure feeds your well, that is your starting point — trace the pipe from it back toward the house.
| Surface Marker | What You See Above Ground | What Is Underneath |
|---|---|---|
| Well cap / safety seal | Round metal or plastic cap, a few inches wide, often flush with grade | Casing and safety seal; the top of the well itself |
| Buried valve box | Small square or round lid poking through grass or mulch | Riser pipe, check valve and pitless adapter |
| Well pit | Concrete pit with a vent and removable lid | Pitless adapter and supply-line connection point |
| Well house / hydrant | Small outbuilding or a freeze-proof outdoor hydrant | Submersible or jet pump and the supply-line run to the house |
How to Find My Well on My Property: 8-Step Process
Here is the exact sequence I use on-site, from the zero-effort paper trail to the physical search. Work down the list in order — each step narrows the search area, so by the time you are walking the yard you are looking at a small zone instead of the whole lot.
Step 1: Start with your well log and property records
Do not skip this. The well log (sometimes called the well completion report) records the well’s location relative to a fixed point on the house, its total depth, its casing, and its water source. Check your closing documents, the well driller’s paperwork, and the county records office (see the section below on where these live). If you have a log, the search is often finished in five minutes.
Step 2: Check the well permit and county records
Most counties require a permit before a well is drilled, and the permit is filed with the county recorder or health department. These records frequently include a site map showing exactly where the well was placed. Requesting them is usually free or low-cost, and a single page from the recorder can save you a whole afternoon of searching.
Step 3: Search within 30 to 100 feet of the house
By convention, residential wells are drilled a short distance from the house — typically 30 to 100 feet, often on the side where the supply line enters the foundation. Start at the house and work outward in a spiral, focusing on that band. Pay attention to the side of the foundation where you can see the water line coming up out of the ground or disappearing into it.
Step 4: Trace the supply line from the house
Follow the supply pipe. In many homes you can see where the line exits the foundation or where it vanishes into the ground. The well sits at the far end of that run. If the line is buried, look for the point where it levels out and heads away from the house — the well is near that turn.
Step 5: Look for the valve box and hydrant
Kneel and look with your eyes, not just your feet. A small square lid, a round cap, or a hydrant will stand out once you know what to look for. Remove leaf litter, mulch and matted grass as you go — these hide the lid almost completely, which is exactly why so many wells go unnoticed.
Step 6: Check under new landscaping, mulch and beds
This is where most “missing” wells are hiding. If the property had a recent landscape remodel, a new patio, or a large mulch bed, the well cap is very likely sitting under it. Do not assume a flat, landscaped area means no well — a fresh bed can rest directly on top of a cap you would never dig up on purpose.
Step 7: Use a metal detector or pipe locator
If the surface is bare and you still cannot find a marker, a small underground pipe locator or a metal detector can find the steel casing, a valve, or the supply pipe. This is the fastest way to confirm a buried location once you have narrowed the zone to a few feet.
Step 8: Verify it is really your well
Once you find a candidate, confirm it is your well before moving on. Open the cap or valve box and look for the casing and the supply line. If you can safely open the hydrant or a test port, a quick check that water is present confirms it. Never open a well you are not sure of without being ready to protect the opening again — see the next section on what to do once you find it.
Using Your Well Log and Property Records
The fastest path to a missing well is rarely your boots — it is a paper trail. A well log or completion report records everything that matters: the exact location of the well relative to a fixed point (usually a corner of the house), the total drilled depth, the depth to static water, the casing diameter, and the source. If you can find the log, the physical search collapses into measuring a few feet in one direction and confirming by hand.
Here is where to look, in order of likelihood:
- Closing or escrow documents. If the seller had a well, the well log is often included in the property closing package — check before you even step into the yard.
- County recorder or assessor. The well permit and completion report are public records in most counties. Bring the legal description of the property.
- County health department. Many jurisdictions file well inspections and test results with the local health office.
- The original well driller. If you can identify who drilled the well, they almost always keep a log on file — and it is the single most accurate source there is.
- Previous owners or neighbors. On older properties a neighbor may remember where the well is, especially if it shares a common aquifer or was drilled around the same time.
What a well log actually tells you
A typical log gives you the well’s distance and bearing from a reference point (for example, “60 feet north of the northeast corner of the house”), the total drilled depth, the depth to static water, and the casing diameter. With that you can place a stake within a few feet of the well on the first try, then confirm with a small probe hole or a pipe locator.
What to Do Once You Find Your Well
Finding the well is half the job. The moment you locate it, you want to do three quick things: confirm the cap and seal are intact, check the system pressure, and get the water tested if you are a new owner. These take an afternoon and catch most problems before they become expensive.
1. Inspect the well cap and safety seal
Look at the cap for cracks, rust and a tight, dry seal. The well safety seal is your first line of defense against surface contamination — a missing or cracked seal lets lawn chemicals, rainwater and insects toward the water source. If it is damaged, replace it before anything else.
2. Check the system pressure
A quick read of the pressure tank gauge — or a portable gauge on the test port — tells you the system is holding pressure. Normal residential systems run around 30 to 50 PSI, with the pump kicking in at the lower number and shutting off at the higher one. A gauge that reads zero, or that swings wildly from tap to tap, points to a pump, tank or leak problem that you now know exactly where to start diagnosing.
3. Test the water, especially as a new owner
If you recently bought the property, get the water tested for bacteria and the basics before drinking it. A comprehensive well water test kit or a local lab panel covers bacteria, nitrates, pH and the minerals that cause taste, odor and staining. Once you know what is in the water, you can plan any filtration or treatment without guessing.
| Tool | What It Lets You Do | Typical 2026 Cost |
|---|---|---|
| Digital pressure gauge | Read system pressure at the test port; spot pump, tank or leak issues | $15–$40 |
| Comprehensive well water test kit | Check bacteria, nitrates, pH and minerals after locating the well | $15–$200 |
| GPM flow meter / test kit | Measure the well’s yield in gallons per minute to gauge its capacity | $20–$150 |
| Underground pipe locator | Confirm a buried casing, valve or supply pipe before any digging | $200–$500 |
When You Cannot Find It: Call a Professional
If you have worked through the records, traced the line, and searched the likely zones and still cannot find the well, stop guessing and bring in a professional. Trying to dig blindly risks damaging the casing, the supply line, or an underground utility — and a damaged well costs far more to repair than a careful search ever will.
The right help depends on what you need. A licensed well driller or a hydrogeologist can locate a well using ground-penetrating radar or a professional pipe-locating service, and can test the well once it is found. A well or plumbing contractor is the right call if you have found a candidate marker and need the cap, seal or pressure tank worked on safely. On its own, a professional well-location visit is usually modest compared with the cost of a misdirected dig or a damaged line.
When to act fast
If the well is missing AND the water has gone off, is discolored, or the pump is cycling, treat it as urgent. You may be looking at a supply-line break, a drained well, or a failed pump — all of which get worse the longer they run. Locate the well (or call a driller) and get the system checked the same day.
How to Keep Track of Your Well’s Location
Once you have found the well, do not let it become a mystery again. A few minutes now saves hours and money every time you winterize the line, replace a seal, or call a driller. Mark and document the location while it is fresh.
- Mark it on a property map. Plot the well’s exact position on a copy of your lot survey and note the distance and direction from a fixed point, such as a corner of the house.
- Stake or flag the spot. A permanent marker, a small post, or a durable flag keeps the location visible through the seasons.
- Photograph it from above and at grade. A couple of labeled photos — one showing the marker, one showing its position relative to the house — are the easiest reference you can leave for future owners or contractors.
- File the well log. Keep the completion report, permit, and any test results with your property documents, not in a junk drawer.
- Protect the opening year-round. A clean, intact cap and safety seal, plus the freeze protection covered in our how to winterize a well guide, keep the well both findable and functional through the cold months.
Finding Your Well: Frequently Asked Questions
How do I find my well if it is buried under the yard?
Start with your well log or the county well permit, which usually gives the well’s distance and direction from a fixed point on the house. That narrows the search to a few feet. Then clear away mulch, grass and leaf litter in that zone and look for a small cap or valve-box lid. If the ground is bare and you still cannot find a marker, use a pipe locator or a metal detector to find the casing, or hire a driller to locate it with ground-penetrating radar.
How far from the house is a well usually located?
Most residential wells are drilled 30 to 100 feet from the house, often on the side where the supply line enters the foundation. Older properties and those with a well house can place it farther away. Your well log or permit will give the exact distance and bearing if you have it.
Can I call my water utility to find my private well?
No. A private well is not on any water utility’s map, so the utility has no record of where it is. Your county recorder or health department (for the well permit and completion report) and your original well driller are the reliable sources. A utility line-locator service will find gas, water and electric lines, but it will not find a private well.
What is the difference between a well cap and a valve box?
A well cap is the round metal or plastic lid that tops the well casing and holds the safety seal — it marks the well itself. A valve box is a buried concrete or plastic box, often with a square or round lid, that holds the riser pipe, check valve and pitless adapter where the supply line connects. Both are surface markers, but the cap sits on the well and the valve box sits on the connection point, which can be a short distance away.
What if there is no marker and no well log at all?
Start at the house and trace the supply line as far as you can see it, then search a 30-to-100-foot band in that direction, clearing away landscaping as you go. If that fails, use a pipe locator or metal detector, or — the surest option — hire a licensed well driller to locate the well with ground-penetrating radar and confirm it with a test.
Conclusion
Finding your well does not have to be a guessing game. Work down the list — records first, then the 30-to-100-foot band, then the physical markers — and you will almost always locate a private well without digging. Once you find it, confirm the cap and seal, check the pressure, test the water if you are new to the property, and mark the spot so it is never a mystery again. A well you can find is a well you can protect, and that is the difference between a routine maintenance task and an expensive surprise.
See Also
Related guides for keeping your well healthy
- How to Winterize a Well 2026 — freeze-protection for the line once you know where it is
- Well Safety Seal 2026: What It Is and How to Replace It
- How to Hire a Well Driller 2026: 10-Step Guide — for locating and testing a well
#FindMyWell #PrivateWell #WellWater #WellLocation #WellLog #WellCap #SafetySeal #WellMaintenance #HomeownerGuide #WellSystem #WellDriller #PropertyRecords #WellPump #WellInspection #WellCare