
If your faucets are spraying, your water heater keeps tripping its relief valve, or the gauge on your pressure tank reads well past 60 psi, the question is simple: how to lower well water pressure without starving the pump or breaking something more expensive. It is one of the most common problems I hear from homeowners, and one of the most fixable. After installing and servicing more than 1,000 well pump systems, I have found that high pressure almost always comes down to one of a handful of mechanical causes: an overcharged tank, a pressure switch set above its factory range, a missing or failed pressure reducing valve, a worn check valve feeding water hammer spikes, or a pump that was simply overbuilt for the job. This 2026 guide covers the ideal pressure range for a residential well system, the six root causes of high pressure, and seven safe methods to bring your pressure back into range — including which fix matches your setup, what each one costs, and the pressure reducing valves I recommend for well systems this year.
Disclosure: As an Amazon Associate, we earn from qualifying purchases on this page. Product selections are based on independent research and real well water data.
By Thomas Reynolds, Pump Systems Engineer
Thomas has installed and serviced over 1,000 well pump systems for homeowners, with a focus on pressure control, pump sizing, and pump station troubleshooting.
Published: November 20, 2026
What this guide covers
What Is the Safe Range for Well Water Pressure?
The sweet spot for a residential well system is 40 to 60 psi at the house, with most systems settling around 50 psi when the pump is off and a faucet is closed. Most plumbing codes cap residential service pressure at 80 psi for exactly this reason: above that level, you start paying for it in damaged washers, leaking toilet fill valves, stressed pipe joints, and a water heater relief valve that discharges on a schedule instead of an emergency. The U.S. EPA points to the same range when discussing household water pressure, and the 40–60 psi window is what pump manufacturers design against when they specify standard 30/50 psi pressure switches.
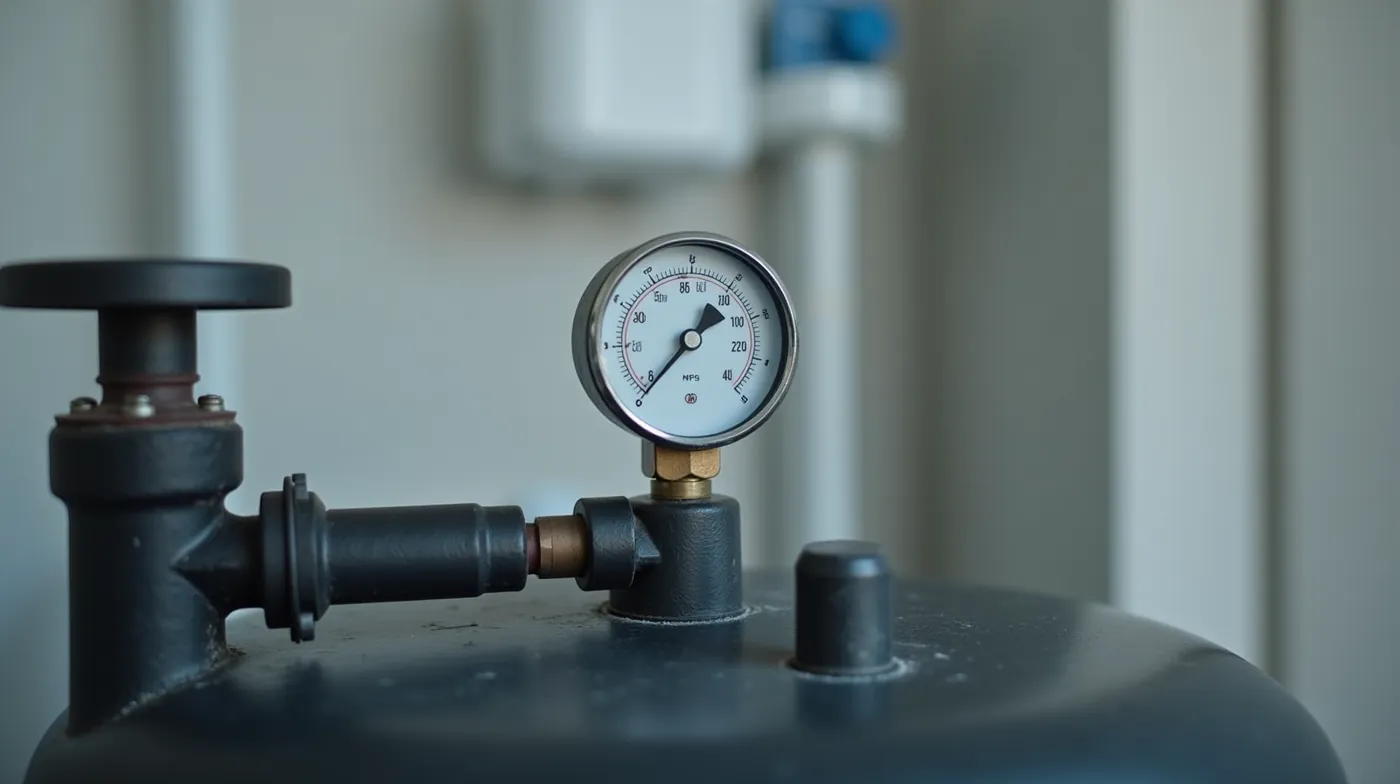
Two details matter when you read your gauge. First, the gauge on top of the pressure tank reads system pressure with the pump off and all faucets closed — that is your “resting” pressure, and it is the number this guide is about. Second, resting pressure is not the same as static head. A pump that delivers water from a 150-foot well is fighting gravity for roughly 65 psi of static head on its own, so the pressure at the pump discharge is always higher than what arrives at your kitchen sink after the friction losses in the pipe. When I talk about “your pressure is 100 psi,” I mean the number on the tank gauge at rest — that is the number the methods below bring down.
Quick reference: resting pressure and what it means
30–60 psi: normal operating range. 60–80 psi: above normal, worth correcting. 80–100 psi: code violation in most jurisdictions, fix within days. Above 100 psi: risk to fixtures, water heater, and piping — treat as urgent.
| Resting pressure | What is happening | Typical signs | Action |
|---|---|---|---|
| 40–60 psi | Normal; tank air cushion and switch range working as designed | Steady flow, infrequent pump cycling | None — check once a year |
| 60–80 psi | Precharge drifting high, or switch set above factory range | Hose bursts off a spigot, fill valves running long | Check precharge and switch setting (Methods 2–3) |
| 80–100 psi | Missing/faulty pressure reducing valve, overbuilt pump, or water hammer spikes | Water heater T&P valve dripping, pipes banging when pump shuts off | Install or service a PRV; replace check valve (Methods 4–5) |
| 100+ psi | Sustained overpressure — fixture and joint failure is a matter of time | Leaking joints, sprayer nozzles failing, relief valve discharge | Correct this week — do not wait for a leak |
Source: field service data from 1,000+ residential pump stations; code limits per typical UBC/IPC residential pressure caps (80 psi max at the point of entry).
Why Your Well Water Pressure Is Too High: 6 Causes
Before changing anything, figure out which of these six mechanisms is pushing your number up. In my experience the causes are not evenly distributed — the tank precharge and the pressure switch account for roughly half of every high-pressure call I take, and a missing or failed pressure reducing valve accounts for most of the rest.
1. The tank precharge is set too high
The air cushion in a bladder or cast-iron tank should sit at 2 psi below the pump cut-in. On a standard 30/50 switch that means a 28 psi precharge. If the air side has drifted up to 40 or 45 psi — from a failed bladder that lets water compress the air, or from a previous “fix” that overfilled it — the pump cannot cut in at 30, and the whole operating range shifts upward. This is the single most common cause of a well system that reads 70–90 psi at rest.
2. The pressure switch cut-in is above factory setting
Standard switches are stamped 30/50. The adjustment screw lets you move the cut-in (and the cut-out follows, keeping the differential). If the cut-in has crept to 45, the system now rests somewhere between 45 and 65 plus whatever the precharge adds — and many homeowners never notice because a higher resting pressure feels like “stronger” water.
3. There is no pressure reducing valve where one is needed
Deep wells and high-head pumps produce pressure that is simply too high for a house. A 1 hp submersible on a 200-foot well can deliver 120+ psi at the tank with every faucet closed. Municipal water gets a pressure reducing valve as a matter of course; well systems often skip one because the builder assumed the pump would handle it. It does not — the pump just makes what the well can give it.
4. The pump is overbuilt for the system
A bigger pump does not make better water; it makes a higher shutoff head and shorter run times. If a system was ever repumped and the installer reached for the next size up “for safety,” the new pump may shutoff at a pressure the old one never reached — and the tank and switch, tuned for the old pump, now ride the top of the range. If your pump has started running all the time or short-cycling alongside the high pressure, the pump and the pressure control are out of balance and both need attention.
5. A worn check valve is creating water hammer spikes
When the pump shuts off, the column of water in the pipe keeps moving until the check valve stops it. A worn or missing check valve lets the water column slam back, creating a pressure spike that can read 100+ psi for a fraction of a second — enough to bang pipes and fatigue joints even when the resting gauge reads normal. Our water hammer in well water guide covers the diagnosis in depth.
6. The gauge itself is wrong
It sounds too simple, but it is not rare: a cracked dial, a gauge stuck in the high end, or a gauge that was never bled after installation. On one property I serviced, the owner had been paying for “pressure fixes” for two years on the strength of a 90 psi reading — a verified test gauge at the spigot read 52. Always confirm the number before you spend money on it. If you are not sure how to take a clean reading, our step-by-step guide to testing well water pressure walks through the exact procedure with photos of the setup.
How to Lower Well Water Pressure: 7 Safe Methods, Step by Step
Work through these in order. Each one is cheaper than the next, and each one fixes a different root cause. On a typical high-pressure system I find one or two of them are all it takes.
Method 1: Verify the reading with a test gauge
- Turn the pump off at its breaker and leave it off.
- Screw a 1/4-inch NPT test gauge onto the spigot or the tank gauge port — make sure the threads are clean so the gauge seats.
- Compare the test gauge against the tank gauge with all faucets closed.
- If the test gauge reads 20+ psi lower than the tank gauge, the tank gauge is lying and you have no pressure problem at all.
A spare 1/4-inch NPT test gauge costs about $15 and is the cheapest diagnostic in this entire guide. Do not skip it: it is the difference between a $20 fix and a $2,000 pump job that was never needed.
Method 2: Lower the tank precharge
This is the first real fix, and the one that works most often.
- Turn the pump off at the breaker.
- Close the isolation valve to the house (or run a faucet briefly to bleed the tank down, then close it).
- With the water side empty, the tire stem on the air side should now read the true precharge.
- Target: 2 psi below your switch cut-in — 28 psi on a 30/50 switch.
- Add or bleed air in small increments and recheck. Do not exceed 50 psi precharge on a standard bladder tank.
- Open the isolation valve and confirm the pump cuts in at the stamped cut-in.
Warning: bladder tanks
If you cannot get the precharge to hold — it drops toward the water-side pressure within a day or two — the bladder is ruptured and water is compressing the air. A failed bladder means the tank no longer cushions pressure swings, which is both a pressure problem and the reason for short cycling. The tank needs replacing, not recharging.
Method 3: Lower the pressure switch cut-in
If the precharge is correct but the system still rests high, the switch is the next suspect.
- Turn the pump off at the breaker — always. The switch is on live 240V or 120V circuits depending on the pump.
- Remove the switch cover. You will see a main spring, a differential spring, and the stamped range.
- Loosen the locknut on the main spring stud and turn the stud clockwise to lower the cut-in. Expect roughly 2 psi per full turn on standard switches.
- Bring the cut-in back to the stamped 30 on a 30/50 unit; the cut-out follows and the range stays 20 psi wide.
- Tighten the locknut, replace the cover, restore power, and verify the cut-in and cut-out with the gauge.
Stay inside the stamped adjustment range. Pushing a 30/50 switch below its minimum cut-in is how systems end up with 5 psi differentials and a pump that cycles every 20 seconds. If you want a more aggressive cycling fix than a standard switch allows, our two-speed pressure switch guide covers how the dual-range option works.
Method 4: Install a whole-house pressure reducing valve
When the cause is the well and the pump themselves — deep well, high-head pump, or a system that simply makes too much pressure — the correct fix is a pressure reducing valve (PRV) installed after the pump and tank, on the line into the house. The PRV holds your house at a fixed outlet pressure (set it to 50–55 psi) no matter what the pump delivers upstream. It is the same device that protects municipal homes, and it is the single most effective permanent fix for sustained high pressure.
- Choose a valve sized for your line — 3/4 inch for most 1-inch well lines, 1 inch if the feed is 1 inch.
- Choose a valve whose maximum inlet rating covers your worst-case tank pressure with margin (a 125 psi-rated valve on a system that spikes to 120).
- Install it on the house-inlet line with the arrow pointing toward the house, between a pair of isolation valves, with a gauge on the downstream side.
- With the downstream valve open, adjust the PRV outlet to 50–55 psi and lock the adjustment bolt.
For most homeowners, a whole-house pressure reducing valve from Watts or an equivalent is the right purchase — the 1-inch units run $150–$200 installed by a plumber, or less if you are comfortable with the plumbing. See the product table below for my 2026 picks and what each one is best at.
Method 5: Replace the check valve and kill the water hammer
If your gauge reads high mostly when the pump shuts off — a spike to 100+ psi with banging pipes — the cause is a failing check valve, not the pressure control. Replace the check valve on the pump discharge (a full-port, swing-type on a 1-inch line is the standard) and confirm an air chamber exists above the check on the suction side for jet pumps. A new full-port check valve is a $30–$60 part. After the replacement, the resting pressure should fall back to whatever the tank and switch actually set — which is often normal all along.
Method 6: Add a second tank for high-output systems
When the problem is less “pressure too high” and more “pump fights the system” — a high-GPM pump on a big house where every faucet opening triggers a cycle — adding a second pressure tank in tandem smooths the drawdown and lengthens run times. It does not lower peak pressure, but it removes the pressure-swing symptoms that make high pressure feel worse. The layout, sizing, and the precharge math for two tanks are covered in our tandem pressure tanks guide. On a typical 44-gallon pair the second tank costs $150–$250 plus a few hours of work.
Method 7: Have the pump and system professionally re-checked
If Methods 1–6 leave the pressure high, the problem is the pump or the well itself: a pump that is overbuilt for the well’s static and drawdown levels, a well whose water level has dropped and now pushes harder at the pump, or a line configuration that creates more head than the house needs. This is a paid-diagnosis job — a well service technician can pull the pump, measure true static and pumping levels, and re-select the pump for the actual duty. Our well pump sizing guide shows the exact calculation so you can sanity-check what the technician recommends before you pay for it.
| Method | Root cause it fixes | Typical cost | Difficulty | Time |
|---|---|---|---|---|
| 1. Verify with test gauge | Bad gauge / no real problem | $15 | Trivial | 15 min |
| 2. Lower tank precharge | Overcharged air cushion | $0 (or $150–250 if bladder failed) | Easy | 30–60 min |
| 3. Lower switch cut-in | Switch set above range | $0 (or $50–70 for a new switch) | Moderate (electrical) | 45–90 min |
| 4. Install whole-house PRV | System makes too much pressure | $40–200 for valve; $150–200 more installed | Moderate (plumbing) | 2–4 hours |
| 5. Replace check valve | Water hammer spikes | $30–60 | Moderate | 1–2 hours |
| 6. Add second tank | Pressure swings, short runs | $150–250 | Easy–moderate | 2–3 hours |
| 7. Professional pump re-check | Overbuilt pump / well change | $150–300 diagnosis | Pro only | 1 visit |
Costs are 2026 retail ranges for parts; installed labor varies by region. Run Method 1 before anything else — it rules out phantom problems for the price of a gauge.
Best Pressure Reducing Valves for Well Systems in 2026
If Method 4 is your fix — or you want to add a PRV as insurance against a high-head pump — here is what I actually specify. Selection comes down to three numbers: the connection size (match your house-inlet line), the maximum inlet rating (must exceed your worst-case tank pressure), and the flow capacity (should cover your peak household demand, usually 10–15 GPM for a family home).
| Product | Size / rating | Outlet range | Street price | Best for |
|---|---|---|---|---|
| Watts 25K whole-house PRV | 1-inch, 125 psi max inlet, 25 GPM | 15–80 psi adjustable | $150–200 | Whole-house on 1-inch feed — my default spec for high-head well systems |
| Watts 14 PRV | 3/4-inch, 125 psi max inlet, 15 GPM | 25–75 psi adjustable | $40–60 | 3/4-inch feeds and smaller homes — the best value in the category |
| Zurn 4915A PRV | 1/2-inch, 150 psi max inlet, 8 GPM | 25–75 psi adjustable | $25–35 | Branch lines and single-appliance protection |
| Laars 023 pressure switch | 30/50 psi, 1/4-inch NPT gauge port | Factory range adjustable | $50–70 | When the switch itself is worn or mis-set (Method 3) |
| 44-gallon well pressure tank | 44 gal, cast iron, 100 psi working | Precharge to cut-in minus 2 | $150–250 | Replacing a failed bladder tank (Method 2 warning box) |
| 1/4-inch NPT test gauge | 0–160 psi, 1/4-inch NPT | n/a | $15–20 | Verifying every number in this guide (Method 1) |
Prices are 2026 Amazon street prices and move with the market. Manufacturer specifications per Watts Water Technologies and Zurn product literature.
When to Call a Professional (and When Not To)
You can safely do Methods 1, 2, 5, and 6 yourself if you are comfortable around the pump station. Method 3 involves the pressure switch, which is on a live circuit — if you are not confident working on electrical components with the breaker off and verified dead, that is a pro job. Method 4 is plumbing work on your house inlet line; it is very doable for a competent DIYer, but it is the one job in this list where a sloppy connection leaks into your basement, so get it right or pay for it. Always call a well service professional when the pressure stays high after all the adjustments above, when the pump itself needs to be pulled or re-sized, when anything touches the wellhead, or when your local code requires a backflow protection assembly on the well line.
Rule of thumb I give homeowners
Pressure problems are almost always mechanical, not mysterious. If the number does not come down after checking the gauge, the precharge, the switch, and the check valve, stop guessing and pay for the diagnosis — a wrong $250 guess costs more than the $150–300 a professional charges to measure the well properly.
Frequently Asked Questions
What is the ideal well water pressure in psi?
Aim for 40–60 psi resting pressure at the house, with 50 psi the most common target. Most codes cap residential pressure at 80 psi; anything above that for an extended period should be corrected because it stresses fixtures, the water heater, and pipe joints.
How do I lower water pressure at just one faucet?
Install a single-outlet pressure reducing valve on the branch line feeding that fixture, or fit a pressure-balance shower valve if the problem is a shower. A whole-house PRV affects every fixture, so use the branch-line approach when only one outlet is the complaint.
Can well water pressure be too low?
Yes. Below about 30 psi you will feel weak flow at upper-floor fixtures, and most codes require at least 20 psi at the fixture. If lowering your pressure drops flow where you do not want it to, the fix is not to raise the pressure again — it is to check your pipe sizing and pump capacity, which our well pump sizing guide walks through.
Why did my well water pressure suddenly get high?
The usual suspects, in order: the tank precharge drifted up (bladder slowly failing or overfilled), a previous repair left the pressure switch turned up, a new or repumped system is making more pressure than the old one did, or a failing check valve is adding water hammer spikes. And do not forget the simplest one — a bad tank gauge. Verify with a test gauge before assuming anything.
How often should I check my well water pressure?
Every 6–12 months is enough for a stable system: read the tank gauge at rest, note the number, and act only if it has drifted outside 40–60 psi. If your pump has started cycling unusually often, check immediately — that pairing of symptoms is how I have seen pressure problems develop over a single season.
The Bottom Line
How to lower well water pressure comes down to finding which one of six mechanical causes is doing it and applying the matching fix: verify the gauge, drop the precharge to 2 psi below cut-in, bring the switch back to its stamped range, add a pressure reducing valve where the system makes too much pressure, replace a worn check valve, or have a professional re-check the pump against the well. Start with the $15 test gauge, work down the list, and stop at the method that brings your resting pressure into the 40–60 psi window. Do that once a year and the high-pressure problems that destroy washers, water heaters, and pipe joints never get the chance to start. If your pressure issue came with a pump that will not shut off, read our guide on a well pump running all the time before you touch the pressure control — the two problems share root causes, and fixing them together saves a second visit.
#WellWater #WaterPressure #WellPump #PrivateWell #WellOwner #WellMaintenance #PressureTank #PressureSwitch #PressureRegulator #WellSystem #HomeownerGuide #RuralLiving #WellCare #Plumbing #WaterQuality