
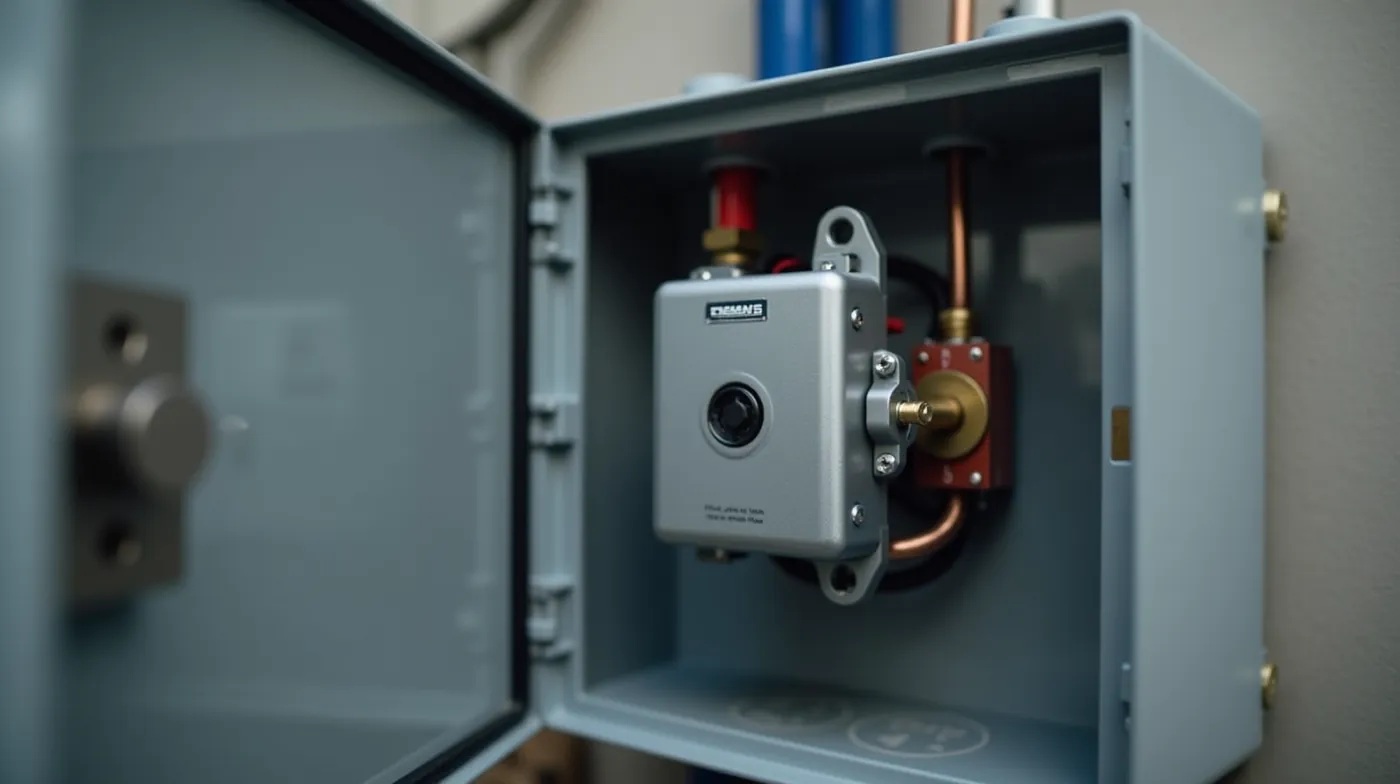
A well pump contactor is the unsung workhorse inside your well pump control box: an electromechanical switch that carries the full motor current from the breaker to your submersible or jet pump. It is also the most commonly misdiagnosed component on a residential well system. When it fails, the pump goes silent, the pressure tank drains, and the house runs out of water in roughly ten minutes — yet the breaker stays on, the pressure switch looks fine, and the wiring reads normal at the panel. After opening more than 1,000 control boxes, we can tell you that at least one in five “dead pump” calls we receive is actually a $30 contactor, not a $1,500 pump. In this 2026 guide, we cover exactly how a well pump contactor works, the seven failure signs to watch for, a nine-step multimeter test you can run in under thirty minutes, the best contactors and start relays for 2026 with pricing, and a complete replacement walkthrough.
By Thomas Reynolds, Pump Systems Engineer
Thomas has installed and serviced over 1,000 well pump systems for homeowners. He has replaced contactors, start relays, and pressure controls in every climate from desert to freeze-line, and he leads our pump-electrical coverage.
Disclosure: As an Amazon Associate, we earn from qualifying purchases on this page. Product selections are based on independent research and real well water data.
Published: October 17, 2026
What Is a Well Pump Contactor and How It Works
A well pump contactor is an electromechanical relay. Inside its cast-metal housing are two separate systems: a low-power control coil and a high-power set of switching contacts. The control coil receives a small signal from your pressure switch — typically 24 volts on modern sealed switches, or 240 volts on older open-frame models. When the coil energizes, an electromagnet pulls the contacts closed, and full line voltage (240 V on a submersible, 120 V on most single-phase jet pumps) flows through those contacts to the pump motor. When pressure reaches cut-out and the switch opens, the coil de-energizes, a spring snaps the contacts open, and the pump stops.
This two-circuit design is the key to understanding contactor failures. The pressure switch never carries motor current — it only switches the coil circuit. The contactor is the only component in the system that sits in the full power path. That means a failed contactor can break the path to the pump while every other component still measures perfectly: the breaker holds, the switch clicks, and the wires at the panel test hot. We see homeowners spend $200 on pump diagnosis fees for what was a welded or pitted contact all along.
Field Note
A typical household well runs the pump 20 to 60 times a day, which is 7,000 to 22,000 contact cycles per year. Every cycle opens and closes the contacts under a small arc. Contactor life is a function of cycle count, not calendar age — a contactor on a high-cycling system (small tank, leaky pipe) can fail in five years, while one on a quiet system can run for 25.
Contactors vs Start Relays: What Is the Difference?
People use the terms “contactor” and “start relay” interchangeably, and on a well system that confusion costs real money. A start relay is a small, inexpensive relay whose job is to engage and then drop out of a start circuit — in a jet pump, it connects the start winding (and the start capacitor) for the first second or two of motor startup, then opens. A contactor is a heavy-duty relay that stays closed for the entire run cycle, carrying continuous motor current. Submersible pump systems use a contactor (plus a separate start device inside or on the pump itself). Jet pump systems use both: a start relay for the start winding and often a contactor in the power line, though many older jet pump setups use a single combined relay.
| Attribute | Contactor | Start relay |
|---|---|---|
| Primary job | Carries full motor current for the entire run cycle | Energizes the start winding for 1-3 seconds at startup, then drops out |
| Typical rating | 15-60 A at 240 V (matched to pump FLA) | 5-15 A at 110-240 V |
| Used in | Submersible pump systems; power line of jet pump systems | Jet pump start circuits (with start/run capacitors) |
| Failure signature | Pump never starts, or hums and stalls; buzz from box | Pump starts weak, draws high amps, surges then dies |
| Typical cost (2026) | $20-45 | $10-25 |
Ratings and pricing cross-checked against Square D, Eaton, and Franklin Electric 2026 catalogs and current retail listings.
7 Signs Your Well Pump Contactor Is Failing
- The pump will not start, but you hear a faint click. When the pressure switch closes, you hear a small relay click from the box, but the motor never cranks. The coil is probably fine and the contacts are pitted or broken — the most common contactor failure we replace.
- A buzzing or humming sound from the control box. A coil that is getting voltage but whose contacts are mechanically stuck will buzz at line frequency. Power down immediately; a stuck-open contactor arcing across the gap will burn itself out within hours and can start an electrical fire in an unventilated box.
- Visible arcing, soot, or burn marks. Open the box cover and look at the contact faces. Blackened, pitted, or fused contacts mean the part has exceeded its life. Even light discoloration on a 10-year-old unit is a plan-ahead-to-replace signal.
- A burnt or ozone smell near the panel or pump box. If you can smell it, the contacts have been arcing badly. This is a stop-and-investigate-now situation — turn the breaker off and inspect before the next cycle.
- The pump starts, runs for a few seconds, then stalls. This pattern is often a weak coil or a contact that opens under load. The motor gets a partial voltage window, builds some momentum, then loses the circuit and trips its own protection. It is also the classic signature of a dying start relay on jet pumps.
- Breaker trips that the motor cannot explain. A failing contactor can create intermittent shorts between poles as the contact faces erode. If the breaker trips at random times — not just when the pump starts — the contactor is a prime suspect before you blame the motor. Our well pump breaker trips guide walks through how to isolate this.
- The pump runs continuously and never stops. A contactor can fail in the opposite direction: contacts weld closed. The pump runs nonstop, the pressure tank overfills, the gauge pegs, and the pump burns out from running dry once the well can no longer keep up. If the pump will not stop even with the pressure switch turned off, you have welded contacts.
Any one of these signs is worth a test before you call a pump replacement quote. In our experience, a contactor that shows even two of these symptoms has typically failed — the test below confirms it in minutes.
How to Test a Well Pump Contactor Step by Step
All you need is a multimeter and a Phillips screwdriver. The whole test takes under thirty minutes and costs nothing. Work with the system labeled and the power fully off whenever you are touching terminals.
- Turn off the well pump breaker at the main panel. Do not rely on the pressure switch or the box switch — the breaker is the only guaranteed disconnect. Verify with the multimeter that there is no voltage at the contactor terminals.
- Open the control box and photograph the wiring before touching anything. Label each wire with masking tape and a marker as you disconnect it. This one habit saves an hour of reassembly on every single replacement job we do.
- Inspect the contact faces visually. Pop the cover off the contactor body. Clean contacts are smooth, bright, and flat. Pitting (tiny craters), blackening, or any fused-together faces mean the part is done — you can stop here and buy a replacement.
- Test the coil resistance. With the multimeter on ohms, place the probes on the two coil terminals (the smaller screws, usually marked A1 and A2). A healthy 24 V coil reads roughly 100-300 ohms; a 240 V coil reads 1,000-3,000 ohms. An open reading (infinity) or a near-zero reading means a burned coil — replace the contactor.
- Test contact continuity (de-energized). Set the meter to continuity or lowest ohms. Measure across the power terminals (L1 to L2, the big lugs). With the coil unenergized the contacts should be open — you should read infinity. If you read near zero, the contacts are welded or shorted internally.
- Test the latch function (energized). This requires restoring power with the box cover off and one hand on the breaker — or better, have a second person watch the panel. With the contactor disconnected from the pump, energize the coil briefly (the pump starting via the switch, or a jumper test on the coil terminals). You should hear a firm click and measure continuity across the power lugs. If the coil clicks but the lugs do not close, the contact mechanism is broken.
- Check the coil voltage at the source. With power on, measure across the coil terminals while the pressure switch is calling for the pump. You should see its rated voltage (24 V or 240 V). No voltage at the coil means the problem is upstream — the pressure switch or its wiring — not the contactor. Our well pump pressure switch guide covers that side of the circuit.
- Compare the amp rating to your pump nameplate. Find the pump data plate in the box or down the well line and note the FLA (full load amps). The contactor rating should be at least 125% of FLA. A 10-amp pump needs a contactor rated for 15 amps or more. An under-rated contactor fails early and takes the breaker with it — our well pump amp draw guide shows how to read the plate and calculate the margin.
- Make the call. Any failed measurement above means replace. If every test passes and the pump still will not start, the problem is downstream — the motor windings, the overload relay, or a dry-run lockout — and you should stop pulling parts and check those next.
Safety Warning
240 V well circuits are lethal and can restart automatically the moment the tank pressure drops. If you are not comfortable working with the box open and the breaker on, stop at step 4 and call a pump technician. The contactor itself is a 20-minute job for anyone who can follow wiring labels; the energized tests are optional if a visual inspection already shows burned contacts.
Best Well Pump Contactors and Start Relays for 2026 (Compared)
We compared the contactors and relays most commonly specified on residential wells in 2026. All are available at hardware stores and online, and all are direct replacements for the units found in existing control boxes. Match the amp rating to your pump FLA first, then pick by brand preference and price.
| Product | Rating | Best for | Typical price |
|---|---|---|---|
| Square D 9007M 240V Contactor | 40 A, 240 V | 1.5-3 HP submersible pumps; the default spec in our installs | $25-40 |
| Square D 9007D 240V Contactor | 30 A, 240 V | 1-1.5 HP submersible pumps | $22-35 |
| Square D 9007E 240V Contactor | 20 A, 240 V | 1/2-1 HP pumps and most jet pump power lines | $20-30 |
| Eaton ZR240 240V Contactor | 40 A, 240 V | OEM-grade alternative; common in Pentair systems | $30-45 |
| 240V 45 MFD Run Capacitor | 45 MFD, 440 V rated | Jet pump capacitor replacement (check your unit plate) | $15-25 |
| Digital Multimeter | AC/DC voltage, ohms, continuity | Required for the contactor test above; any auto-store model works | $20-60 |
Pricing reflects October 2026 retail listings; model numbers follow Square D and Eaton 2026 catalog designations. Verify the exact rating against your pump nameplate before ordering.
Pro Tip
Buy the contactor before you start the job, not after. Match the physical form first (snap-in 4-hole base vs. bolt-on), then the amp rating, then the coil voltage. If your old unit is a sealed 24 V-coil contactor, a 240 V-coil unit will not work in its place without rewiring the switch circuit — the coil voltage is printed on the old part and on the pressure switch data plate.
How to Replace a Well Pump Contactor (Step-by-Step)
- Confirm the replacement part. Match form factor, amp rating, and coil voltage against the old unit. Photo the old part with the wiring in place — most hardware counter staff can order the exact match from one photo.
- Kill the breaker and verify zero voltage at the contactor terminals with the multimeter. Hang a “do not switch on” note on the panel or the box.
- Label and disconnect the wires. Power lines (usually 2-4 gauge, from the breaker and to the pump) and coil wires (thin, from the pressure switch). Take a photo at each stage if you are not sure.
- Unbolt the old contactor from its base or bracket. Note any mounting orientation — some bases have keyed pins.
- Install the new contactor in the same orientation. Bolt it down snugly; vibration from the pump line will loosen a loose unit and cause contact chatter.
- Reconnect the wires to the matching labels. Torque the lugs firmly — a loose lug on a 240 V motor circuit runs hot and ages the contact early.
- Restore power and cycle the pump manually. Open a faucet until the pump kicks in, let it run to cut-out, and listen. One clean click at start, one at stop, no buzz. Check the gauge is building to cut-out pressure.
- Run a 24-hour soak check. After the first day, re-open the box and confirm no new discoloration at the lugs and the unit is not warm to the touch. That closes the job.
A completed swap takes most homeowners 30-45 minutes. The total parts cost is typically under $50 — which is why a contactor test should always come before a pump replacement quote, which can run from $1,200 to $2,500 installed depending on well depth and pump size. Our well pump replacement cost guide breaks down what a real replacement should cost so you can price-check any quote you receive.
Why Your Contactor Clicks but the Pump Won’t Start
If the contactor is clicking properly yet the motor never turns, the electrical path is intact and the problem is one of four things: a tripped overload protector, a dry-run lockout, a shorted motor winding, or a failed start device on the pump itself. On submersible pumps, most modern units have an internal start capacitor or electronic starter that fails independently of the contactor — a dead internal starter produces exactly this “click, then silence” symptom, and the fix is pulling and reseating the pump or replacing its start kit.
Two checks narrow it fast. First, find the motor overload (a small resettable breaker on the pump junction box, or a thermal protector inside the submersible) and reset it if tripped. Second, measure the motor winding resistance with the pump disconnected — a reading of infinity on any winding means an open motor, and no amount of contactor swapping will fix that. If the well is low or dry, the pump may also be locked out by a dry-run protection device (such as a WaterGuard or similar flow sensor) that has cut the circuit to save the pump. Flush the well and reset the protector before condemning the motor.
Cost Perspective
The diagnosis chain is always cheapest first: contactor $20-45, start relay or capacitor $10-25, overload reset free, internal starter kit $50-150, motor/pump replacement $1,200-2,500. Working down that list in order is how we avoid paying the last number when the first one was all that was needed.
Frequently Asked Questions About Well Pump Contactors
What does a contactor do on a well pump?
It is the main power switch. The pressure switch sends a low-power signal to the contactor coil, and the contactor closes its heavy contacts to carry full motor current to the pump. The pressure switch itself never carries motor load — the contactor does all the real switching.
Can I test a well pump contactor with a multimeter?
Yes. The core tests are coil resistance (should read hundreds to a few thousand ohms, never open or near-zero), contact continuity (open when de-energized, closed when the coil is energized), and a visual inspection of the contact faces. The nine-step procedure above covers each measurement with probe placement.
How long does a well pump contactor last?
Typically 10-20 years, but life is cycle-based, not calendar-based. A high-cycling system (small pressure tank, a leaking pipe or faucet that runs the pump constantly) can burn a contactor out in 3-5 years. Replacing a small tank with a properly sized one and fixing leaks is the single best way to extend contactor life.
What is the difference between a start relay and a contactor on a well pump?
A start relay only energizes the motor start winding for the first one or two seconds of startup and then drops out; it is standard on jet pumps and works alongside the start capacitor. A contactor carries the full motor current for the entire run cycle. A jet pump system can use both, while a submersible system uses a contactor plus its own internal start device.
Can a bad contactor trip the breaker?
Usually not — a worn contactor more commonly fails to carry current (dead pump) than to short (tripped breaker). But a contactor whose contact faces are eroding can create intermittent cross-pole shorts that trip the breaker at random times. If trips happen at odd moments rather than reliably at pump startup, test the contactor before replacing the motor.
The Bottom Line on Well Pump Contactors
A well pump contactor is the cheapest and most replaceable component in your pump system, and the one most often blamed on the most expensive part. When your pump goes silent, the smart diagnosis order is: breaker, pressure switch, contactor, start device, motor — and the contactor test above takes thirty minutes with a $30 multimeter. If the unit is more than ten years old and shows any arcing or pitting, replace it even if it passes the test; a contactor that is failing is failing on a timer. Keep the right amp rating for your pump FLA in the garage, and the next “dead pump” scare ends with a 30-minute swap instead of a five-figure service call.
See Also
Well Pump Pressure Switch 2026: How It Works, Specs & Fixes
Well Pump Breaker Trips 2026: 8 Causes and Fixes
Well Pump Amp Draw 2026: How to Size and Troubleshoot
#WellPump #Contactor #StartRelay #WellWater #WaterWell #WellMaintenance #HomeownerGuide #WellEquipment #SubmersiblePump #JetPump #WellRepair #DIYRepairs #PrivateWell #ElectricalSafety #2026Guide