
When the first hard freeze hits, the last thing you want is to hear your well pump hum for a full minute and get nothing but a trickle from the tap. Every winter, well owners discover that the system that ran all summer has frozen somewhere between the well and the house — a burst discharge line, a seized check valve, or a pump that ran dry against a frozen column of water. The good news: a frozen well system is almost always preventable, and learning how to winterize a well pump takes an afternoon, not a weekend. In this 2026 guide I walk you through exactly what freezes first in a residential well system, the eight steps to winterize your well pump and its plumbing before the first hard freeze, the full drain procedure for seasonal homes, and the six products that do the most work for the least money. I have serviced well systems across the northern Midwest and mountain states for over a decade, and the systems that end up frozen are rarely the ones that got a heat tape installed — they are the ones that got nothing done.
Disclosure: As an Amazon Associate, we earn from qualifying purchases on this page. Product selections are based on independent research and real well water data.
By Thomas Reynolds, Pump Systems Engineer
Thomas has installed and serviced over 1,000 well pump systems for homeowners, with a focus on pressure control, pump sizing, and matching storage to real household draw.
Published: November 14, 2026
What this guide covers
- Why Winterizing Your Well Pump Matters
- What Freezes First: Risk Map of Your Well System
- How to Winterize a Well Pump: The 8-Step Checklist
- How to Winterize a Well Pump for a Seasonal Home
- The Six Products That Do the Most Winter Work
- Winterization Mistakes That Still Freeze Pumps
- Frequently Asked Questions
- Bottom Line
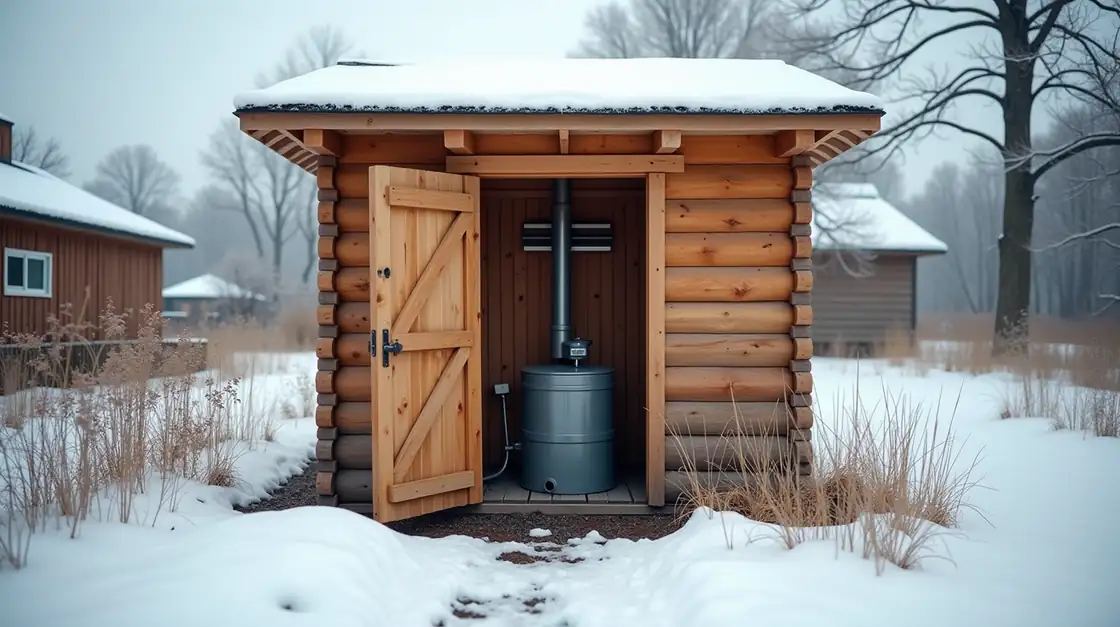
Why Winterizing Your Well Pump Matters
Most submersible pumps sit below the local frost line — typically 2 to 6 feet in the Midwest, 6 to 12 feet in Minnesota, the Dakotas, and the mountain states — which is why the pump itself survives most winters without any help. The problem is everything the pump is connected to. The 3/4-inch or 1-inch discharge line, the check valve, the well house, the pressure switch, and any pipe running through an unheated crawl space or basement wall are all exposed to air temperatures that can sit below freezing for weeks at a time.
When water freezes inside a closed steel or PVC line, it expands by roughly 9 percent. A 3/4-inch line filled with ice can generate enough internal pressure to split pipe, crack a check valve, or blow a fitting you will be paying to repair in March. On the pump side, the classic failure is subtler: the water column in the well or in the casing above the pump freezes, the pump keeps running against a closed system, pressure spikes, and the motor overheats or the thermal overload trips repeatedly until the winding insulation degrades. By the time you notice the problem in February, the repair has gone from a $150 insulation job to a $1,200 pump replacement.
The cost math of freeze damage
Based on the repair calls I have handled over the past decade, the average cost of a single freeze-related failure runs $500–$2,000: a burst 3/4-inch discharge line typically costs $300–$1,200 to dig out and replumb, a frozen and split pitless adapter runs $500–$2,000, and a motor that burned out while running against a frozen line costs $600–$1,500 for the pump alone. Compare that to the $100–$300 the prevention in this guide costs in materials.
Freeze depth varies dramatically by region, so know your local number before you plan anything. According to the EPA Private Well Owner’s Guide, the frost line in most well states runs 3 to 5 feet deep, and the deeper your well head, pump, and line sit relative to that number, the less you have to do in winter. If any part of your system — the well house, a buried line that rises near the surface, or a crawl-space pipe — is closer to the ground than the frost line, that part is your liability, and it is the part this guide protects.
What Freezes First: Risk Map of Your Well System
The components of a well system do not freeze at random — they freeze in a predictable order, starting with whatever water sits closest to cold air and stays sitting longest. Here is the risk map I walk through on every new system before its first winter:
| Component | Typical Location | Freeze Risk | Early Warning Signs | Protection |
|---|---|---|---|---|
| Discharge line | Buried, well to house | High if shallower than frost line | Slow pressure build, air in taps, pump runs with no water | Heat tape on exposed sections, deep burial |
| Check valve / pitless adapter | Top of the well casing | High in unsealed well houses | Pump runs long, weak pressure, no prime | Well house insulation and sealing |
| Well house pump, switch, tank | Unheated outdoor structure | High in northern climates | Short cycling, frozen fittings, ice on fittings | Insulation panels, heat tape, disconnect switch |
| Pressure tank & switch | Basement or well house | Low in basement, moderate in well house | Waterlogged tank, rapid pump cycling | Foam wrap, precharge check each fall |
| Submersible pump | Below the frost line, in the well | Low (unless well water freezes) | Motor will not start, high amp draw, trips breaker | Keep casing water from freezing solid; drain in seasonal use |
| Crawl-space and basement branch piping | Unheated portions of the house | Moderate to high | Icy pipe walls, slow or frozen fixtures | Foam pipe insulation, seal drafts |
Source: field inspection notes and failure patterns from residential well service work, 2016–2026. Frost line figures per USDA/NCEI frost depth data for the region of the well.
Key insight: the pipe freezes before the pump does
Owners ask whether the pump will freeze. In a properly drilled well it almost never does — the pump is submerged in groundwater below the frost line. What freezes is the water sitting in the discharge line, the well house, and the casing above the water table. Protect the line and the well house, and the pump takes care of itself. That is the whole game of winterizing, and it is why an afternoon of work in November beats a week of thawing work in January.
How to Winterize a Well Pump: The 8-Step Checklist
Do these steps in late October or early November — before the first hard freeze, not after. Each one takes under an hour, and together they turn a freeze-risk system into a winter-ready one.
- Check the pressure tank precharge. A waterlogged bladder makes the pump short-cycle, which means dozens of motor starts every day in the coldest weeks — and every cold start is a thermal shock to the windings. Set the precharge 2 psi below cut-in (28 psi for a standard 30/50 switch) and put the check on your fall calendar. If you have not tested the tank in a year, walk through our pressure tank precharge guide first.
- Seal and insulate the well house. Add R-13 to R-15 insulation panels to the walls, gap-seal foam at the door frame, and weatherstripping so the door actually closes. A properly sealed well house typically runs 10 to 20 degrees warmer than the outside air on a 20-degree night, which is the single highest-leverage step on this list for systems that use a well house at all.
- Wrap exposed discharge line with thermostat heat tape. Self-adhesive 33W/ft tape on any section of line that runs shallower than the frost line or passes through the well house and crawl space. The built-in thermostat cycles the tape off above about 40 degrees, so it does not waste power. Wrap the tape directly on the pipe — never on top of existing foam insulation — and never double-wrap the tape over itself, which can overheat and melt the pipe wall.
- Install a well pump disconnect switch. A 30-amp, 240-volt disconnect on the pump circuit lets you cut power in seconds if you are heading out for the weekend in a deep freeze or if you see ice forming at the well house. It is the cheapest insurance in this guide and takes an electrician about 30 minutes to install properly.
- Insulate the pressure switch and tank in unheated spaces. If the tank and switch live in the well house or a utility corner, wrap the tank in closed-cell foam and keep the switch out of the coldest corner of the room. A pressure switch that runs in a 10-degree well house still works, but the fittings and the pipe stub feeding it are the weak points.
- Protect the check valve and pitless adapter. These sit at the top of the casing and hold your prime all winter. Make sure the well house around them is sealed and insulated, and keep snow from piling against the structure wall. In extreme climates (continuous temps below 0 for days), a small well-house space heater with a proper vent, or a second run of heat tape around the casing area, is worth it.
- Keep the wellhead and casing clear. Clear debris, mulch, and snow from around the well cap. A buried or waterlogged cap traps meltwater, freezes the cap to the casing, and becomes a small but real bacteria entry point when the ice thaws in spring.
- Test the system after the first hard freeze. Run the pump through a full pressure cycle, time the build, and walk the well house and line path looking for ice. Finding a problem in November, while the ground is only frozen a few feet, costs a fraction of what the same problem costs in mid-January. If something is already frozen, stop and read our how to unfreeze a well guide before touching the pipe with heat.
Pro tip: match heat tape wattage to line size
For a standard 3/4-inch line, 33W/ft is enough to hold the line above freezing even in -20-degree ambient. If your exposed run is longer than one roll of tape, run a second tape circuit on its own thermostat alongside the first — never double-wrap a single tape onto itself. And if the line is 1 inch, check the tape packaging for the maximum pipe diameter; some 33W tapes are rated to 1 inch, others only to 3/4 inch.
How to Winterize a Well Pump for a Seasonal Home
If the property is only used part of the year — a lake house, a mountain cabin, a farm stand — insulation alone will not save you. A system that sits for four months with water in the line will freeze somewhere, and the repair bill will dwarf the half hour it takes to drain it. This is the full drain procedure I run on seasonal properties every fall:
- Turn off the power. Breaker off at the panel, and the disconnect switch if you installed one. Verify the pump is dead before opening anything.
- Open the low-point drain valve. Most discharge lines have a 1/2-inch ball valve at the lowest point of the run — usually in the well house or where the line enters the house. Open it and let the line drain completely. If your system does not have a drain valve, install one this year; it is a $15 brass part that saves you from this whole procedure being a disaster.
- Drain the pressure tank. Open the lowest fixture on the house side and let the tank empty through the line. With the pump powered off, the tank will empty fully in a few minutes. If your tank has a drain valve at its bottom, open that too.
- Drain the pump and casing where you can. On a drop-tube installation where the pump can be lifted, pull the pump out of the well, drain the casing water with a wet-dry vac or a hand pump, and store the pump indoors. If the pump is bolted down and cannot be lifted, at minimum make sure the discharge line is fully drained so the water above the pump can drain out of the casing; a full column of water above a frozen pump is what cracks casing joints in extreme cold.
- Leave the well house door open. Air-drying the well house all winter keeps fittings, the pressure switch, and the tank from sitting damp in the cold.
- Cap the open pipe ends. Rags or tape on any open stub keeps snow, rodents, and mud out until spring.
Warning: the spring restart is where drained systems die
Before turning the power back on in spring, make sure the system refills from the well — close the drain valve, turn the breaker on, and let the pump refill the line from below (a few minutes on a submersible), then run a tap until the water runs clear. If you ever power a submersible pump with the drain valve still open, the motor runs dry: it is water-cooled, and a dry start against the thermal overload is the most common way a spring restart kills a pump that would have survived the winter fine.
The Six Products That Do the Most Winter Work
These are the items I actually install on winterization calls, with the specs that matter. Every one of them is available on Amazon with the tracking link below the product name.
| Product | Type | Best For | Key Specs | Approx. Cost |
|---|---|---|---|---|
| Self-Adhesive Heat Tape | Thermostat heat tape | Exposed discharge line | 33W/ft, 33 ft roll, auto-off ~40°F | $40–$70 |
| Well House Insulation Kit | Insulation panels + gap seal | Unheated well houses | R-13 to R-15, 4×8 panels | $60–$120 |
| Well Pump Disconnect Switch | 30A disconnect | Seasonal shutoff, emergency cutoff | 30A, 240V, NEMA 3R | $30–$60 |
| 1/2-Inch Brass Ball Valve | Drain valve | Seasonal full drain | 1/2 in NPT, brass | $10–$20 |
| 3/4-Inch Foam Pipe Insulation | Closed-cell foam wrap | Well house and crawl-space lines | 3/4 in ID, 4 ft sections | $15–$30 |
| 2-Gallon Bladder Pressure Tank | Small bladder tank | Small systems, tight well houses | 2 gal, 40 psi max precharge | $60–$100 |
Self-Adhesive Heat Tape — Best Overall for Exposed Lines
Buy the self-adhesive kind with a thermostat, not the bare strip you have to wrap with wire. The 33W/ft rating is the standard for 3/4-inch residential line, and the auto-off thermostat keeps your electric bill flat while the tape only fires when the pipe actually drops near freezing. One 33-foot roll covers the typical well-house-to-crawl-space run with room to spare.
Well House Insulation Kit — Best for Well Houses
Look for a kit that includes R-13 to R-15 panels sized for a standard 4×8 or 6×8 well house, plus gap-sealing foam. The panels snap or screw to the studs without drywall, and the door gap seal is the part most owners skip — it is also the part that saves the most heat, because the door is where all the cold air gets in.
Well Pump Disconnect Switch — Best for Seasonal Shutoff
A 30-amp, 240-volt NEMA 3R disconnect mounts at the well house or the first junction box on the pump circuit. It gives you a local, weatherproof way to kill the pump in seconds — far easier than hunting for the breaker in a dark basement when the ground is frozen solid.
1/2-Inch Brass Ball Valve — The $15 Drain Valve
If your system does not have a drain point at the low end of the discharge line, add one. A full-diameter 1/2-inch NPT brass ball valve at the well house or at the line entry to the house is what turns a four-season drain into a 30-minute job. Brass over plastic here: this valve sits outdoors and sees the freeze-thaw cycle every year.
3/4-Inch Foam Pipe Insulation — Best for Well House and Crawl Space Lines
Closed-cell foam wrap slows freezing on lines that are not cold enough to justify heat tape — a well house line on a mild winter night, or the first few feet of a crawl-space run. Buy sections in the exact inner diameter of your line (3/4 inch for most residential systems) so the foam seals against the pipe with no air gap.
2-Gallon Bladder Pressure Tank — Best for Small and Tight Systems
If your main tank failed this fall and a 44-gallon replacement will not fit the well house, a 2-gallon bladder tank keeps the system running through winter on a 1/2- or 3/4-hp pump with a modest draw. It is a stopgap, not a permanent fix — but it is the difference between water in January and a $1,500 emergency install.
Winterization Mistakes That Still Freeze Pumps
Even after a proper winterization, systems still freeze — almost always because of one of these five mistakes that I see on service calls:
- “The pump is below the frost line, so we are fine.” The pump may be, but the 200 to 800 feet of line above it are not. The line is where the water sits still, and standing water in an exposed line is the #1 freeze casualty in residential wells.
- Heat tape under existing insulation. If you wrap foam around the pipe first and tape the heat tape outside the foam, the heat cannot reach the pipe. Strip the old foam off the section, tape the heat tape directly on the pipe, then put the foam back on.
- Forgetting the spring re-prime. A drained system that gets its power on with the drain valve still open, or a line that never refilled from the well, runs the pump dry. The motor overflows its thermal limit in under a minute and the owner thinks the pump died in the winter — it actually died on the restart.
- Leaving the well house door propped open. The door is the biggest heat leak in the structure, and a propped door also loads the roof with snow that can collapse the structure in February. If the door is open, everything you insulated is gone.
- Ignoring short cycling through the first cold snap. A waterlogged pressure tank makes the pump start every 45 seconds, and 50 cold starts a day is how motors die in February. The precharge check in step 1 takes five minutes with a tire gauge — do not skip it because it feels like a spring task.
Frequently Asked Questions
How deep below the frost line should my well pump be?
As a rule of thumb, the top of the well (and the check valve or pitless adapter) should sit at least 3 feet below the local frost line, and the pump should be deeper still. The frost line in most of the country runs 3 to 5 feet, and 6 to 12 feet in the northern tier states — check your county or state extension service for the exact number for your area. If your well head is shallower than the frost line, the upper part of the well can freeze solid in a hard winter, which is exactly why the well house and casing protection in this guide matter more on shallow wells than on deep ones.
Can a well pump freeze and still work after it thaws?
Often, yes — if the pump was off and the water in the casing froze around it, a slow thaw usually restores full function, and the system primes itself on the first long run. The danger case is a pump that kept running while the line was frozen: it was pumping against a closed, ice-blocked system, and the motor took thermal abuse the whole time. After a thaw, run the pump and watch the breaker and the pressure build. If it trips the overload, draws unusually high amps, or smells burnt, stop immediately — that is a motor that needs an electrician, not a retry. Our frozen well pump thawing guide walks through the safe thaw sequence step by step.
Should I winterize a well I use year-round?
Yes — with the 8-step checklist, not the full drain. A year-round system needs the well house sealed and insulated, heat tape on any exposed line section, the tank precharge checked, the wellhead cleared, and a test run after the first hard freeze. Draining a system you use every day just means you will have to re-prime, re-chlorinate, and wait for the line to refill in spring for no benefit.
How do I restart a drained well pump in the spring?
Close the drain valve first, then turn the power on. On a submersible system the pump refills the line from the well in a few minutes, and you then run a tap until the water clears of air and sediment. Check the pressure tank precharge once the system is back up — it tends to lose a few psi over the winter. If the pump never starts, do not keep cycling the breaker; verify the line is full of water before trying again, because a dry start is the one restart mistake that permanently damages the motor.
What is the cheapest way to winterize a well pump?
For under $100: gap-seal and insulate the well house door, wrap the exposed line section in heat tape, and check the tank precharge with a tire gauge. If your line is buried deeper than the frost line and the well house is sealed, that combination is enough for a year-round system in most climates. The $15 drain valve is the one item I would add even on a tight budget if the property is used seasonally at all.
Bottom Line
Learning how to winterize a well pump is really about protecting the parts of your system that sit above the frost line — the discharge line, the well house, the check valve, and the pressure tank — because that is where the standing water freezes and the damage starts. The pump itself, sitting in groundwater below the frost line, survives on its own. For a year-round home, the 8-step checklist costs $100 to $300 in materials and an afternoon of your time. For a seasonal property, add the 30-minute full drain and you have eliminated nearly every freeze failure I see in the field. Do the work in late October, test the system after the first hard freeze, and your well will run through February like it is July — instead of becoming the $1,200 emergency call that half of my January schedule is built around.
See Also
How to Winterize a Well House 2026: Complete Guide — the structure-side half of this process, with panel and door-sealing details
How to Thaw a Frozen Well Pump 2026: Safe Step-by-Step Guide — what to do when the winterization was not done in time
Well Pump Not Working 2026: 10 Causes and How to Fix — the full diagnostic path if the pump still will not run after a thaw
#WellWater #WellPump #Winterizing #WellMaintenance #FrostLine #WellHouse #HeatTape #PressureTank #WellOwner #PrivateWell #WaterWell #FreezeProtection #WinterReady #WellSystem #HomeownerGuide